
-
Modelers Alliance has updated the forum software on our website. We have migrated all post, content and user accounts but we could not migrate the passwords.
This requires that you manually reset your password.
Please click here, http://modelersalliance.org/forums/login to go to logon page and use the "Forgot your Password" option.
You are using an out of date browser. It may not display this or other websites correctly.
You should upgrade or use an alternative browser.
You should upgrade or use an alternative browser.
Fokker Eindecker
- Thread starter moon puppy
- Start date

Brokeneagle
Master at Arms
:coolio
I think you got the effect spot on, just the pattern is different. I still think it looks good and suits the model.
Good one MP :dude
Ian.
I think you got the effect spot on, just the pattern is different. I still think it looks good and suits the model.
Good one MP :dude
Ian.
Thank you Ian, Pattern would have been unique on each aircraft as they were hand applied. I tried to brush with the though of a person in arms reach of the area he was working in, think I got lost some spots. the swirls may have hypmotized me...
A good friend said to me, let's model for enjoyment and have fun, well I think your take on the metal worked cowl is damned good and I personally would go with that, nice!
what's your camera and flash ?
if you are using a SLR 35mm with add on flash, tilt and swivel the flash head to create a bounce flash off a wall or white card,and you won't get that hotspot of light that drowns out the detail.
HTH
Not sure which setting looked best, with or without flash.
what's your camera and flash ?
if you are using a SLR 35mm with add on flash, tilt and swivel the flash head to create a bounce flash off a wall or white card,and you won't get that hotspot of light that drowns out the detail.
HTH
What camera Phil? Samsung Galaxy S3, the battery cover on my old Fuji has busted and I don't think it can be repaired and figure this Samsung has a 10mpixel camera so I'm just using it instead. Hardly a SLR, who knows, might have Santa hook me up this year.
Thanks, moving forward.
Thanks, moving forward.
Update
Tedious progress, nothing earth shaking.
did I tell ya I masked off the metal area to spray for the CDL and when I pulled the mask off the paint came off?? No??? Well IT FREAKIN DID!!!
No biggy, just redid it, again. Actually think it came out better this time around.
this shots are not the repair shots.

Prop turned out nice if I say so myself. :patmyselfonback
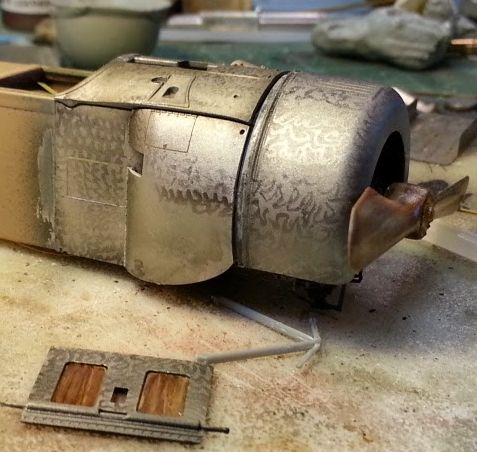
So we got this part right here.

It's the mast to hold up the rigging for the wing warping system. Those two wing things should be turn buckles as you can see from the nice picture in the instructions. But they don't lend themselves well for rigging.
James I think you're right about the 1:48 turn buckels working better for control lines. These look like some heavy duty turn buckles and the 1:32 scale ones look spot on.

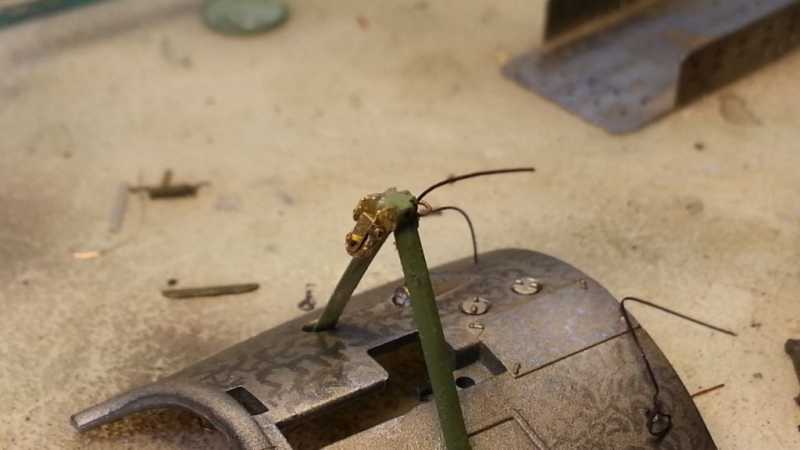
So I opened up my dusty ol' brain and wondered what to do?
got some brass square rod (if that's the term) and opened it up, drilled a couple of holes and rigged up some Scale Hardware to attach the turnbuckles with. Now the fun part.

I gotta figure out how to make that work with the kit part. Think I'll cut off the kit turnbuckles and cut a slit on the top and slide the new assembly down in there. Only hope everything is strong enough for cutting here and there.
Now I gotta figure out how to make that Pulley.
Tedious progress, nothing earth shaking.
did I tell ya I masked off the metal area to spray for the CDL and when I pulled the mask off the paint came off?? No??? Well IT FREAKIN DID!!!
No biggy, just redid it, again. Actually think it came out better this time around.
this shots are not the repair shots.
Prop turned out nice if I say so myself. :patmyselfonback
So we got this part right here.
It's the mast to hold up the rigging for the wing warping system. Those two wing things should be turn buckles as you can see from the nice picture in the instructions. But they don't lend themselves well for rigging.
James I think you're right about the 1:48 turn buckels working better for control lines. These look like some heavy duty turn buckles and the 1:32 scale ones look spot on.
So I opened up my dusty ol' brain and wondered what to do?
got some brass square rod (if that's the term) and opened it up, drilled a couple of holes and rigged up some Scale Hardware to attach the turnbuckles with. Now the fun part.
I gotta figure out how to make that work with the kit part. Think I'll cut off the kit turnbuckles and cut a slit on the top and slide the new assembly down in there. Only hope everything is strong enough for cutting here and there.
Now I gotta figure out how to make that Pulley.
phantom II
Master at Arms
 :hmmm
:hmmm Cheers, Christian B)
Sherman 18
Master at Arms
:zen :zen :zen
Really? that's odd, thought standard nav lights were opposite. Guess it depends on which way you're looking. 
Hmm..yeah I can see that working very easily. But I've made this attachment point so I'm going to try it. Think I will test it on the other mast that comes with the kit, if I can do it right there the second one will be a snap.
Hmm..yeah I can see that working very easily. But I've made this attachment point so I'm going to try it. Think I will test it on the other mast that comes with the kit, if I can do it right there the second one will be a snap.

 :gogo
:gogoDave I picked this one for the minimal rigging, think I was wrong...
Dave I picked this one for the minimal rigging, think I was wrong...
Been getting my geek on with the mast.
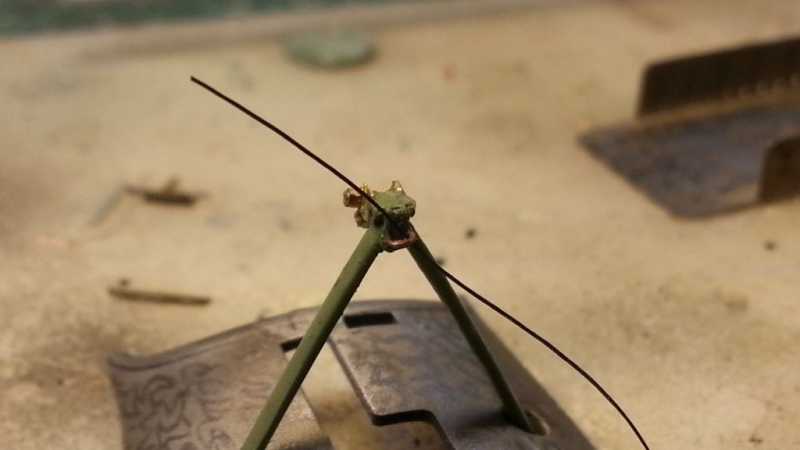
Spare PE and about 40 freakin' hours later..
Spare PE and about 40 freakin' hours later..
Love the prop Bob, very nice!
but think of the result! going to look great
Spare PE and about 40 freakin' hours later..
but think of the result! going to look great
Well here's the Mast or whatever they call it all rigged up. Think there's another support wire that comes up to the foward attachment point but will figure that out when I get it installed.


Dry fit
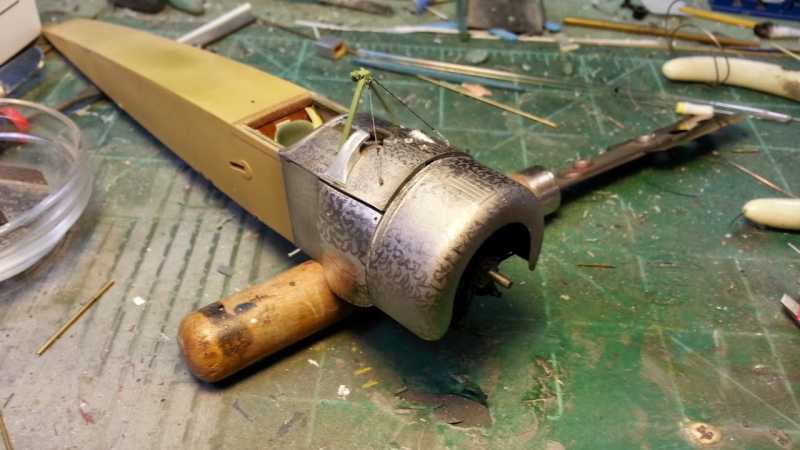
I have the landing gear legs built up and dry fit is ok. Rigging on the underside is very complex and I'm kinda stoked as there was some rigging that passes through the floor that I didn't realize. Really wish there was a heads up in the instructions regarding this but ultimately it was my not doing my homework. I'll rig it up somehow. Going to try really hard to resist temptation to open the fuselage up to get to those attachment points. :facepalm
Dry fit
I have the landing gear legs built up and dry fit is ok. Rigging on the underside is very complex and I'm kinda stoked as there was some rigging that passes through the floor that I didn't realize. Really wish there was a heads up in the instructions regarding this but ultimately it was my not doing my homework. I'll rig it up somehow. Going to try really hard to resist temptation to open the fuselage up to get to those attachment points. :facepalm