Brokeneagle
Master at Arms
 ONCE UPON A TIME ON A FLATCAR
As promised in my cancelled thread in the Copy the photo' build, I have moved this thread to here so that I can be a bit free with my details. I always end up doing this and very rarely copy a photo exactly because there always is something I want to add or change but the general idea from the photo drives the whole thing.
OK, I was motivated by a series of pictures from PANZERWRECKS 6.........

This stug really grabbed me for a number of reasons.....
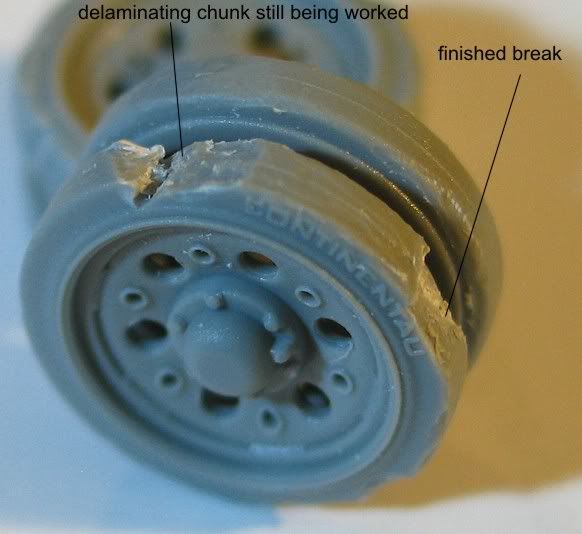
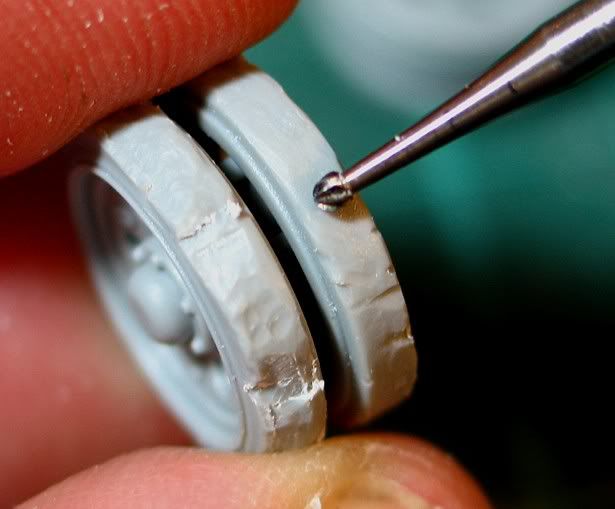
Damaged.
No drive wheels
open transmission covers
Dirty
no tracks
covered in T34 track
on a flat car
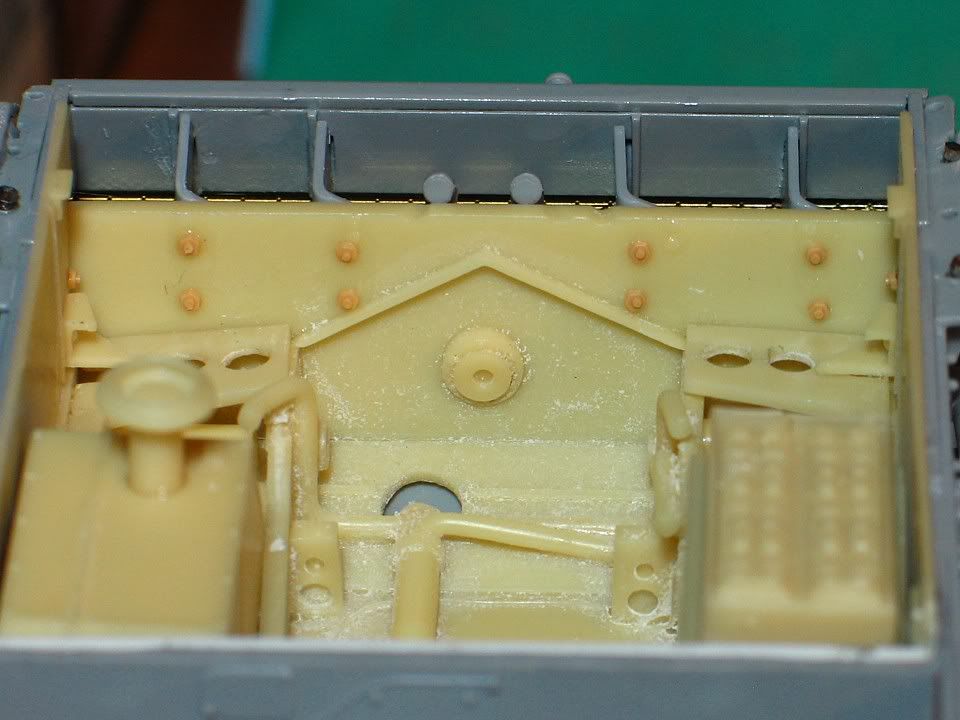
I really wanted to make use of my new Dragon STUG3 G but it was an early version and this is most probably a Nov 44 version. The Dragon kit is a perfect base for a stripped or damaged tank, as all of their more recent releases over the last 2 or3 years have been detailed in places where noby ever bothered before (LARGE PLASTIC KIT MANUFACTURERS). The detail can now be found underthe track guards, behind the drive housings, inside the tank, under the floor etc, etc. So I really wanted to make use of this detail and have some real modelling fun.
I am also a fan of rail so a flatcar and all of its 'stuff' was an added bonus. My long term plan for this is to add a number of flatcars and carriages and my 3/4 finished BR52 and create a railyard scene at the end of the war in late 1944. We shall see how we go - I will keep my fingers crossed.
INSPIRATION SHOTS
FROM PANZERWRECKS 6


The STUG 3 G
The dilemma I mentioned above was easily solved by going with
- a retro-fitted early G that has been kept in the field with a Saukopfblend cast gun manlet (standardised nov 43)
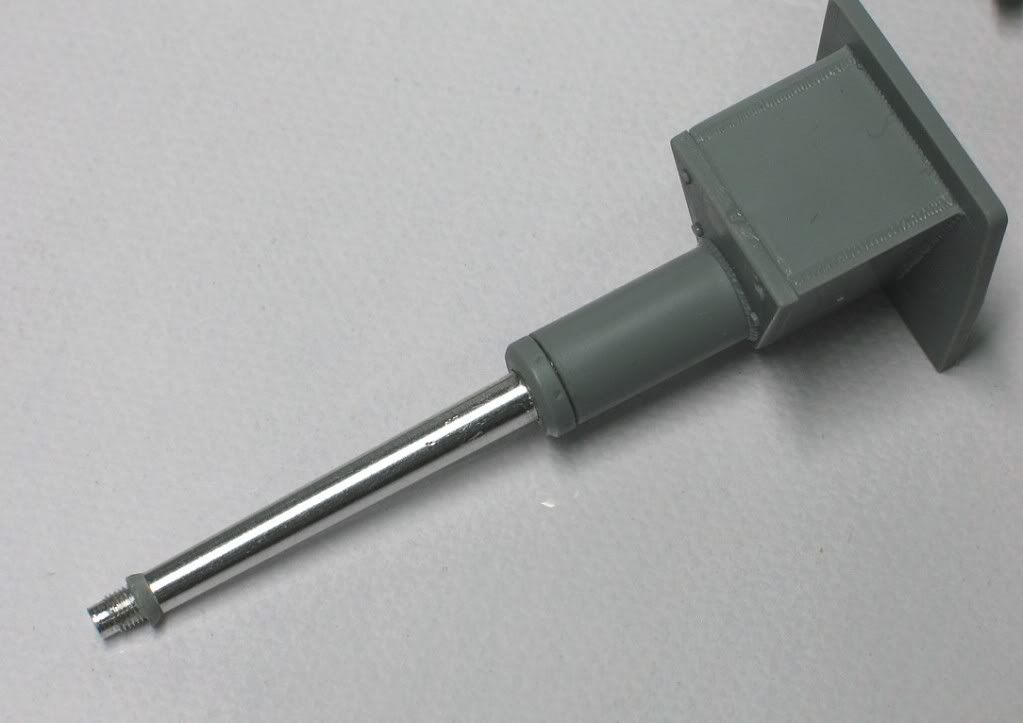
- spring loaded travel support for the barrel
- but running the bolted front 80mm armour.
- The dragon kit has the earlier pattern straight welds on the rear deck
- but the frontal superstructure additional bolted armor typical of post April 1943 onward.
I then started looking for photos that would support the later mantlet retrofitted with the earlier bolted add-on armour .......and a bonus a late spring loaded travel lock as well. I wasn't concerned with the zimmerit as I have plenty on photos of early Stug 3 G's without zimm but with the added armour.

OFF WE GO....

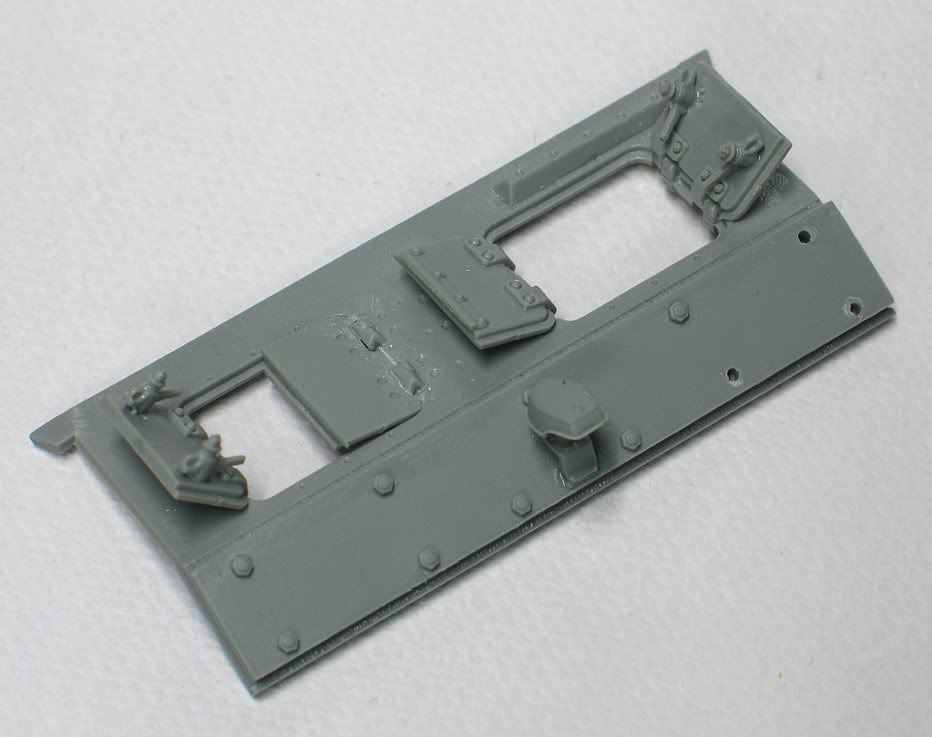
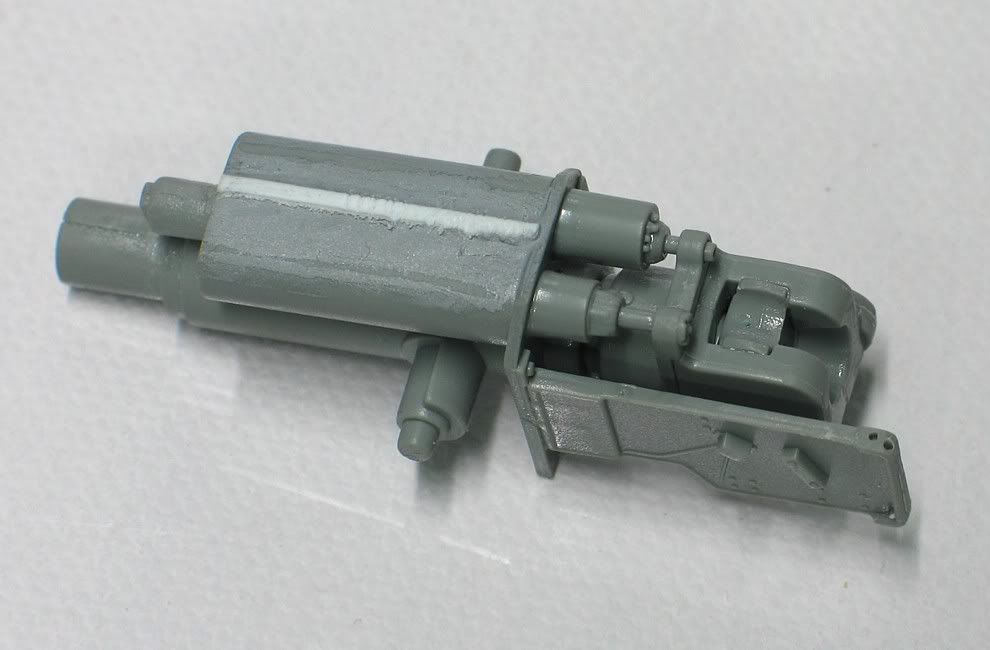
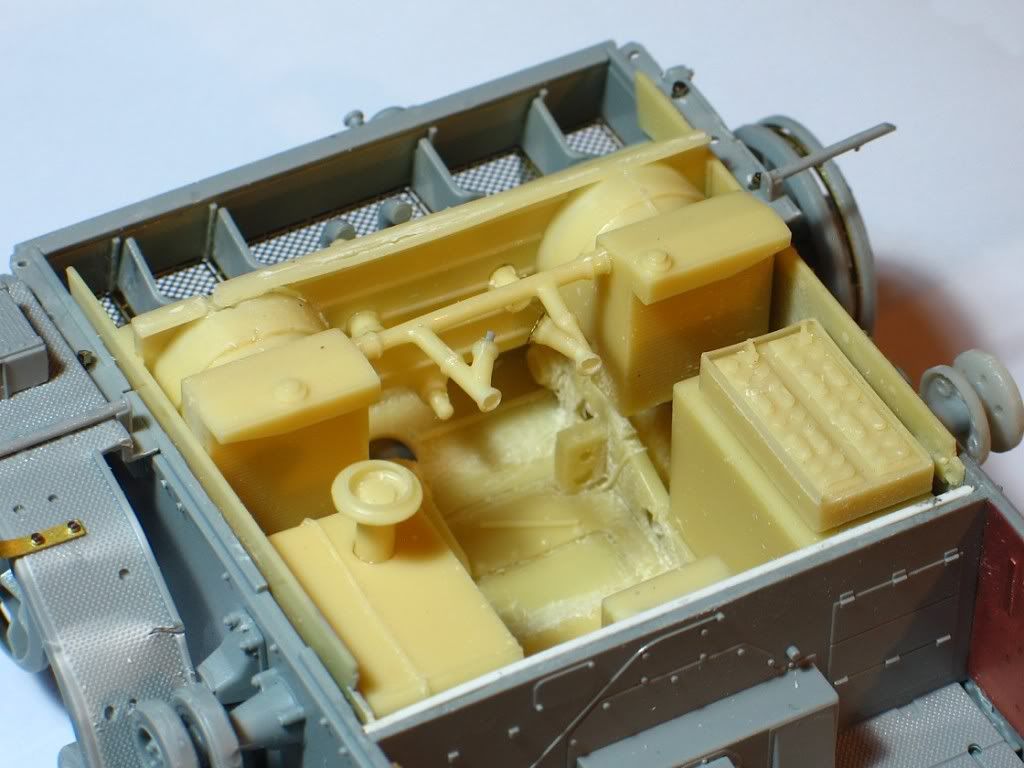
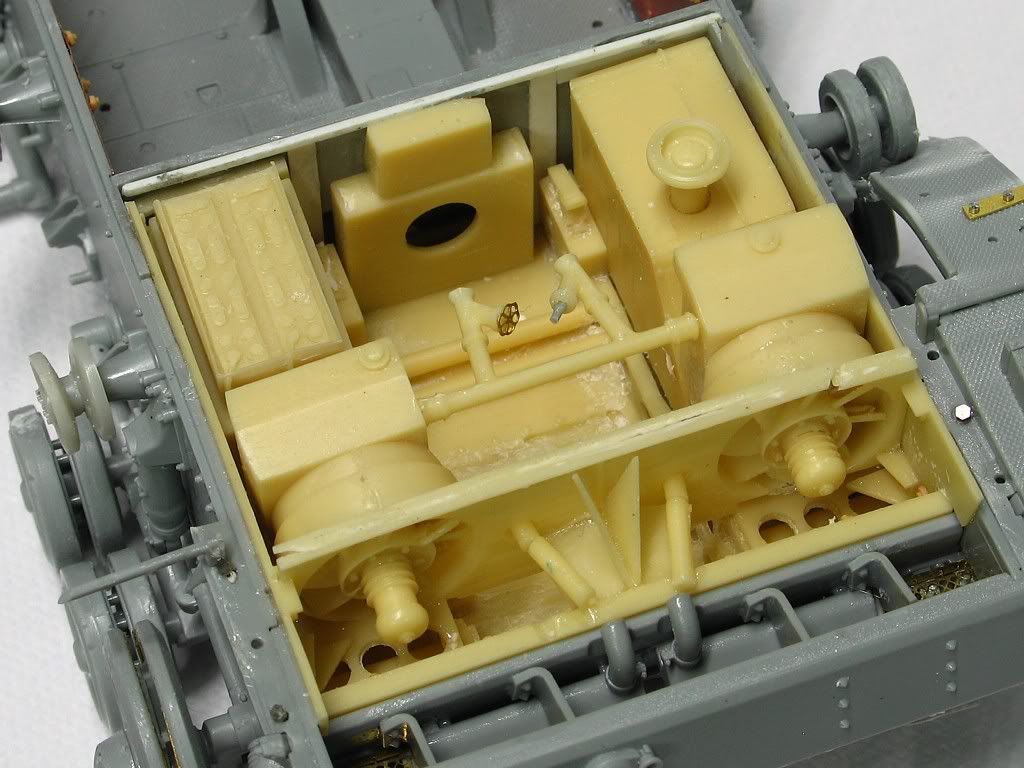
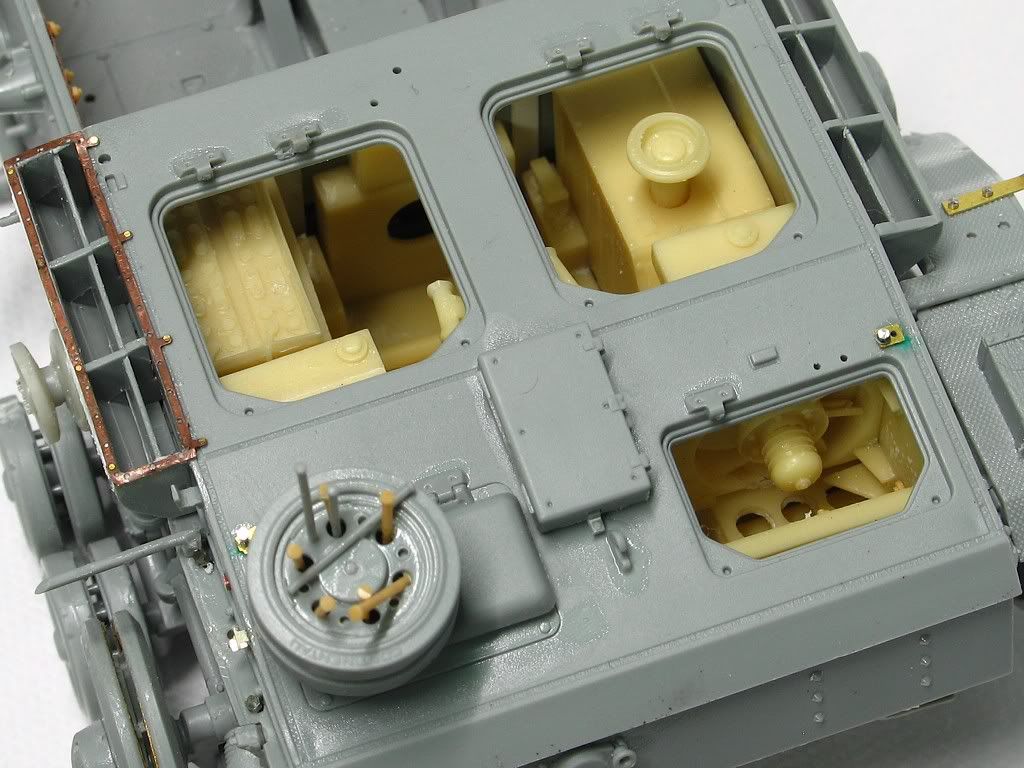
All the good gear including some metal track and scalwerk nuts and bolts plus a VP front interior.
I removed the interior rear detail from the engine bay area to fit the Calibre 35 stuff.


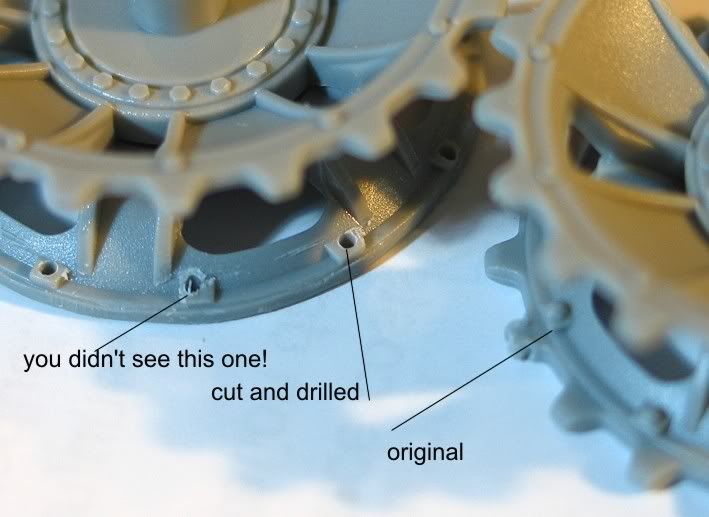
I found a few nice shots of the chassis without the drive housing etc and saw what needed to be drilled out.


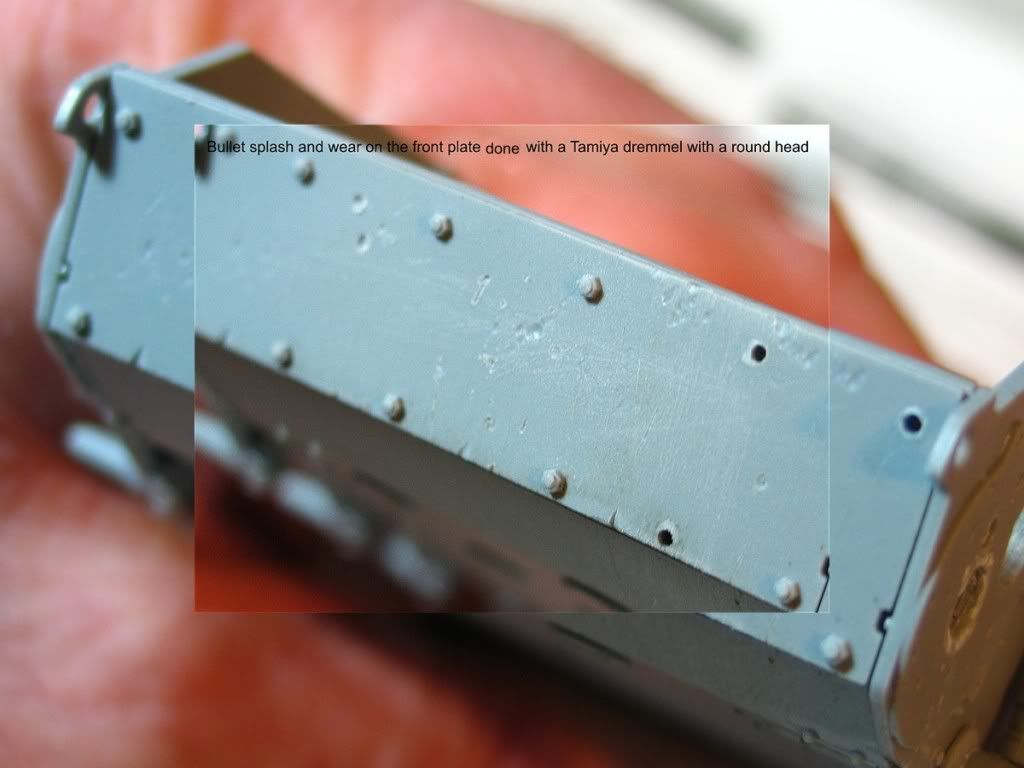
This was one of the main reasons for using the Dragon kit because it had that nicley detailed machined steel face found under the front wheels.
I will need to putty up the joint after the drilling etc.
BACK SOON WITH WHEELS ADD SOME MORE RESIN.
")

 ANOTHER IAN HILL...........PLEASE PLEASE....DON'T TAKE TOO LONG :woohoo:
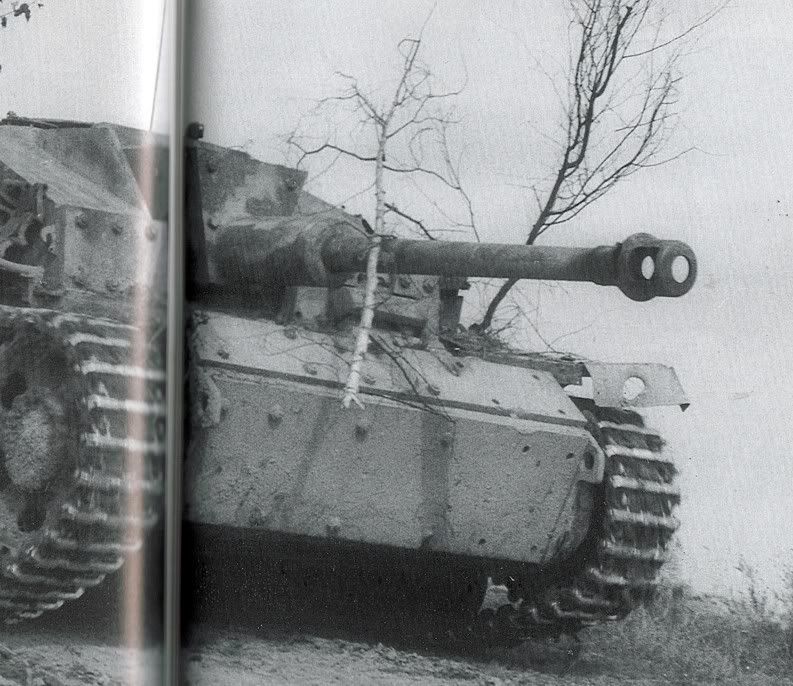


 I said I tend to skip around!)