
-
Modelers Alliance has updated the forum software on our website. We have migrated all post, content and user accounts but we could not migrate the passwords.
This requires that you manually reset your password.
Please click here, http://modelersalliance.org/forums/login to go to logon page and use the "Forgot your Password" option.
You are using an out of date browser. It may not display this or other websites correctly.
You should upgrade or use an alternative browser.
You should upgrade or use an alternative browser.
STUG 3 G EARLY (REMIX) ON A FLATCAR
- Thread starter Brokeneagle
- Start date
Brokeneagle
Master at Arms
 Sorry for not replying earlier to your posts, I have been putting my head down and modelling.
 ")
Thank you Mike, Tom, Tibor, Kolche, James, Rudi and Cheyenne. I appreciate your comments.
Rudi, yeah nice to meet up at Expo even though we didn't really get to go into much detail. Maybe the next model gathering?
I am still going strong on the interior work and will post again soon.
Regards
Ian.
jose luis lopez
Member
Wooowww .... such an attractive and really impressive Stug!. You detailing skills are ... no words!!.
Excellent my friend!
Excellent my friend!
randy_ditton
Master at Arms
Hi Ian, What fun it is to watch your progress on this one 
Randy
Randy
I don't know how I missed this one but.......
You need to tie one arm behind your back when modeling so the rest of us have a chance!
Awesome Ian, just awesome!
Bob
You need to tie one arm behind your back when modeling so the rest of us have a chance!
Awesome Ian, just awesome!
Bob
Brokeneagle
Master at Arms
Jose, Randy and Bob, thanks guys- glad you like it. I have really had some fun on this kit. I really recommend this model if you are looking at Stugs. I just brought another at the model expo 2 weeks ago - white box George Bose early Stug G. :laugh: :evil: Comming up to the finish line with the building. I have done the gearing in the front drive plate holes on either side and finished all the obs clamps. I am even considering using the saukopf mantlet again. ??? The interior brass is nearly done as well even without instructions so I will be posting soon. I won't paint this yet as I want to finish all the vehicles and the train and paint them at the same time. Kind of a Bob L approach.
Once this is done I will revive my BR52 post from planet armour and bring it accross to tanks and things and finish it off.

Ian.
Brokeneagle
Master at Arms
Finally finished construction
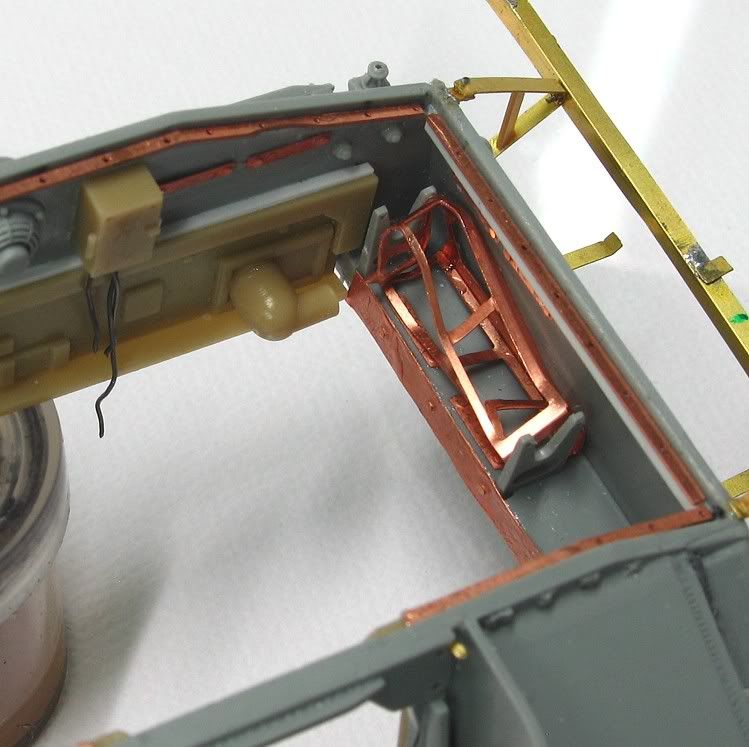
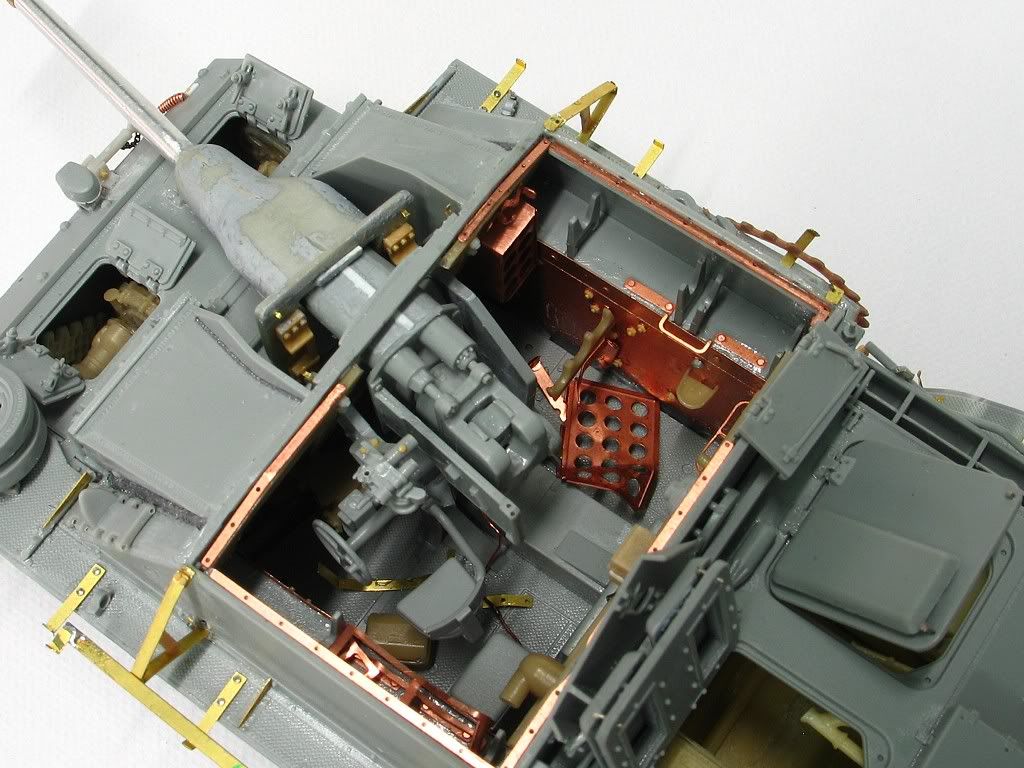
This was avery hard task as I had to work from photos as I did not have instuctions for the VP interior.
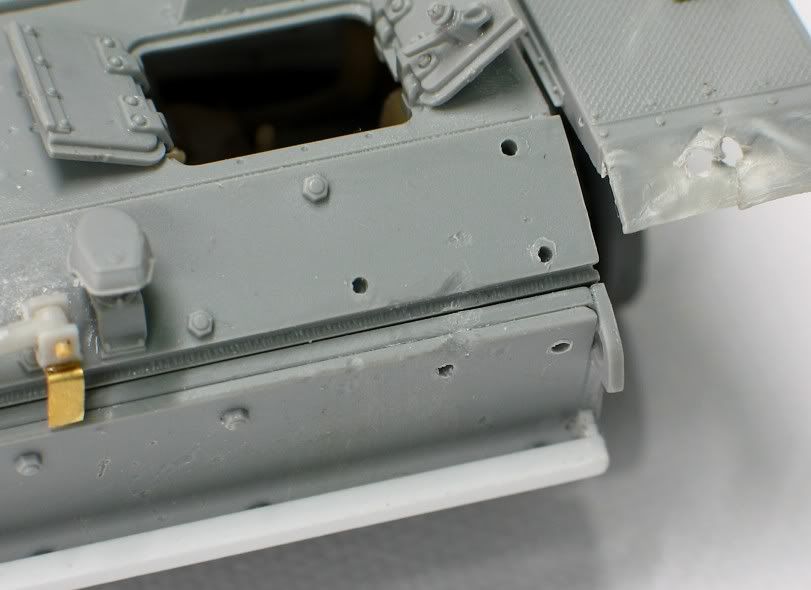
Added the following to the detail.....- locking bolts to the corners of the engine deck hatch corners.
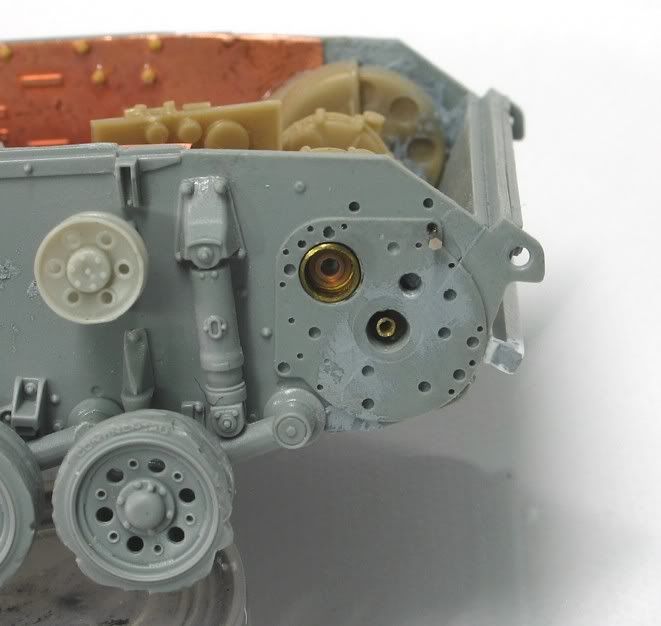
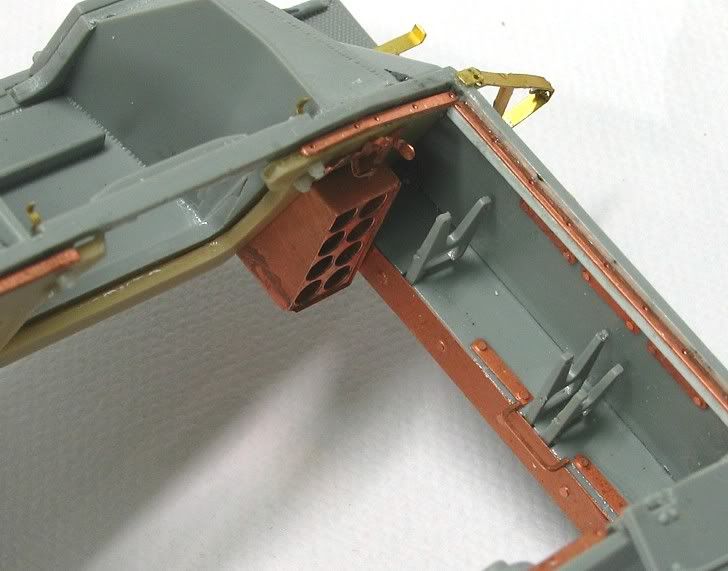
- internal detail to the frontal drive holes.
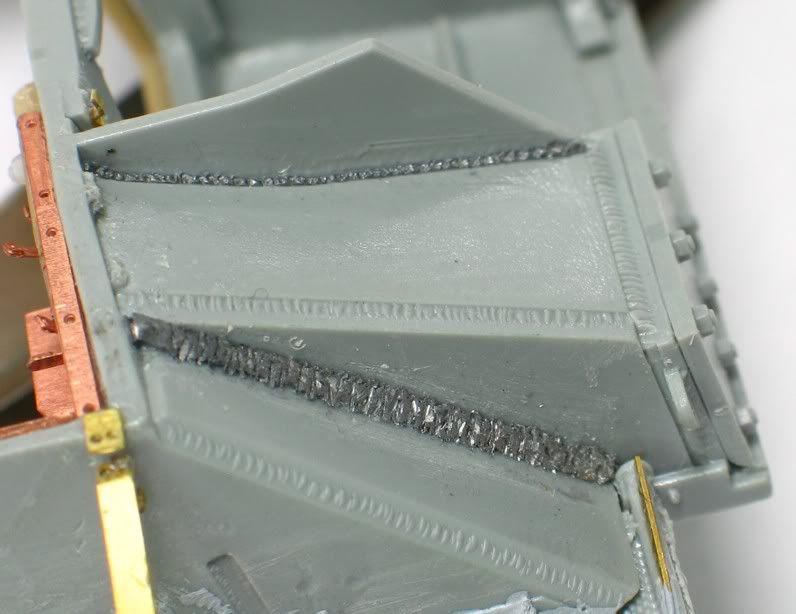
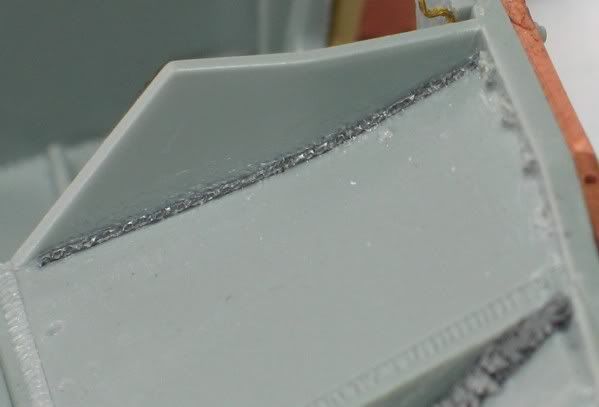
- small welds re-made to the frontal upper super structure.
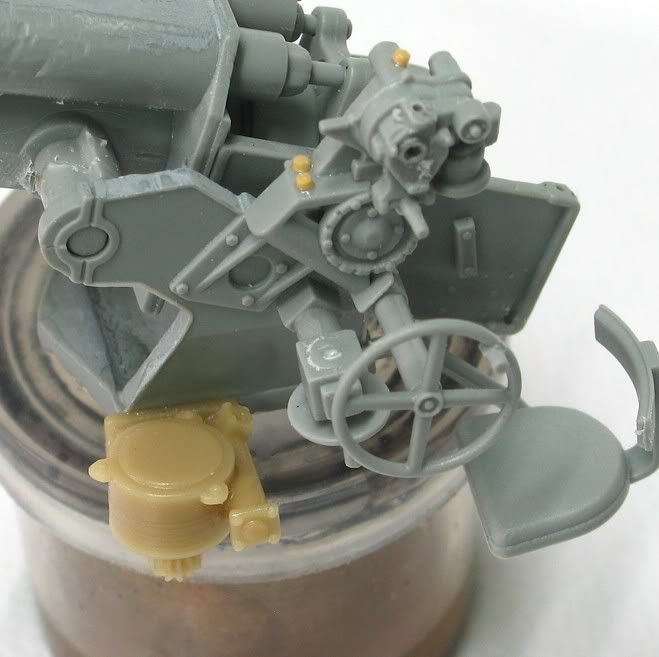
- Barrel replaced to the longer version with the saukopf mantlet. Texture added to the mantlet and casting number.
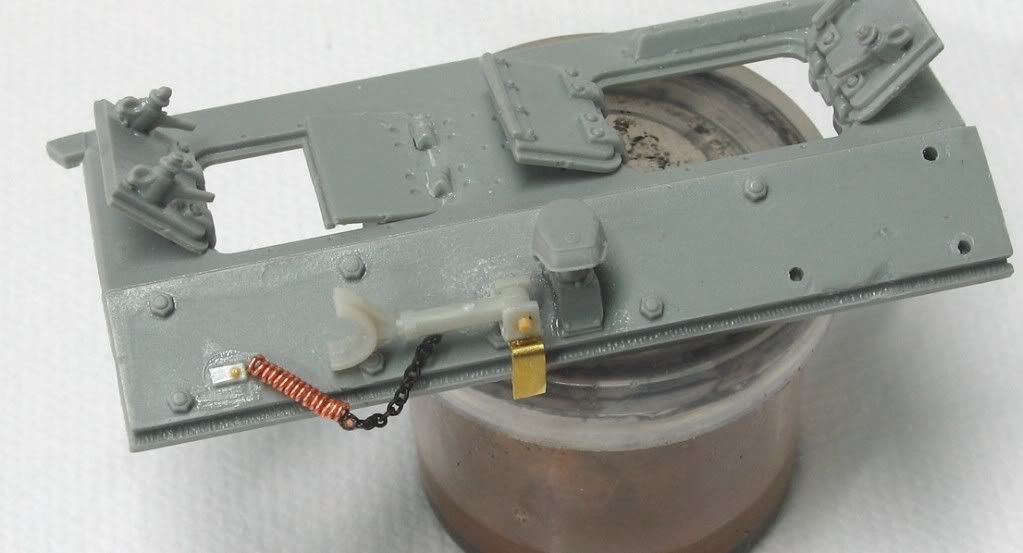
- travel lock, chain and spring.
- retaining chains for rear locking pins
- interior completed with damaged sheet metal details etc. wires and bolt heads plus holes drilled for missing detail.
- handles added to the clamps.


Ian.
This was avery hard task as I had to work from photos as I did not have instuctions for the VP interior.
Added the following to the detail.....- locking bolts to the corners of the engine deck hatch corners.
- internal detail to the frontal drive holes.
- small welds re-made to the frontal upper super structure.
- Barrel replaced to the longer version with the saukopf mantlet. Texture added to the mantlet and casting number.
- travel lock, chain and spring.
- retaining chains for rear locking pins
- interior completed with damaged sheet metal details etc. wires and bolt heads plus holes drilled for missing detail.
- handles added to the clamps.


Ian.
Ian, I don't know what I am more impressed with, your modeling skills or command of BBCode and presentation here. Well done on both counts!
That's right Alex, lots going on here so make sure you check in often!
That's right Alex, lots going on here so make sure you check in often!
Legio Italica
Member
:woohoo: I've missed this.... Outstanding....Incredible details and assembling. Congratulations !
Massimo
Massimo
Well Ian, it looks as though you WILL match the photo!
If so, I am sure you will add the coaxial MG to the topfblende mantlet armor and a few more T-34 track links to the spare track holder. Three are needed but you have an extra one (the bottom one) on the right side of the superstructure.
Excellent work as always...
Regards,
If so, I am sure you will add the coaxial MG to the topfblende mantlet armor and a few more T-34 track links to the spare track holder. Three are needed but you have an extra one (the bottom one) on the right side of the superstructure.
Excellent work as always...
Regards,
Brokeneagle
Master at Arms
B) Thanks for the great response everyone, I really appreciate the support.
Luiz, you still at the south pole! :laugh: Thanks mate.
Bucket, maybe next year or at Wheels and Tracks? Glad I have something that gets you fired up!
Legio, thanks!
Mike, your just a repeat offender You can't help yourself. Thanks for the regular fededback mate.
Sharkmouth, I already filled in the coax mg hole because it is a early refit. If I put too much track in the front holder it will block out my missing bolts and bullet splash on the front panel. I am not trying to match it exactly but close is fine.The determining factor for all this is the kit as I wanted to use the early front bolt-on armour [because of Dragons excellent Bolt detail] and the rear deck has weld seams which are the interlocking style (early type).
Thanks for the interest mate.
Ian.
Luiz, you still at the south pole! :laugh: Thanks mate.
Bucket, maybe next year or at Wheels and Tracks? Glad I have something that gets you fired up!
Legio, thanks!
Mike, your just a repeat offender
You can't help yourself. Thanks for the regular fededback mate. Sharkmouth, I already filled in the coax mg hole because it is a early refit. If I put too much track in the front holder it will block out my missing bolts and bullet splash on the front panel. I am not trying to match it exactly but close is fine.The determining factor for all this is the kit as I wanted to use the early front bolt-on armour [because of Dragons excellent Bolt detail] and the rear deck has weld seams which are the interlocking style (early type).
Thanks for the interest mate.
Ian.
randy_ditton
Master at Arms
Ian, Just wonderful modelling going on here I always look forward to your updates!
Randy
I always look forward to your updates!Randy
Kreighshoer
Active member
damnit!  how insanely uberf-wordcool is this!
the only thing i wonder is how the RHS fender made it's way under the third return roller!
how insanely uberf-wordcool is this!the only thing i wonder is how the RHS fender made it's way under the third return roller!
shawngehling
Active member
Looking Great Ian,
Shawn
Shawn
Brokeneagle
Master at Arms
Thanks Randy, not much though on this thread now as I am not going to paint this one until the whole dio is ready.