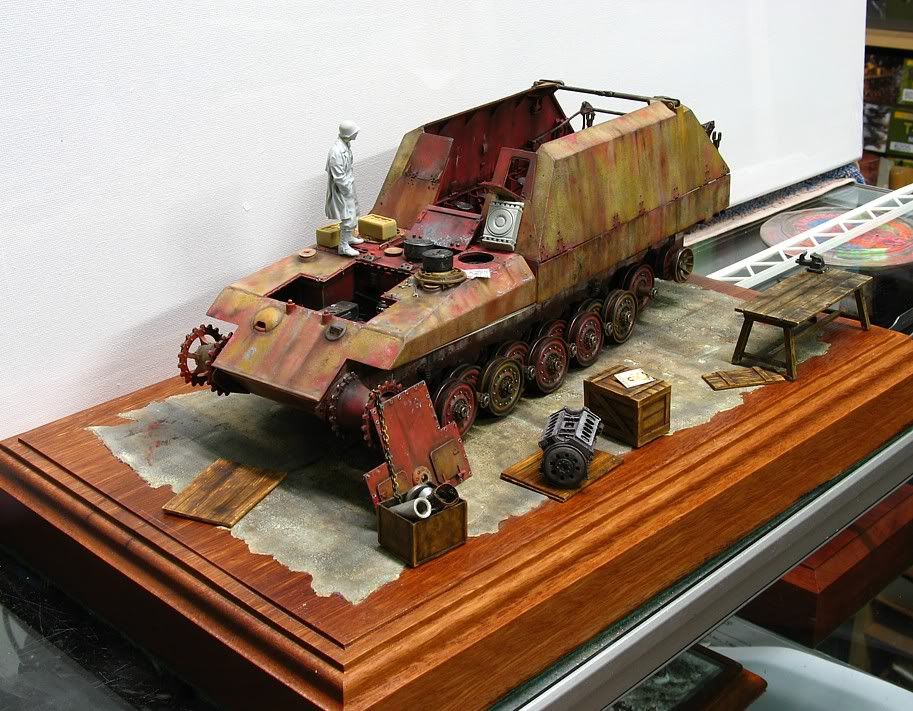
UPDATE ON THE BODY - ENGINE BAY.
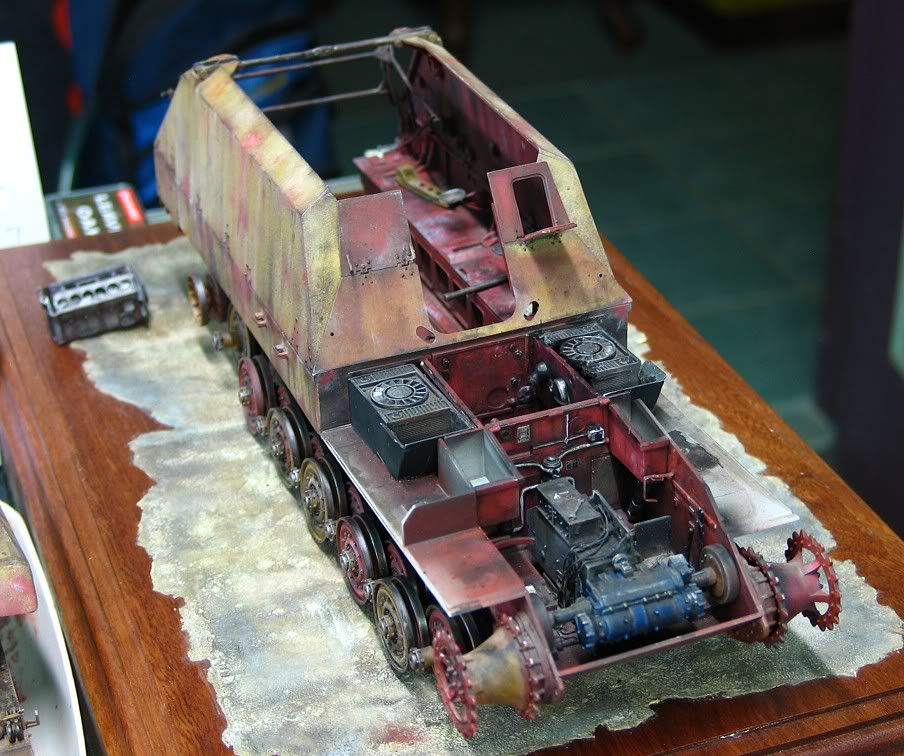
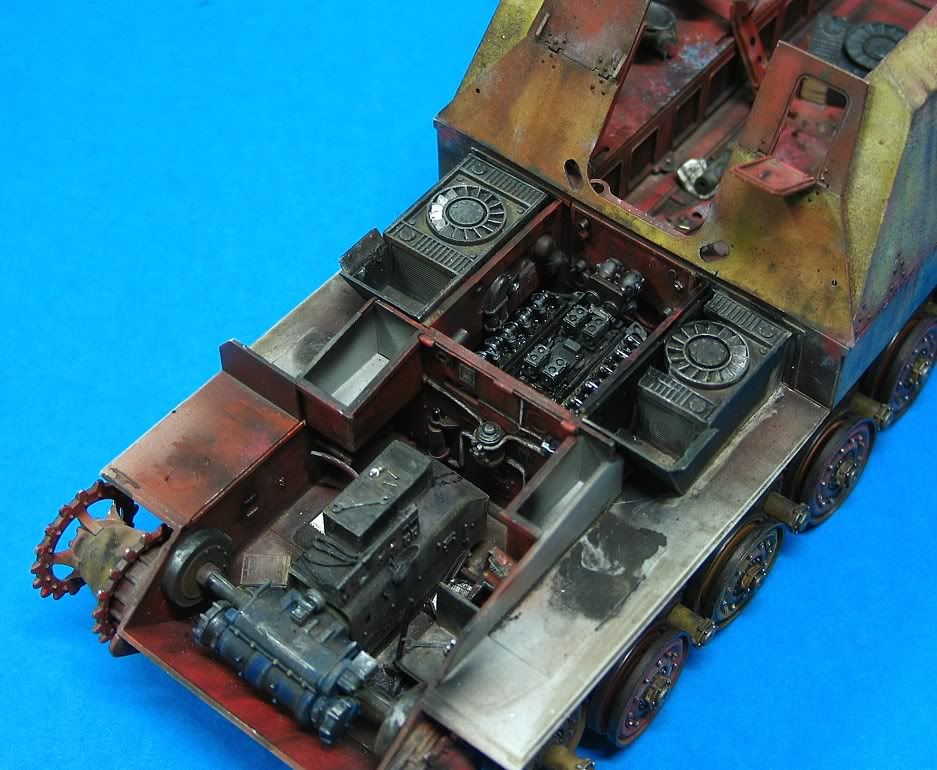
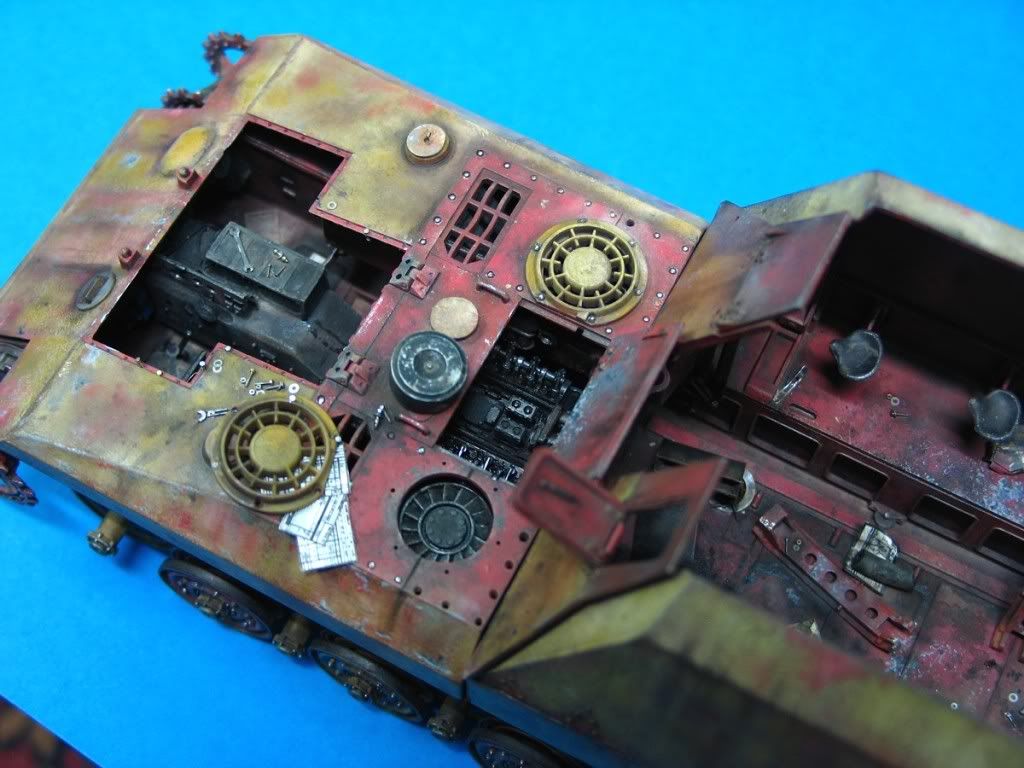
Once I finished the cradle I shifted back to getting the Body completed. A major stalling point for me has been the updating of the engine bay area.
This has proven to be more difficult than I thought. The cooling fans do not sit equally apart when trying to match them to the upper body openings and the rear firewall detail.
I had to hack away a certain amount of the fan assembly to get it to match the hole position, however this is detail that will be hidden once I have the top back on.
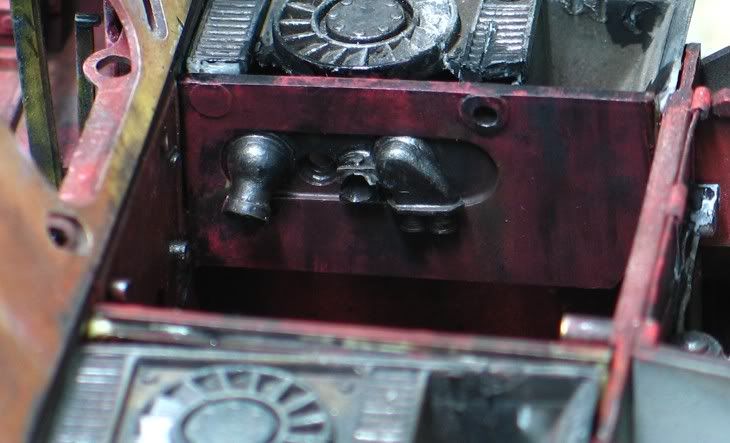
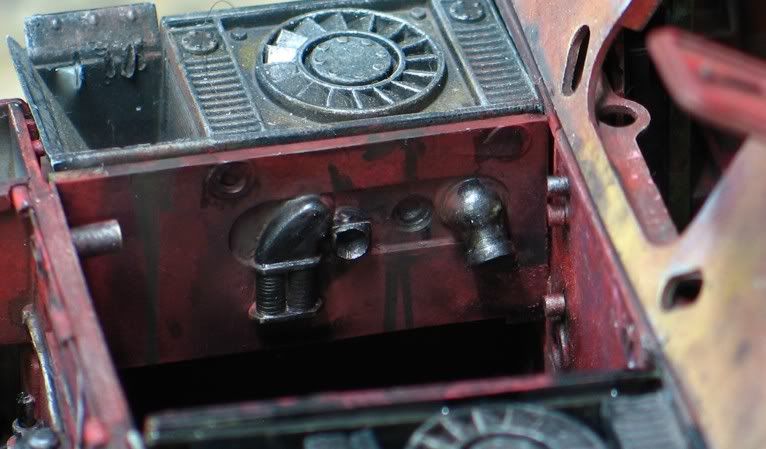
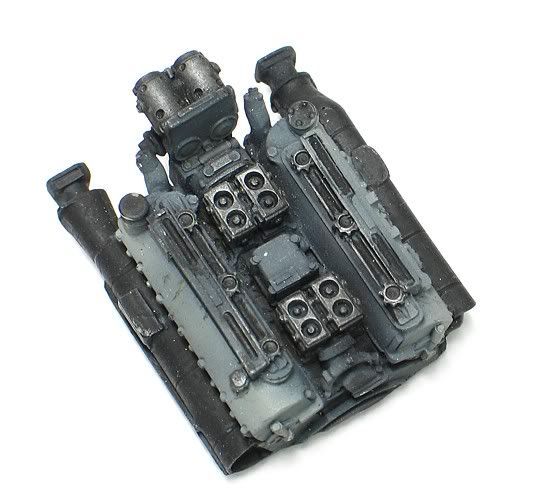
The inclusion of a VP KT motor and engine bay walls just added to my problems. The ENGINE BAY WALLS HAD TO BE MODIFIED SO THAT THEY FITTED A FRONT VEHICLE POSITION AND NOT A REAR WITH A SLOPING PLATE.
I wanted to use these because of the added detail (see photo in base primer below) but the thicker walls caused issues with fan fit.


I then found that once I adjusted the walls to finally sit right horizontally , they effected the vertical fit of the front plate.....adjustment again.
After all of that I found the VP engine top half that I was originally going to use would not go into the space because of the pipe end details I had added around the engine bay walls,
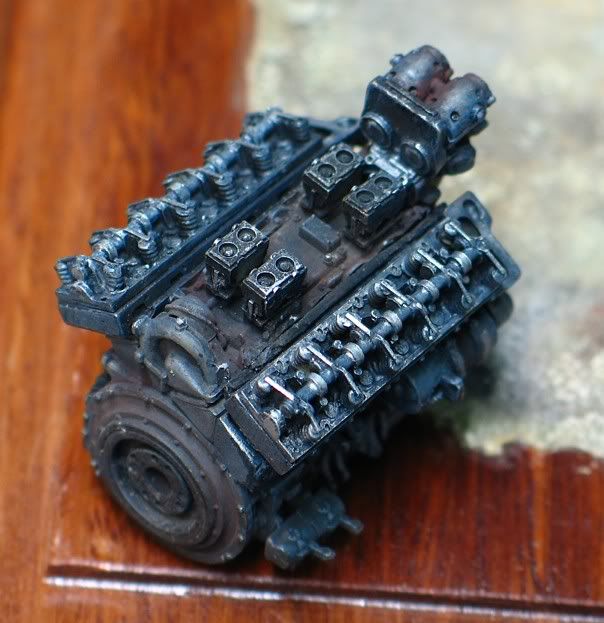
so I went back to the Trumpeter kit engine and modified this to a build up state.
This was visually more interesting and allowed me to fit the motor in though the pipe detail because it does not have the pipes on the sides yet. (see below)
As the lower portions of the motor will not be able to be seen once it is in, I did not spend any time doing any elaborate painting there, only on the upper top face detail.


I used pieces from the VP disassembled engine to detail the 'butchered' Trumpeter motor. I thought the exposed Rockers would be an interesting piece of detail to be seen through the engine bay hatch.
This also fits with the photos as well showing lots of cooling pipes and other stuff lying around. I must say though that I was quite impressed with the plastic injection detail that Trumpeter had done with the kit motor.
I also took this opportunity to try out the new MIG Grease paint that I picked up a couple of weeks back just for this purpose. Very good product and is actually a semi liquid inside, so be careful when using.
Dont try to smear any paste out of this tube, rather use it like a jar of semi-liquid and dip your brush into the tube- give it a shake first before you take off the cap.


I am now working on finishing the workshop scene with the chassis, so I will post on this topic again when this has been completed.
Ian.


") Thank you moonpuppy and Laura,
Thank you moonpuppy and Laura,