
-
Modelers Alliance has updated the forum software on our website. We have migrated all post, content and user accounts but we could not migrate the passwords.
This requires that you manually reset your password.
Please click here, http://modelersalliance.org/forums/login to go to logon page and use the "Forgot your Password" option.
You are using an out of date browser. It may not display this or other websites correctly.
You should upgrade or use an alternative browser.
You should upgrade or use an alternative browser.
17cm Grille Trumpeter (Gerwertz Tammener update)
- Thread starter Brokeneagle
- Start date
Brokeneagle
Master at Arms
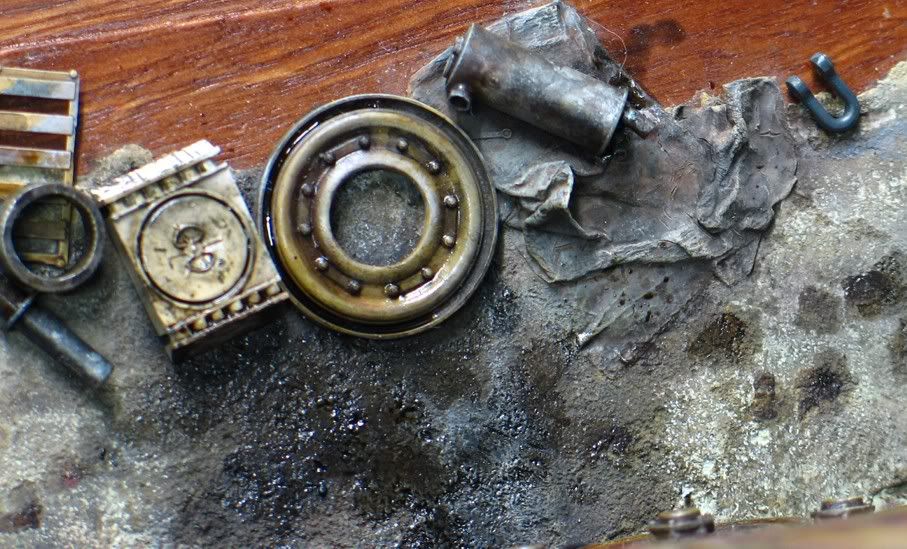
Thanks Mike - greasy is good....mmmmmm
Brokeneagle
Master at Arms
Thanks Alex, great to hear from you again after such a long time. I hope all is well.
Ian I don't know how I missed this previously, just so much going on lately I guess. Outstanding work, Thanks for sharing!

Brokeneagle
Master at Arms
") Thanks Moon Puppy , dave and James.
Thanks Moon Puppy , dave and James.Glad you like the 2 dio idea. I thought that it was the best way to go so that I wouldn't waste any of the kit and it also seemed like 2 interesting ideas that were both different.
Ian.
randy_ditton
Master at Arms
Hi Ian, Nice work on the engine! Will have to try the 'grease'
Randy
Randy
Brokeneagle
Master at Arms
Recomend it Randy. Yiu won't look back.
Brokeneagle
Master at Arms

AFTER THE PHOTO
IT'S ALL FINALLY DONE! HOORAY. I HAVE BEEN PUSHING MYSELF OVER THE LAST MONTH TO GET THIS ONE OUT OF THE WAY BEFORE GETTING SERIOUS ABOUT MY GROUP BUILD PROJECTS.
I cannot GET motivated when there are other projects 'hanging over my head'
To give you an idea of the time spent
- approx. Chassis of the vehicle took about 160 hrs
- approx.accessories and base (all the random parts and figures etc) 130 hrs
- approx. 100 hrs on the gun cradle and base.
In the past 3 weeks i spent 70 hours finishing the junk off.
TOTAL = 390 HRS WHICH EQUATES TO 18 MONTHS FROM BEGINNING TO END IN THE REAL WORLD.
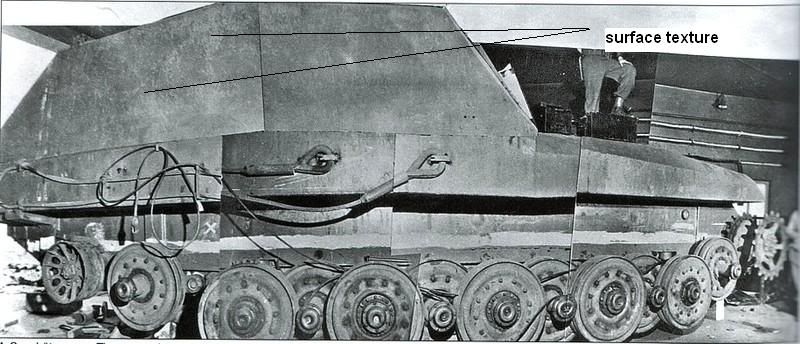
I HAVE FOLLOWED THE DETAILS IN THE PHOTOS AS MUCH AS POSSIBLE, DONE SOME GUESSING AND ADDED DETAIL THAT MIGHT HAVE BEEN THERE OFF PHOTO - I WANTED THE DISPLAY TO BE ACCURATE BUT ALSO EYE CATCHING, SO I FOUND THE MIDDLE GROUND MOST OF THE TIME.
STORY
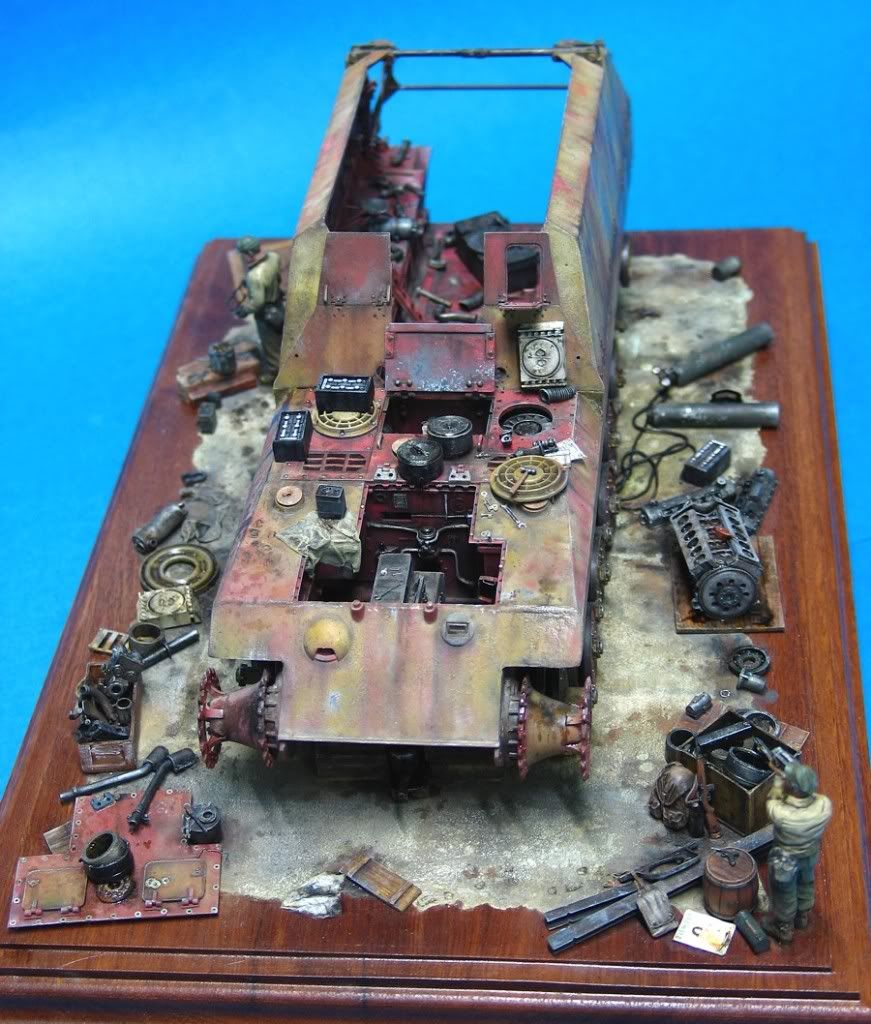
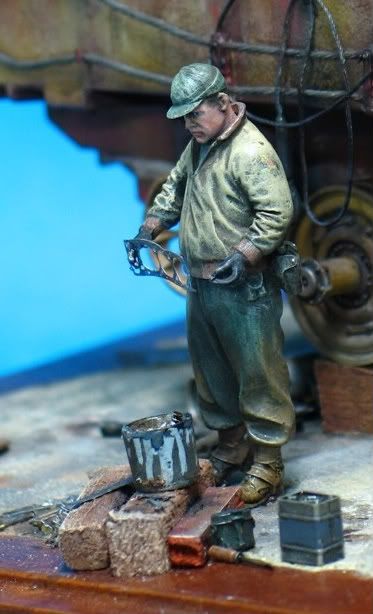
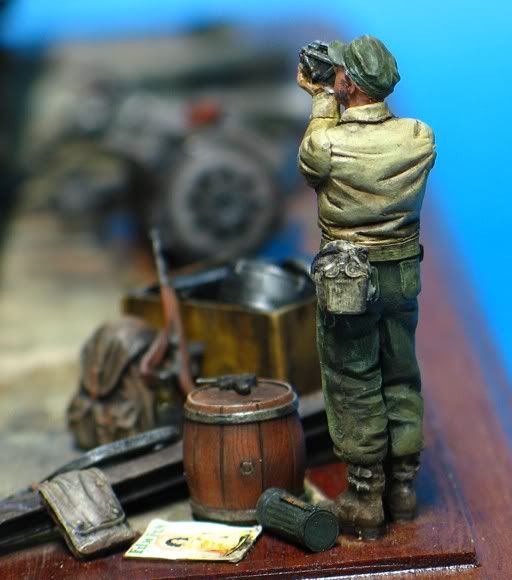
AFTER THE PHOTO - my name for this vingette
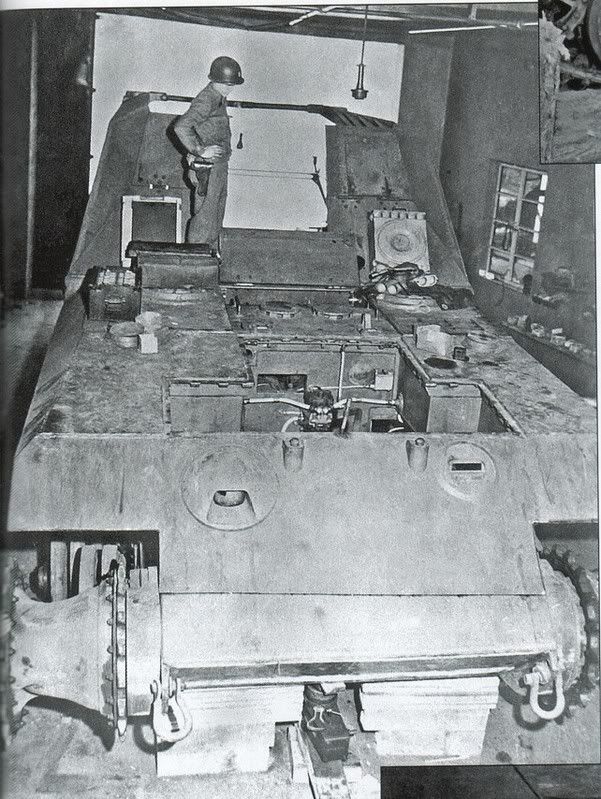
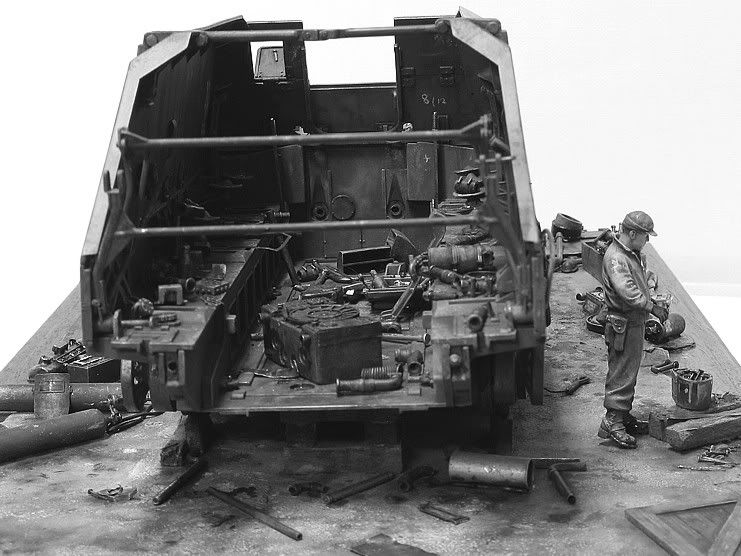
A LOT OF DETAILS WERE VERY DIFFICULT TO RECOGNISE, SO I DID HAVE TO DO SOME GUESSING.i HAVE BASED MY SCENE AFTER THE PHOTOS WERE TAKEN OF THE VEHICLE INSIDE THE PROTOTYPE GARAGE BUT BEFORE THE VEHICLE WAS DRAGGED OUT EMPTY AND PHOTOGRAPHED AGAIN.
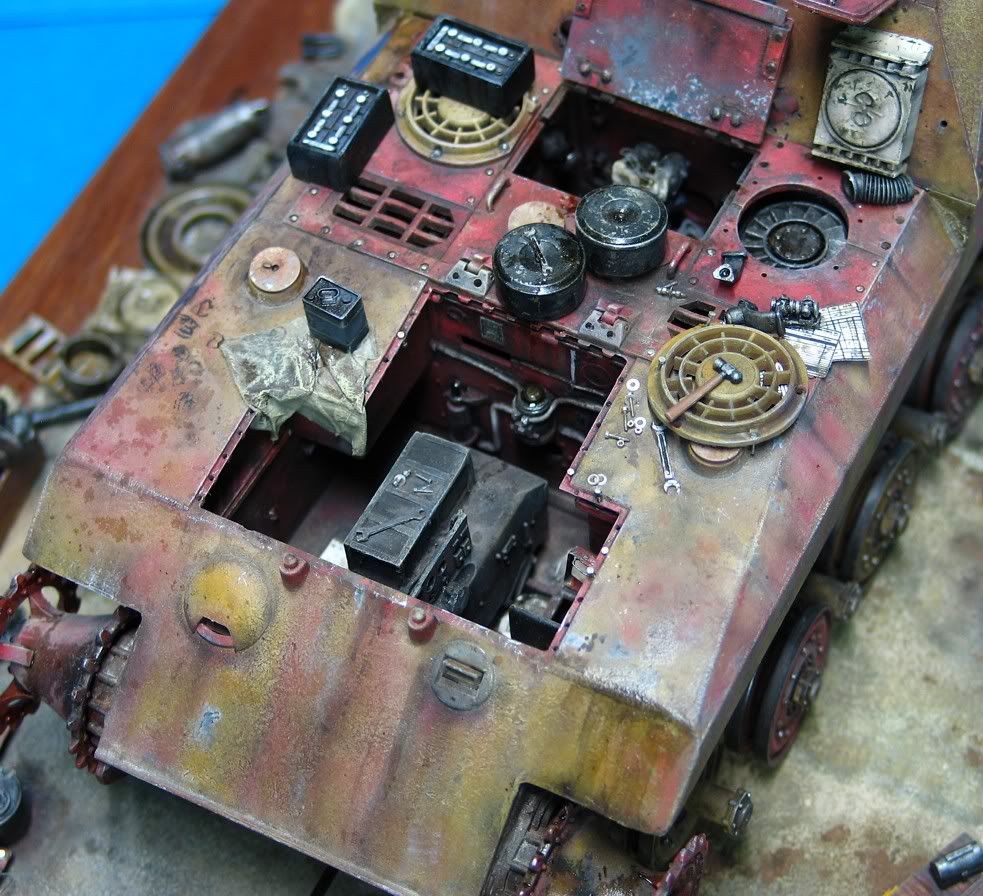
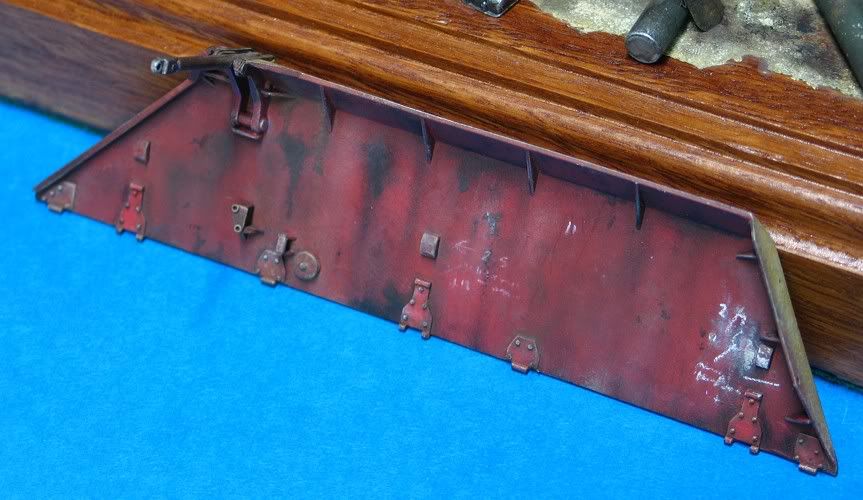
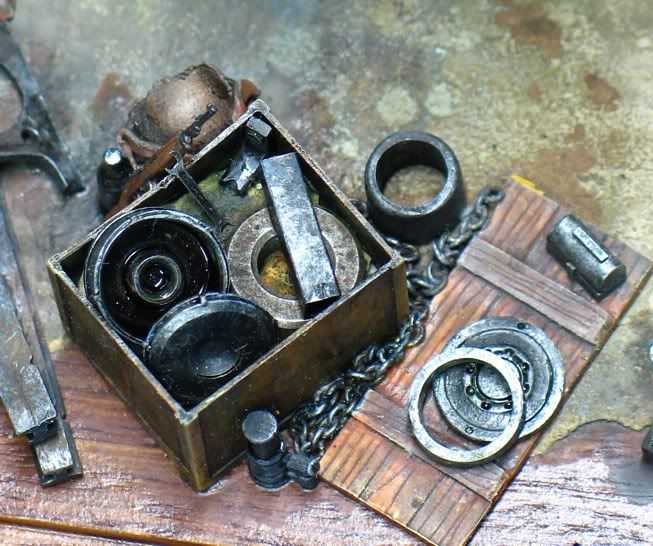
This allowed me to add and move detail that I wanted to improve and make more visually exciting. An example of a change is the white air/oil filter on the left front of the vehicle front , sitting bacwards up against the front super structure behind the batteries. This has a battery lid in front of it. I have made this fall from the vehicle after the photo as though it has been knocked over by the soldier in the picture - oils has spilled everywhere and the oil bath has been reassembled. This has allowed the paint work on the front plate to be seen which I did not want to cover.
I am not sure of the time frame but for the American soldiers to move all of the junk, bring the vehicle down off the blocks and drag it outside must have taken at least 3-4 days(I think a week). So that gave me a large period of time where things would have benn moved, opened, assembled etc.
So now you know why I have been quiet. I also find that the more that I am on the net the lessmodelling I do so I will be off and on from time to time so that i actually get some models built - which is meant to be the whole point of being a modeller. Also as a Master on this site I think that we should be providing examples of our work as guides but also as interest and entertainment for people who come to TnT to see models!
So here are my finished shots.
BASE (WITHOUT VEHICLE)


MORE TO COME
Can't wait!!!
Kreighshoer
Active member
words fail me! that's just uberphantastic!
Hey Ian,
I wondered what had happened to this build.
You have always been really great at doing those "Junkyard" type dios! You have outdone yourself with this one.
The rusting and the oily mess is just spectacular!
What can I say, This is another Ian Hill Classic!
Bob
I wondered what had happened to this build.
You have always been really great at doing those "Junkyard" type dios! You have outdone yourself with this one.
The rusting and the oily mess is just spectacular!
What can I say, This is another Ian Hill Classic!
Bob
D
DBridges
Guest
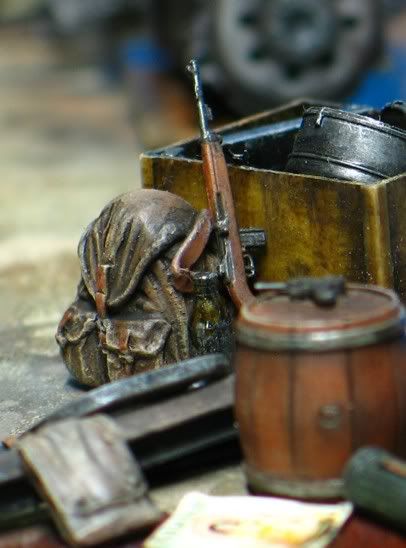
Wow, very nice looking! I always love dioramas like this, with the broken down engines and tools laying around. Can't wait to see everything together and finished.
David
David
Ian is the master of this style, no doubt. I could spend half the day looking at all this eye candy! And the photo effects, looks like they were scanned out of a book. Great stuff Ian!
Brokeneagle
Master at Arms
Moonpuppy, Laura, Bob L and David, thank you for the posts. Glad you like the base it was virtually a model in itself.
Moonpuppy, thank you for the comment on my photos, I do try my hardest to mae my posts entertaining and visually interesting.
OK, I have finished the photos of the chassis on the base so I can now finish what I started - sorry for the wait but photographig, preping, sizing and arranging of the material now takes me quite a while so I put this up in 2 stages.
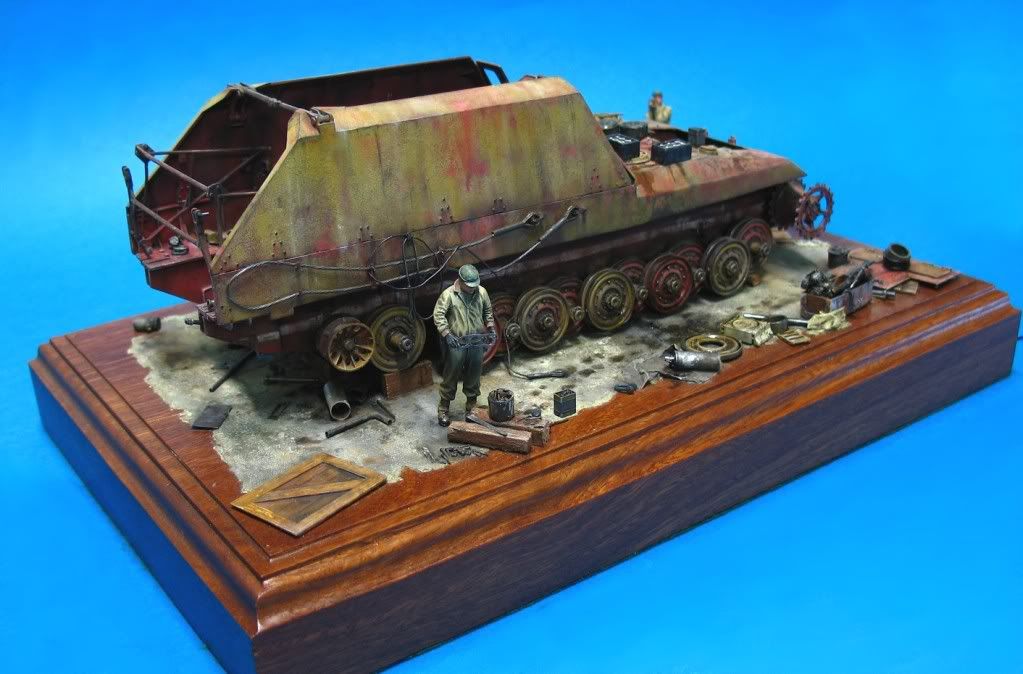
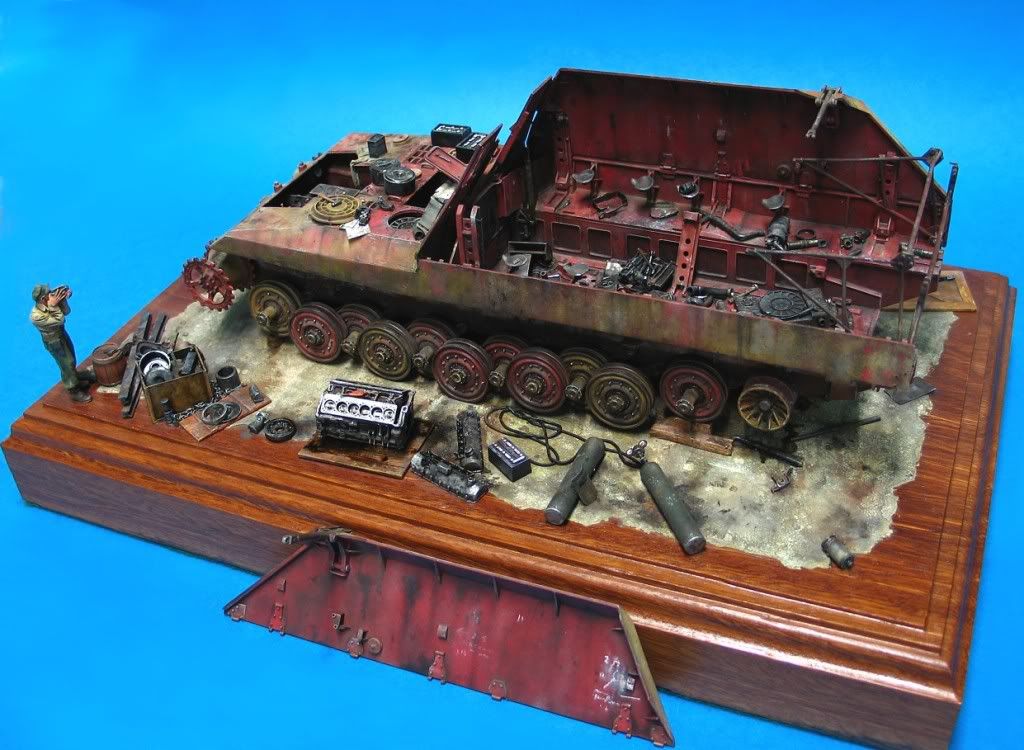
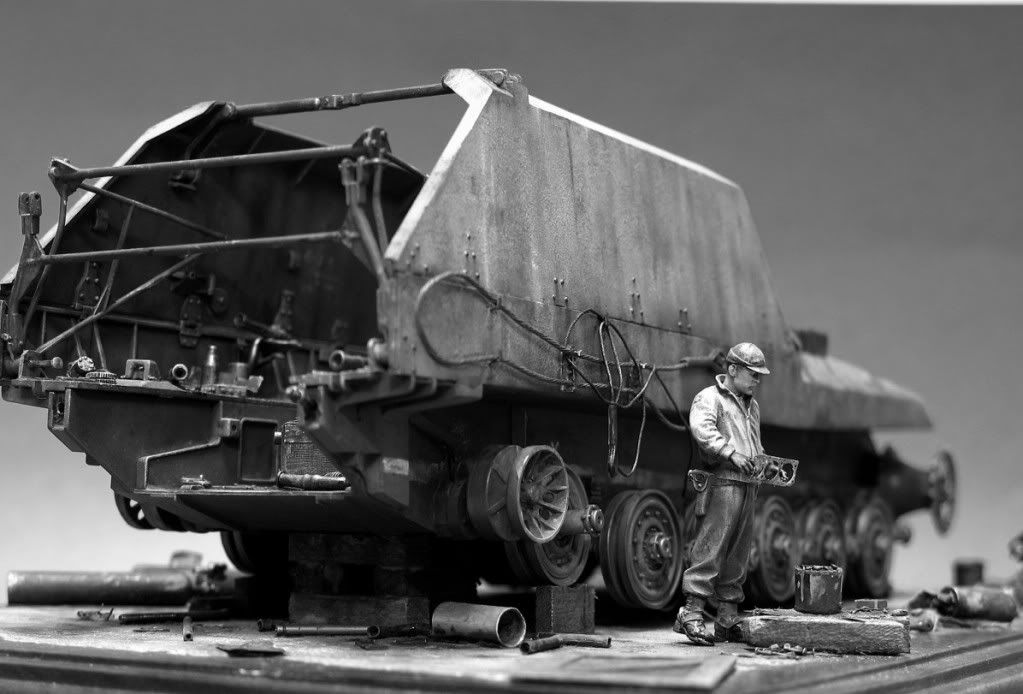
VEHICLE ON THE BASE COMPLETED.
My dioramas are becoming more and more difficult to photograph due to the detail. With this particular dio please keep in mind that I have not been able to capture all details properly with the camera and some aspects will remain the reward of the people veiwing the actual piece - I really do like the actual dio better in the flesh than in the photos.
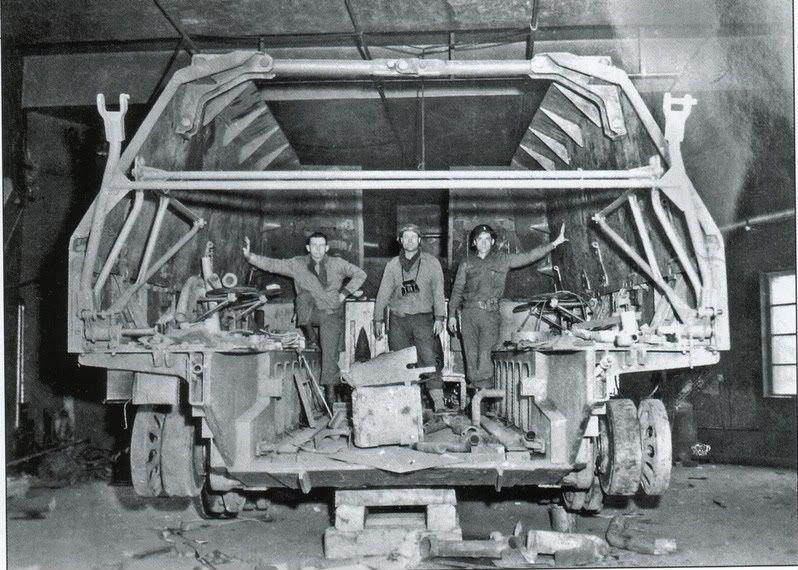
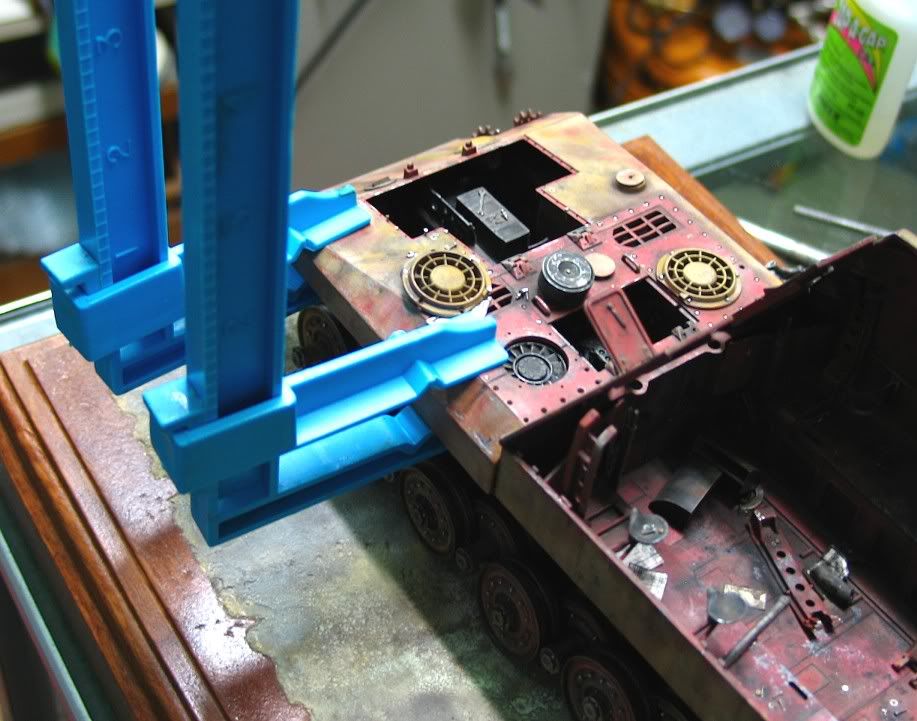
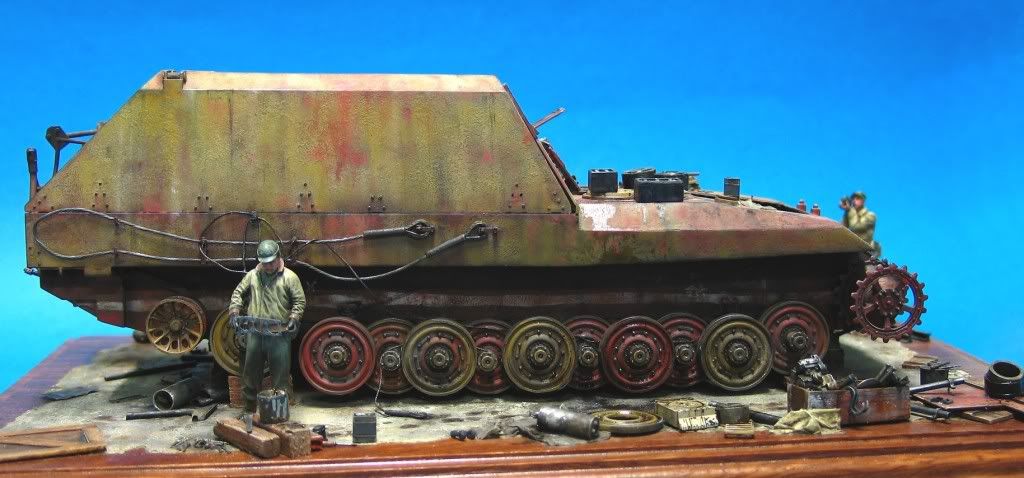
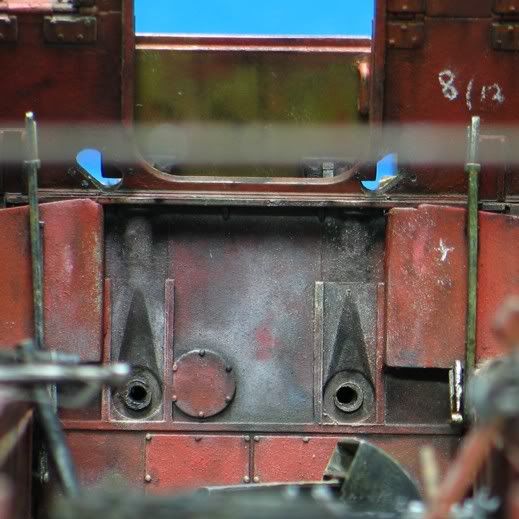
I had to attach the front plate to the chassis as my first step towards finally finishing and this was a really big road block for me. Sanding away already painted detail and blending the 2 sides into the rear side plate which had a starting point that was so far out it was horrific (mismatched and stepped). I also added the welds when it was in place. The detailing of the radiator piece was also a stalling point as I had to add the pipes etc - not a biggy but painful. I used a Panther /Tiger2 radiator from VP and modified it (see pics below) and this became the substitute for the large something in the middle ofthe rear of the vehicle in front of the soldiers - For the life of me I could not work out what that is. Same with the large object under the left rear on top of the wheels (you can see it in the photo of rear from previos section)
PLEASE CLICK ON ALL PHOTOS (BIG AND SMALL) FOR A LARGER VERSION


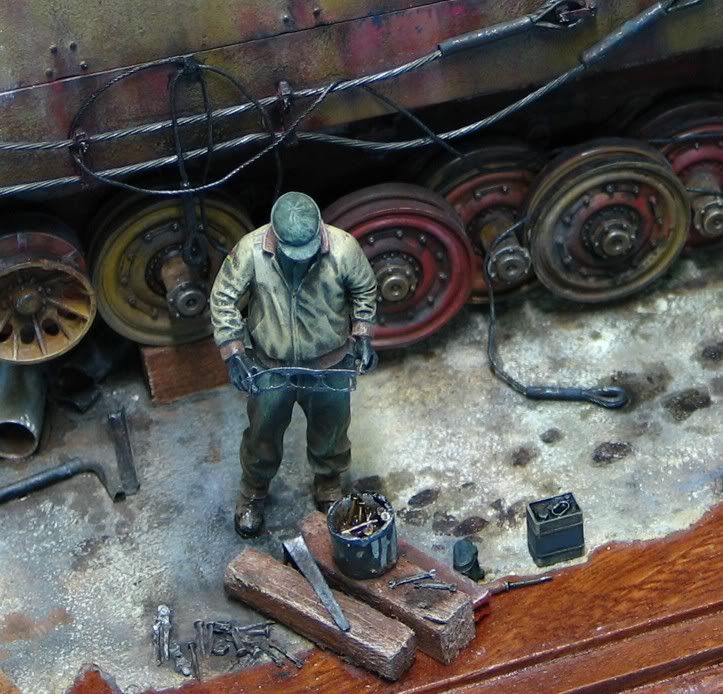
The other road block was the cables and their hang from the PE clamps. I wanted to get their look as close as possible to the side photo so this took a lot of patience.

The other point to note in the photos is that the tank is not actually on the ground except for one or two wheels that might be just touching.


I really had a lot of fun on this but it always feels good to wrap up and move on to a new one :evil:
Thanks for looking I hope you enjoyed the photos and text - comments welcome.
Ian. :evil:
Moonpuppy, thank you for the comment on my photos, I do try my hardest to mae my posts entertaining and visually interesting.
OK, I have finished the photos of the chassis on the base so I can now finish what I started - sorry for the wait but photographig, preping, sizing and arranging of the material now takes me quite a while so I put this up in 2 stages.
VEHICLE ON THE BASE COMPLETED.
My dioramas are becoming more and more difficult to photograph due to the detail. With this particular dio please keep in mind that I have not been able to capture all details properly with the camera and some aspects will remain the reward of the people veiwing the actual piece - I really do like the actual dio better in the flesh than in the photos.
I had to attach the front plate to the chassis as my first step towards finally finishing and this was a really big road block for me. Sanding away already painted detail and blending the 2 sides into the rear side plate which had a starting point that was so far out it was horrific (mismatched and stepped). I also added the welds when it was in place. The detailing of the radiator piece was also a stalling point as I had to add the pipes etc - not a biggy but painful. I used a Panther /Tiger2 radiator from VP and modified it (see pics below) and this became the substitute for the large something in the middle ofthe rear of the vehicle in front of the soldiers - For the life of me I could not work out what that is. Same with the large object under the left rear on top of the wheels (you can see it in the photo of rear from previos section)
PLEASE CLICK ON ALL PHOTOS (BIG AND SMALL) FOR A LARGER VERSION

The other road block was the cables and their hang from the PE clamps. I wanted to get their look as close as possible to the side photo so this took a lot of patience.
The other point to note in the photos is that the tank is not actually on the ground except for one or two wheels that might be just touching.


I really had a lot of fun on this but it always feels good to wrap up and move on to a new one :evil:
Thanks for looking I hope you enjoyed the photos and text - comments welcome.
Ian. :evil:
Fantastically Fabulous...
Regards,
Regards,
Matt Beattie
Member
Ian , man what can i say , this is AWESOME , no wonder Pete and myself haven't heard from you in a while
Can't wait to see this baby in the flesh , hopefully soon
cheer's
Matt
Can't wait to see this baby in the flesh , hopefully soon
cheer's
Matt