
-
Modelers Alliance has updated the forum software on our website. We have migrated all post, content and user accounts but we could not migrate the passwords.
This requires that you manually reset your password.
Please click here, http://modelersalliance.org/forums/login to go to logon page and use the "Forgot your Password" option.
You are using an out of date browser. It may not display this or other websites correctly.
You should upgrade or use an alternative browser.
You should upgrade or use an alternative browser.
A-36A
- Thread starter Old Dog
- Start date
phantom II
Master at Arms
Thanks OD. , guess I most have the packing tape incorrectly in my mind. Need to go look at some. Looks pretty sturdy in the photos.
Something else to go figure out .
Cheers, Christian B)
Something else to go figure out .
Cheers, Christian B)
Old Dog
Well-known member
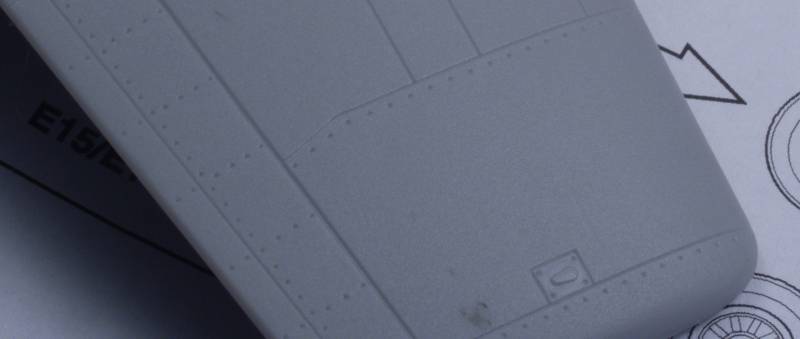
OK with the Wellington out of the way it's time to get this one finished up. The canopy was masked and installed and we are ready for paint. One issue exists, the kit surface has a pebbly finish. Not sure it will show up in this photo but ...
I would be tempted to just sand the whole thing with some 1000 grit but it would remove all the raised detail and I didn't want the so it was on to a coat of Mr. Surfacer 1000. After it dried I went over the whole airframe with some 0000 steel wool. This smoothed up any irregularities with out removing the raised items. Of course I found a few spots that need more work so these were taken care of then a second coat applied to areas that need it. At that point I was satisfied that things were go for color.
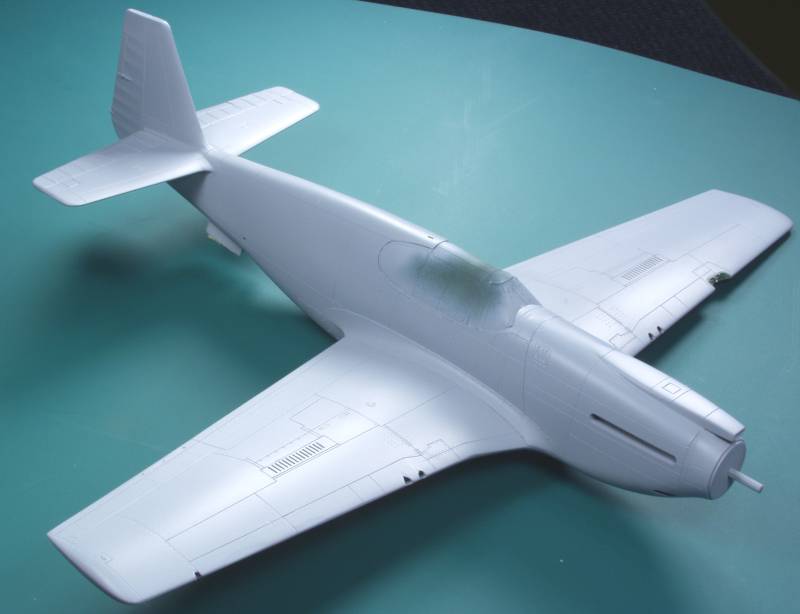
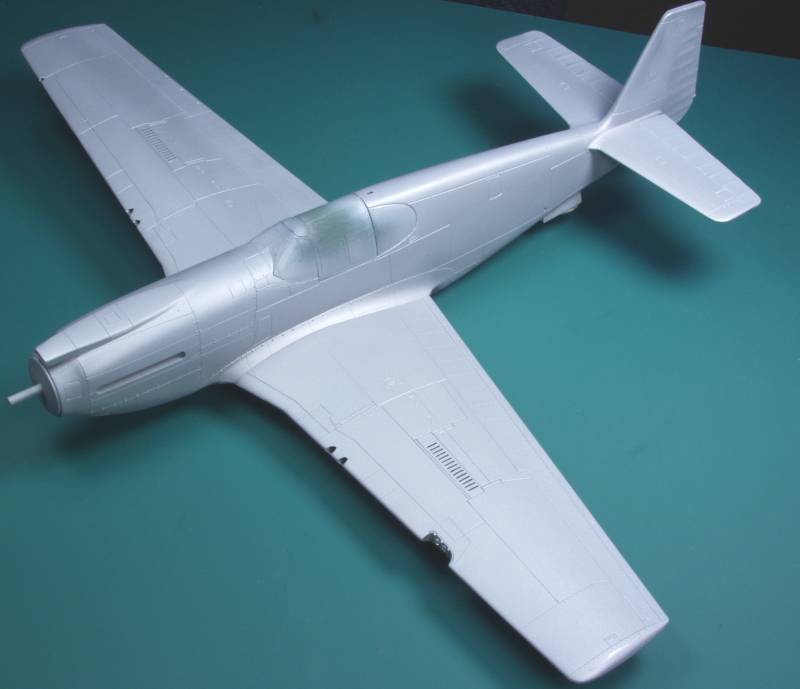
Next the upper surfaces and a few other areas that I felt might get abraded away by the wind, sand and ground crew were given a coat of Alclad. Tried a new shade for me anyway, "Dull Aluminum". I like it, might be the answer for those wanting a weathered aluminum finish, as you can see, except for a slight sheen it doesn't look a lot different than the gray primer.
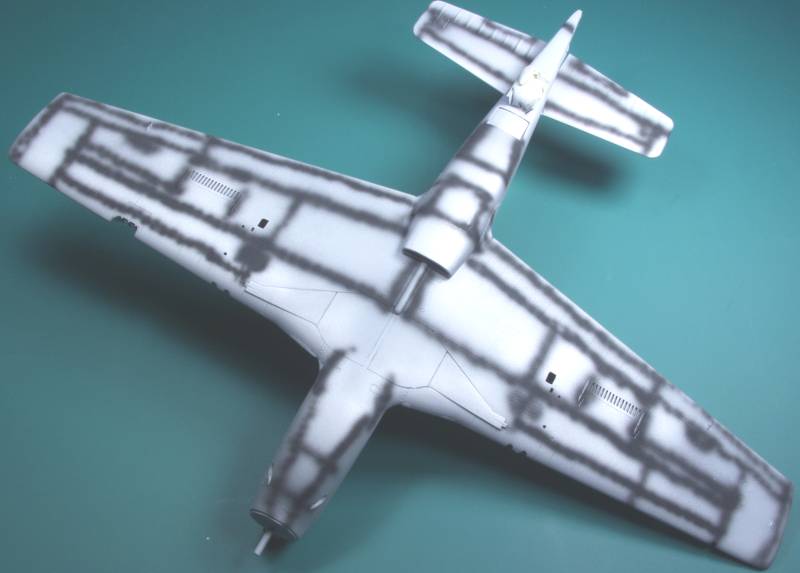
Last step before color was to preshade the panel lines on the bottom. I generally don't have much luck with preshading but I keep at it figuring some day I'll figure it out. I didn't do the top as I feel the eventually weathering would hide it anyway.
Next up will be neutral gray, may happen yet today.
I would be tempted to just sand the whole thing with some 1000 grit but it would remove all the raised detail and I didn't want the so it was on to a coat of Mr. Surfacer 1000. After it dried I went over the whole airframe with some 0000 steel wool. This smoothed up any irregularities with out removing the raised items. Of course I found a few spots that need more work so these were taken care of then a second coat applied to areas that need it. At that point I was satisfied that things were go for color.
Next the upper surfaces and a few other areas that I felt might get abraded away by the wind, sand and ground crew were given a coat of Alclad. Tried a new shade for me anyway, "Dull Aluminum". I like it, might be the answer for those wanting a weathered aluminum finish, as you can see, except for a slight sheen it doesn't look a lot different than the gray primer.
Last step before color was to preshade the panel lines on the bottom. I generally don't have much luck with preshading but I keep at it figuring some day I'll figure it out. I didn't do the top as I feel the eventually weathering would hide it anyway.
Next up will be neutral gray, may happen yet today.
I can never do a preshade, made it look easy Gary. 
Old Dog
Well-known member
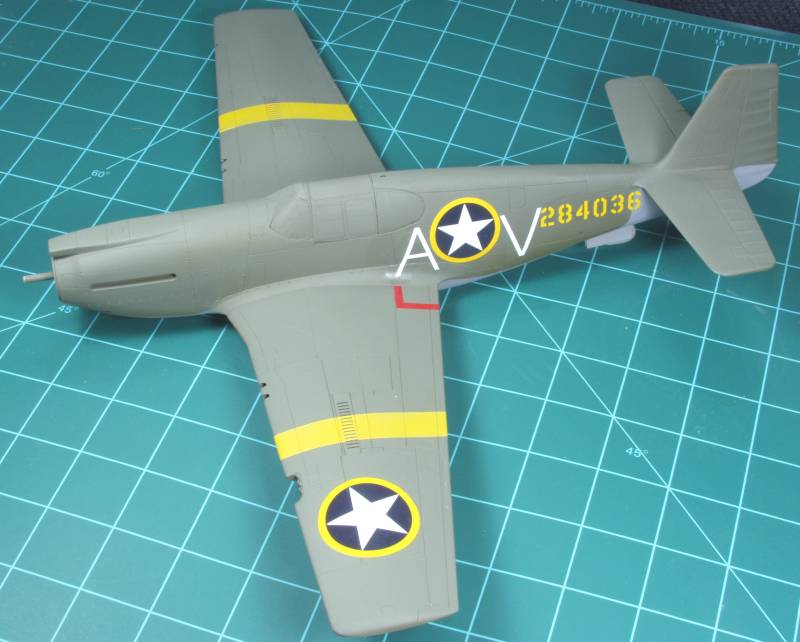
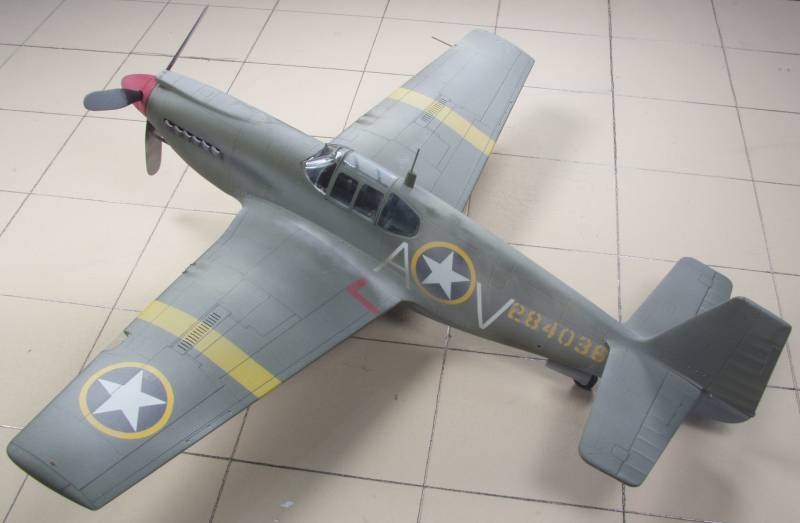
OK top color on, doesn't show in this photo but there is some color gradient towards the bottom on the OD. Decals also on, the Hobbycrap decals lived up to their reputation, the national insignia will probably require several more coats of setting solution before I can over coat them and even though I set the "A" and the serial number with Future, I suspect I may still get some silvering. Also a good thing I had two of these kits as I trashed one of the A's and one of the V's putting them on. Still hoping to finish this one over the weekend if nothing else goes wrong.
Old Dog
Well-known member
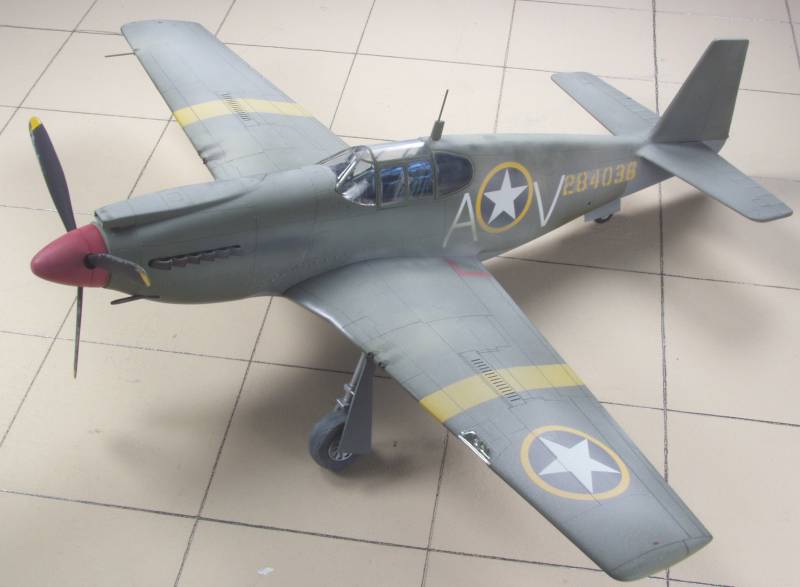
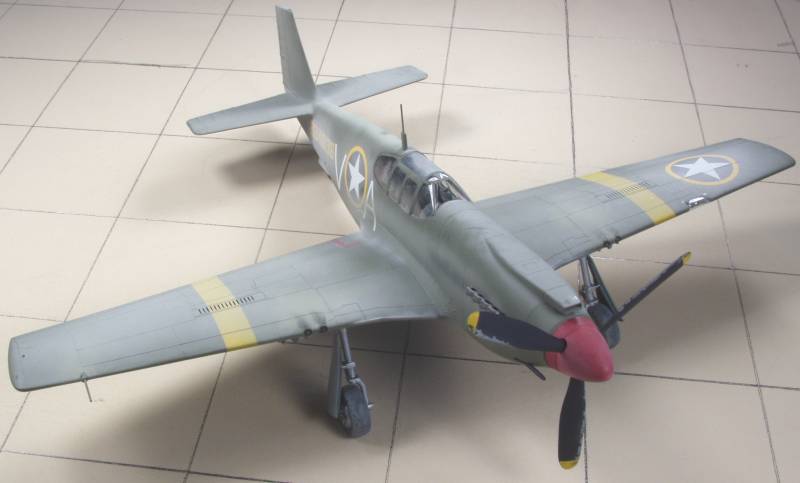
OK, I'm calling this one done ! Hey a day early, how did that happen :hmmm
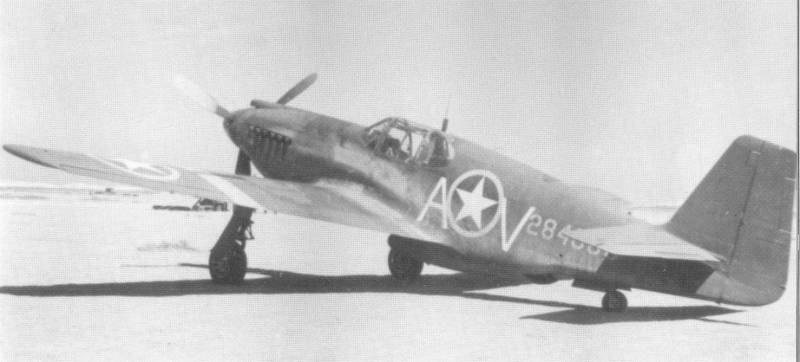
Anyway back in the beginning my goal with this build was to get experience doing extreme desert weathering, something like this
Anyway this is how it turned out...
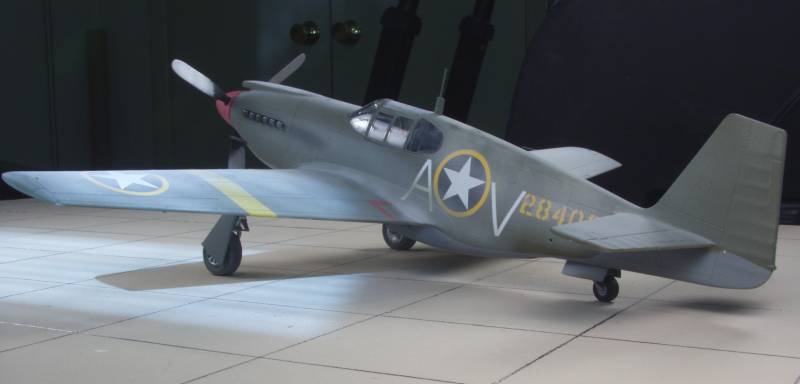
Not too shabby, for me anyway, granted it would look better in natural light on a desert diorama but you can't have everything.
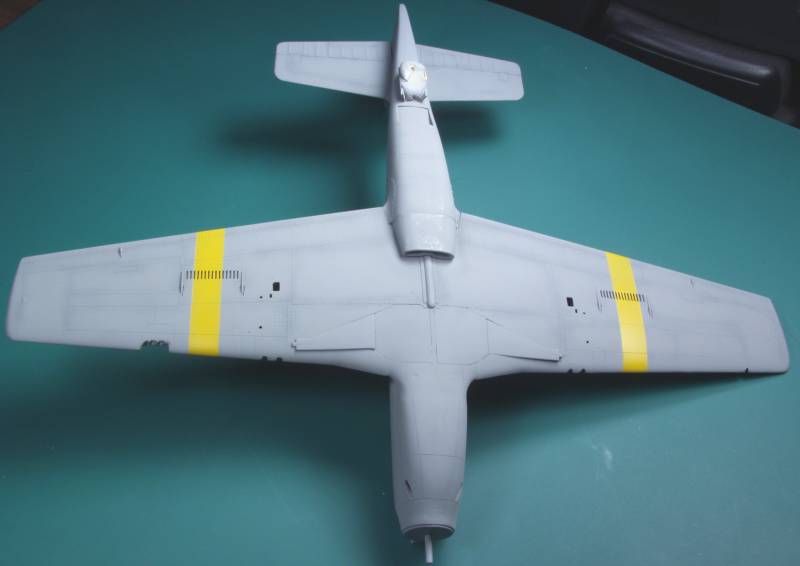
Here are the rest of the pix, bottoms up first, the nifty formation lights are MV lenses they sell them as a set.
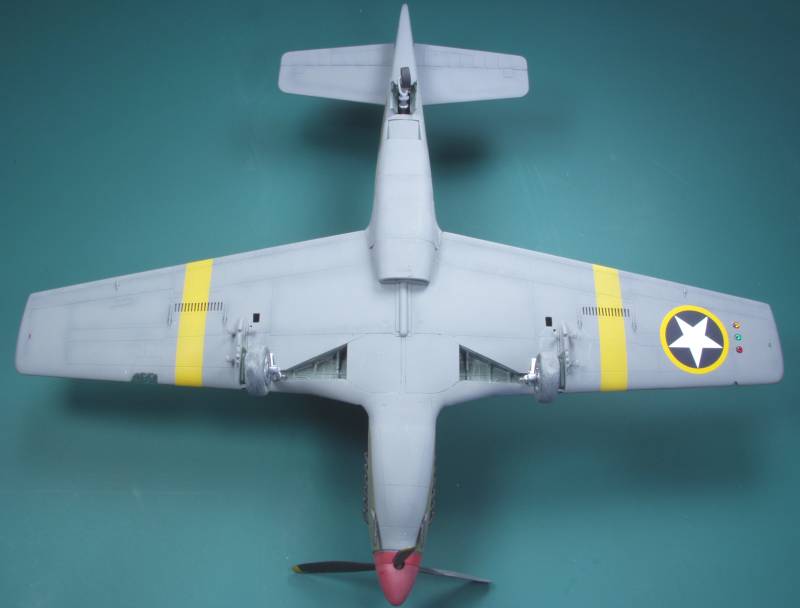
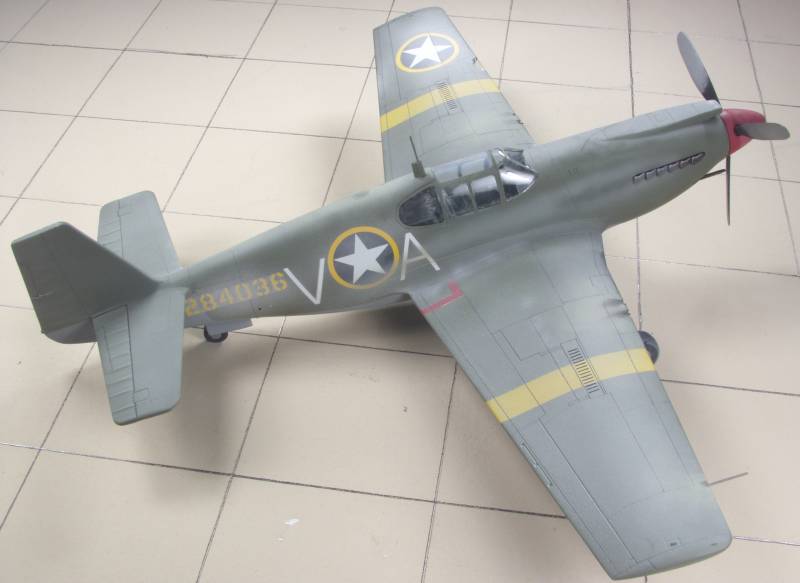

The antenna was scratched as the A-36 used a MTO only special antenna not used on them elsewhere and the kit did not supply it !
Not everything I tried on this worked as planned I had high hopes for this
I did use it on the prop but found it too hard to control the effect and took too long to accomplish what I wanted, I think the grit I had was too fine, I suspect I'll find other uses though.
All in all it was an enjoyable build, the kit is OK, I read somewhere where someone is working on a resin pit for it which would do wonders for us with minimal scratch building tendencies.
And when ever I thought I might be going overboard on the weathering I looked at this...
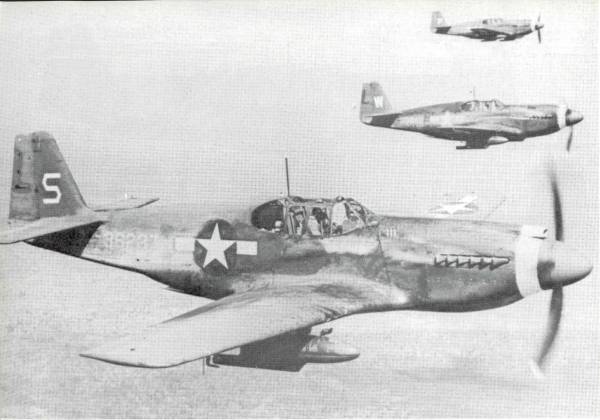
Anyway back in the beginning my goal with this build was to get experience doing extreme desert weathering, something like this
Anyway this is how it turned out...
Not too shabby, for me anyway, granted it would look better in natural light on a desert diorama but you can't have everything.
Here are the rest of the pix, bottoms up first, the nifty formation lights are MV lenses they sell them as a set.
The antenna was scratched as the A-36 used a MTO only special antenna not used on them elsewhere and the kit did not supply it !
Not everything I tried on this worked as planned I had high hopes for this
I did use it on the prop but found it too hard to control the effect and took too long to accomplish what I wanted, I think the grit I had was too fine, I suspect I'll find other uses though.
All in all it was an enjoyable build, the kit is OK, I read somewhere where someone is working on a resin pit for it which would do wonders for us with minimal scratch building tendencies.
And when ever I thought I might be going overboard on the weathering I looked at this...
phantom II
Master at Arms
Very nice Gary . The A-36 is my favorite from that stable . It looks more like a war machine to me than the more refined P-51 series.
If I ever figure out what to do about the non existent dive brakes in the 1/72 scale versions I'll build mine.
Cheers, Christian B)
If I ever figure out what to do about the non existent dive brakes in the 1/72 scale versions I'll build mine.
Cheers, Christian B)