He's not going to be able to see that unless he registers. If you like Mustangs it's the place to be! 
-
Modelers Alliance has updated the forum software on our website. We have migrated all post, content and user accounts but we could not migrate the passwords.
This requires that you manually reset your password.
Please click here, http://modelersalliance.org/forums/login to go to logon page and use the "Forgot your Password" option.
You are using an out of date browser. It may not display this or other websites correctly.
You should upgrade or use an alternative browser.
You should upgrade or use an alternative browser.
A-36A
- Thread starter Old Dog
- Start date
Old Dog
Well-known member
Dug through the stash last night and found this,
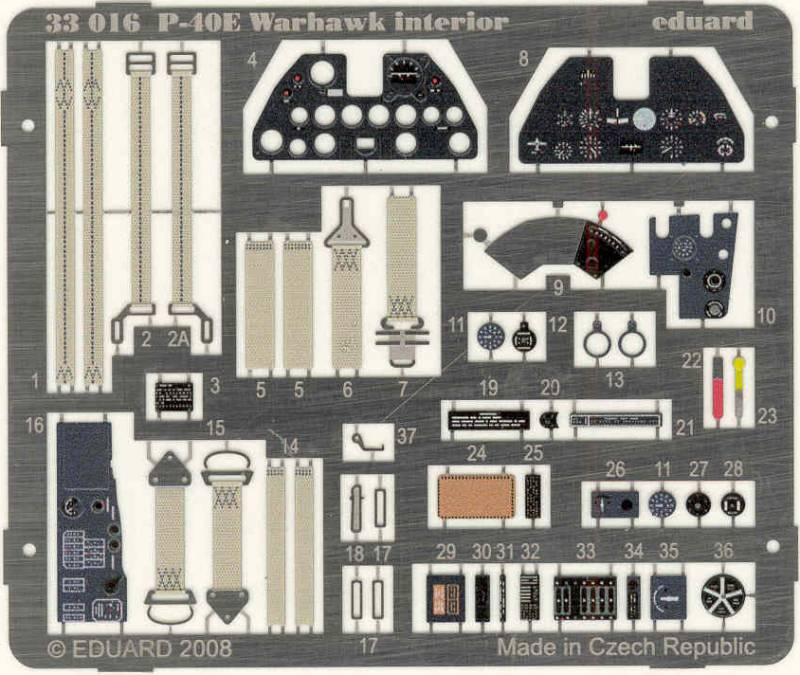
the P-40 build is a ways off and it looks like more than enough parts to make something similar to the diagram I posted. Only thing I noticed was that either the seat is a bit too small or the PE belts a bit too large but they seem a little out of proportion but I'm not sweating it !

the P-40 build is a ways off and it looks like more than enough parts to make something similar to the diagram I posted. Only thing I noticed was that either the seat is a bit too small or the PE belts a bit too large but they seem a little out of proportion but I'm not sweating it !
Well you're dealing with Eduards for one thing so no telling where it's going to be off. Nice stuff on that fret, sure some of it could find it's way into an early Mustang.


Sherman 18
Master at Arms
Great updates, looking sweet. 
Old Dog
Well-known member
OK, got the pit together. Instead of a shadow or grime wash I'm thinking dusty here and mixed up a light tan colored dust wash and use it.
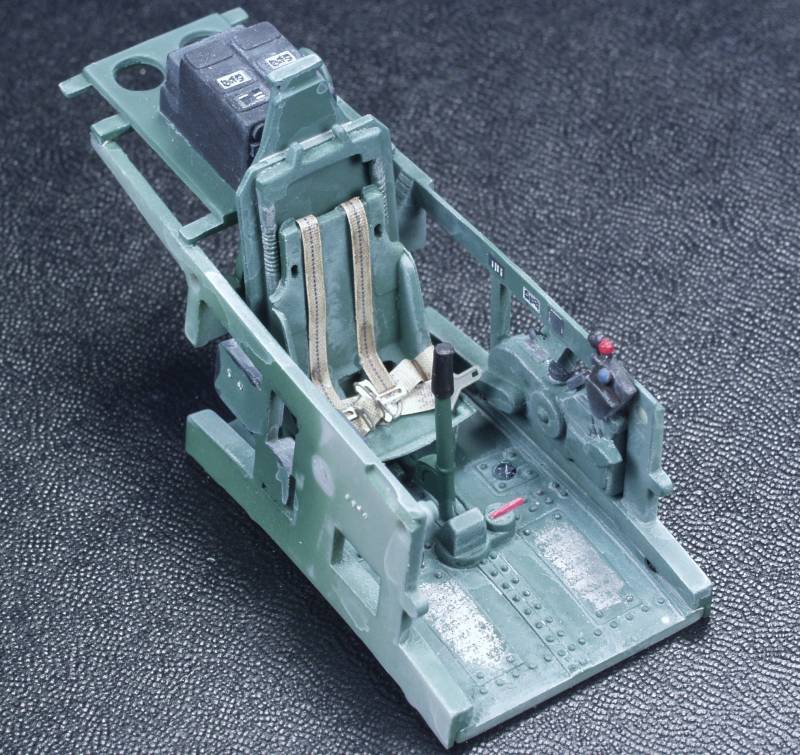
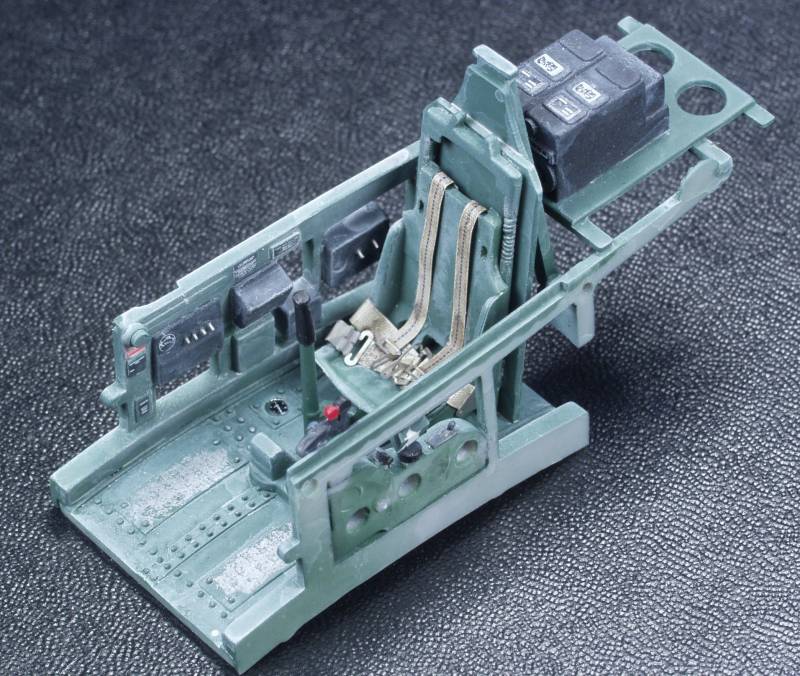
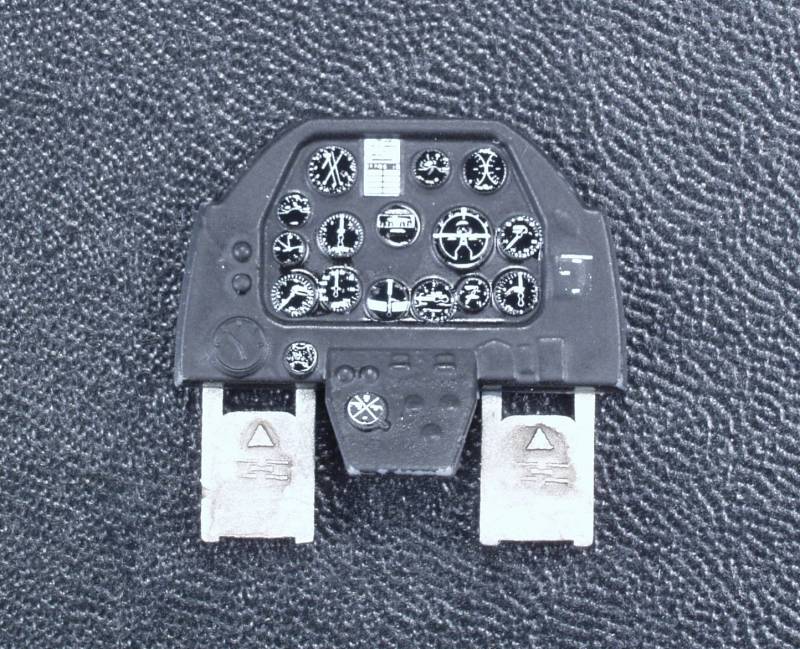
My first pass on the instrument panel was to hit all the raised detail with a silver pencil. Looked OK at arms length but in a close up photo, well, it was just hideous ! Sooo. I striped it down and repainted and when dry I grabbed a sheet Airscale decals and my Waldron punch set and spent a couple hours punching and placing. Not perfect and the instrument arrangement on the kit part didn't exactly match photos but it looks 100% better than my first try.
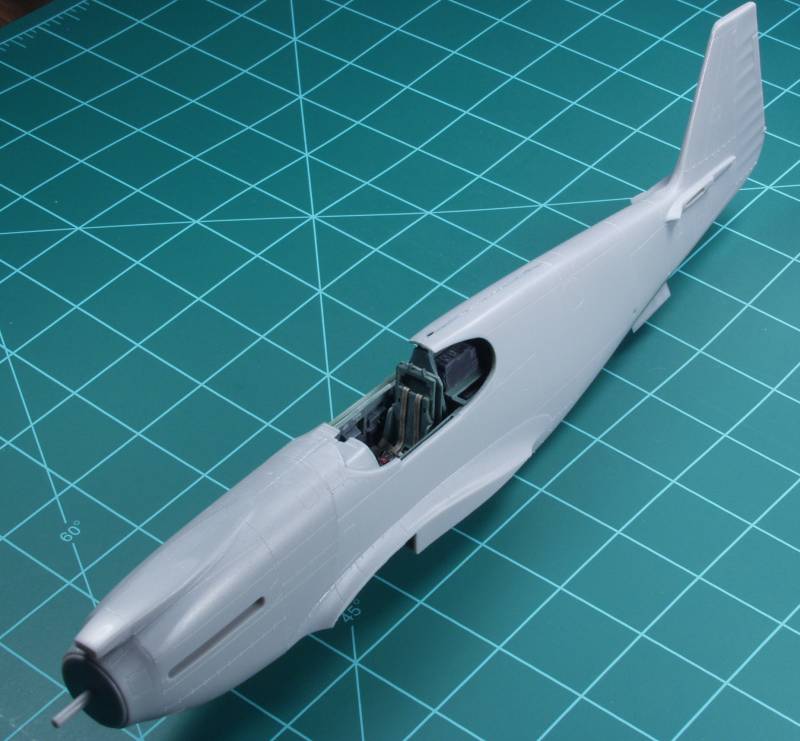
With that done it was on to the fuselage. The kit provides the nose separate from the rest of the fuselage to accommodate various versions. This is usually best handled by gluing the nose part to the fuselage part prior to assembling the fuselage so that's what I did. One side clicked right into place but the other side required torquing the fuselage a bit until the glue dried. Once done both halved were sanded where they join. I cut the alignment pins off as they didn't seem to help the fit any. After testing that all the guts fit OK the halves were glued together. I found it necessary to do a slow progressive gluing allowing each section to dry a bit. Apparently the torquing I did put some stress in the parts and they didn't want to just go together without a fight. Everything eventually fit pretty well, had a step here and there to work on and a little filler will be required but I've seen much worse. Also got the nose carburetor intake installed.
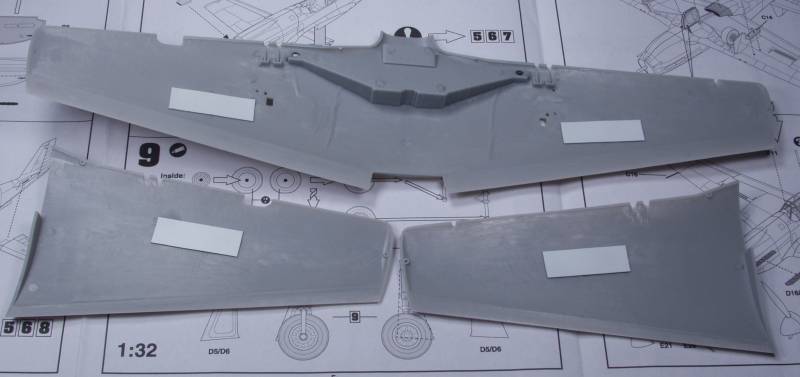
Next step will be the wings. First task on those was to install blanking pieces on the inside to block off the airbrakes so you can't see light through the wings, just some pieces of thin styrene.
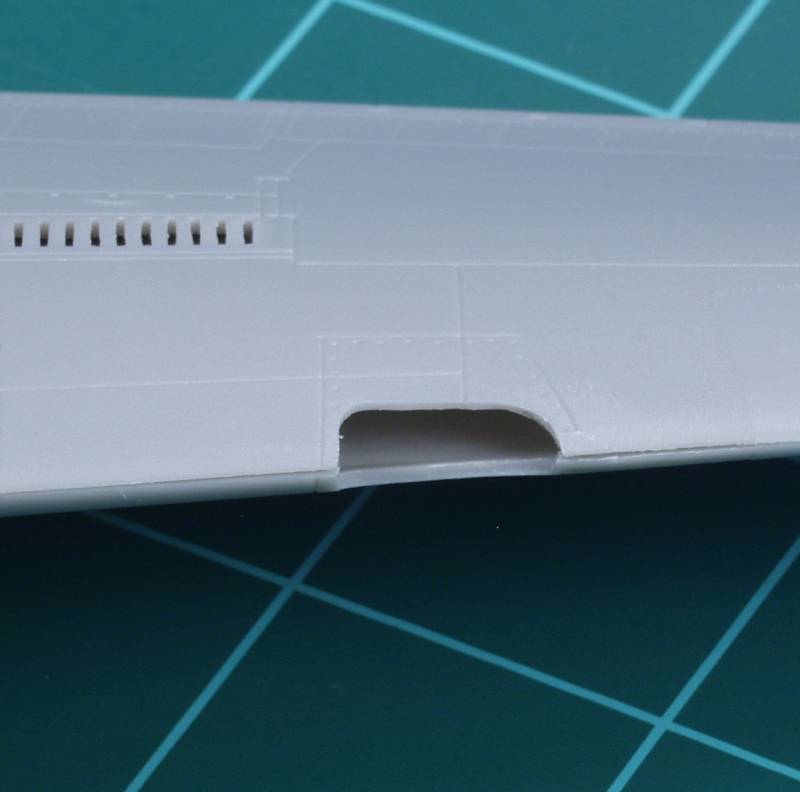
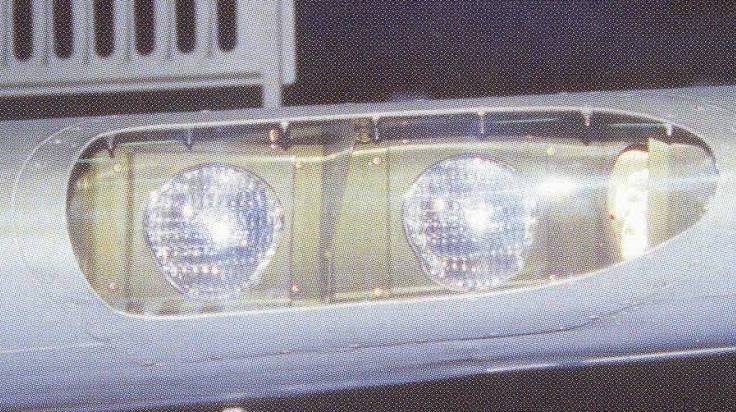
Next up will be to fill this cavern in so it resembles a landing light.
Got some MV lenses on order from the brothers Sprue that should be here later this week.


My first pass on the instrument panel was to hit all the raised detail with a silver pencil. Looked OK at arms length but in a close up photo, well, it was just hideous !

With that done it was on to the fuselage. The kit provides the nose separate from the rest of the fuselage to accommodate various versions. This is usually best handled by gluing the nose part to the fuselage part prior to assembling the fuselage so that's what I did. One side clicked right into place but the other side required torquing the fuselage a bit until the glue dried. Once done both halved were sanded where they join. I cut the alignment pins off as they didn't seem to help the fit any. After testing that all the guts fit OK the halves were glued together. I found it necessary to do a slow progressive gluing allowing each section to dry a bit. Apparently the torquing I did put some stress in the parts and they didn't want to just go together without a fight. Everything eventually fit pretty well, had a step here and there to work on and a little filler will be required but I've seen much worse. Also got the nose carburetor intake installed.

Next step will be the wings. First task on those was to install blanking pieces on the inside to block off the airbrakes so you can't see light through the wings, just some pieces of thin styrene.

Next up will be to fill this cavern in so it resembles a landing light.

Got some MV lenses on order from the brothers Sprue that should be here later this week.
Good call on the dusty look and well executed.

Old Dog
Well-known member
OK, after scratching my head about how to fill the landing light cavern, I decided to go ahead and glue the wing halves together. Once done I cut a piece of .01" thick styrene sheet and formed it to fit the opening and glued it in place. Once dry, I trimmed it to the shape of the wing and presto, a landing light box.
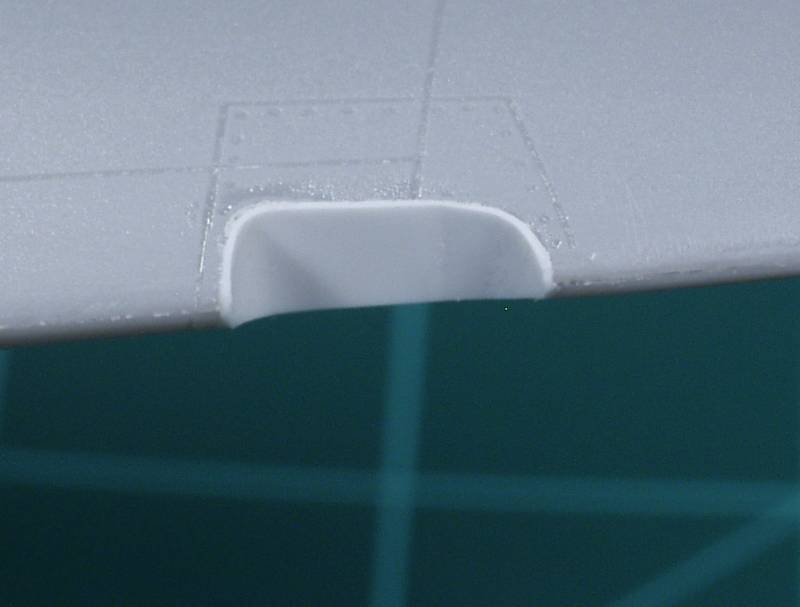
Next I added some internal stiffeners from styrene strip, drilled holes for the MV lenses and painted it with some chromate green. When dry the MV lenses were glued in place. The supplied lens is way too thick and I'll most likely make one from packing tape when the time comes.
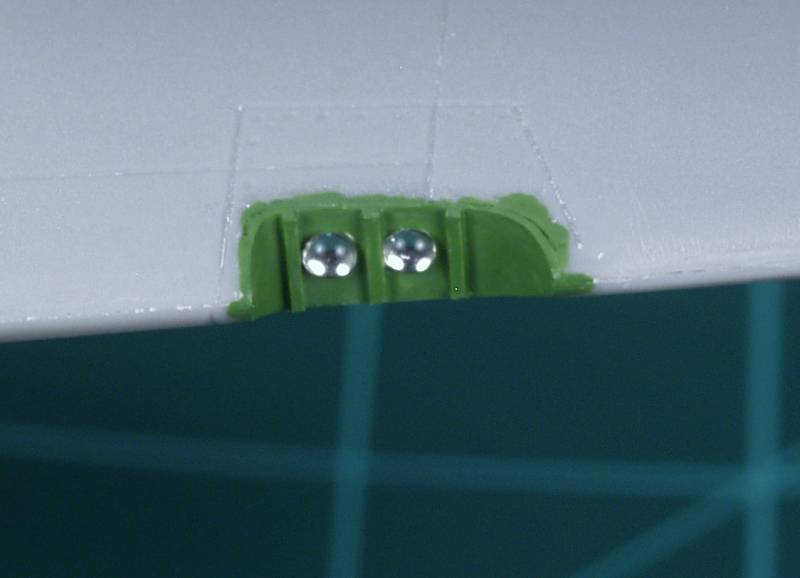
Not perfect but close enough for me
Next the wings were attached to the fuselage. The fit was tight, so tight that I had to do a bit of sanding to get them to fit, but that certainly beats the alternative. Only bad place wan on the bottom and the leading edge, in spite of my best efforts I ended up with a step that required a fair amount of sanding. The tail feathers fit tight and square but needed filler on the seam. All and all this kits fit so far is way better than any other Hobbycrap kit I've built, but then all the credit goes to Accurate Airframes.
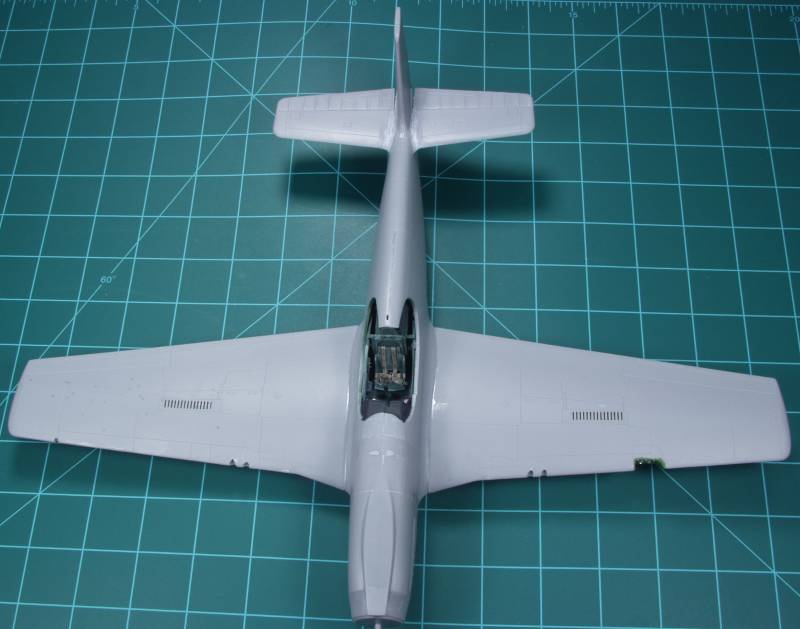
Few sink marks to fill and panel line repairs to do but paint won't be far away now !

Next I added some internal stiffeners from styrene strip, drilled holes for the MV lenses and painted it with some chromate green. When dry the MV lenses were glued in place. The supplied lens is way too thick and I'll most likely make one from packing tape when the time comes.

Not perfect but close enough for me

Next the wings were attached to the fuselage. The fit was tight, so tight that I had to do a bit of sanding to get them to fit, but that certainly beats the alternative. Only bad place wan on the bottom and the leading edge, in spite of my best efforts I ended up with a step that required a fair amount of sanding. The tail feathers fit tight and square but needed filler on the seam. All and all this kits fit so far is way better than any other Hobbycrap kit I've built, but then all the credit goes to Accurate Airframes.

Few sink marks to fill and panel line repairs to do but paint won't be far away now !
phantom II
Master at Arms
HI OD, looking good. Let me know how the packing tape lens cover goes. I have not seen that done yet .
Cheers, Christian B)
Cheers, Christian B)
Old Dog
Well-known member
Christian, the packing tape lens is easy to do compared to doing a master and vacuforming. Basically you just cut a piece larger than the opening you want to cover, stick it on, use a new x-acto blade and trace around the lens. Obviously you need to leave an edge around it but many of these type of lenses fit that way anyway. Once you are done you peel off the excess tape and presto
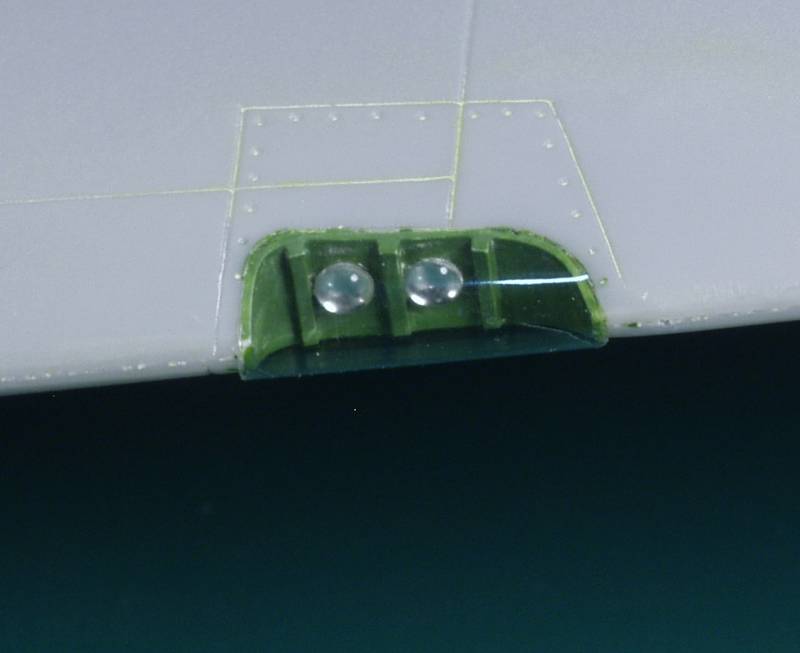
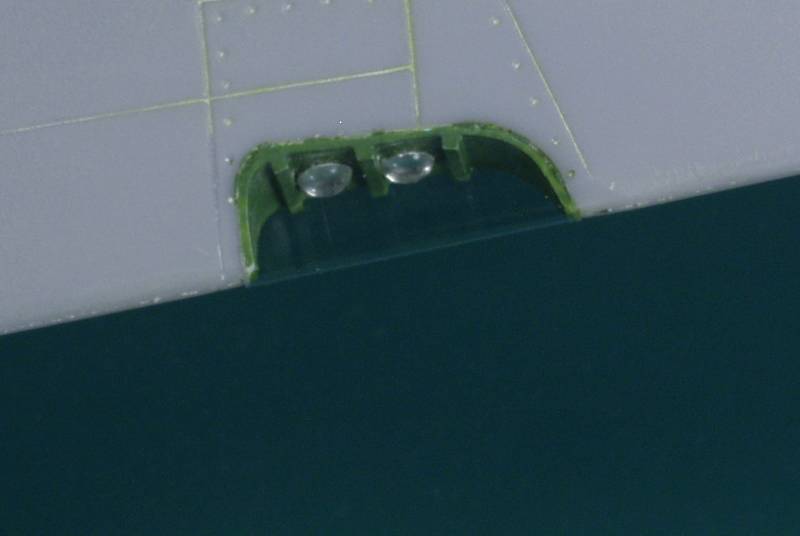
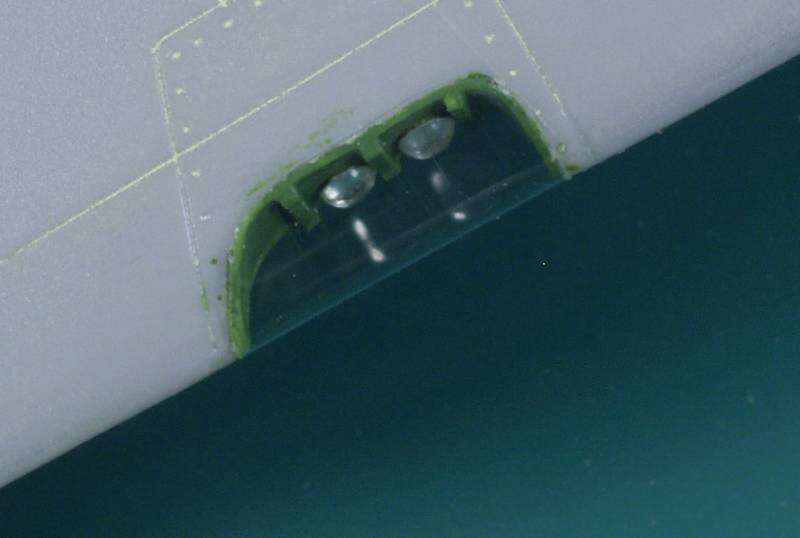
It's so clear it doesn't show up all that well in the photos. A couple on tips on doing this...first the area you are covering must be free of any dust or debris, if not, it will sooner or later end up stuck to the inside of the tape. The tape when pulled off the roll creates static electricity and will attract any dust in the area to it, just make sure the area you want to use is free of it. Also the tape is very aggressive so make certain your finish is well cured and adhered or this stuff will pull it off. If you are concerned about this put some lower tack tape in the area first. In my case I needed to mask this area before painting anyway so I used the packing tape for that so I could demonstrate how it looks.


It's so clear it doesn't show up all that well in the photos. A couple on tips on doing this...first the area you are covering must be free of any dust or debris, if not, it will sooner or later end up stuck to the inside of the tape. The tape when pulled off the roll creates static electricity and will attract any dust in the area to it, just make sure the area you want to use is free of it. Also the tape is very aggressive so make certain your finish is well cured and adhered or this stuff will pull it off. If you are concerned about this put some lower tack tape in the area first. In my case I needed to mask this area before painting anyway so I used the packing tape for that so I could demonstrate how it looks.
Old Dog
Well-known member
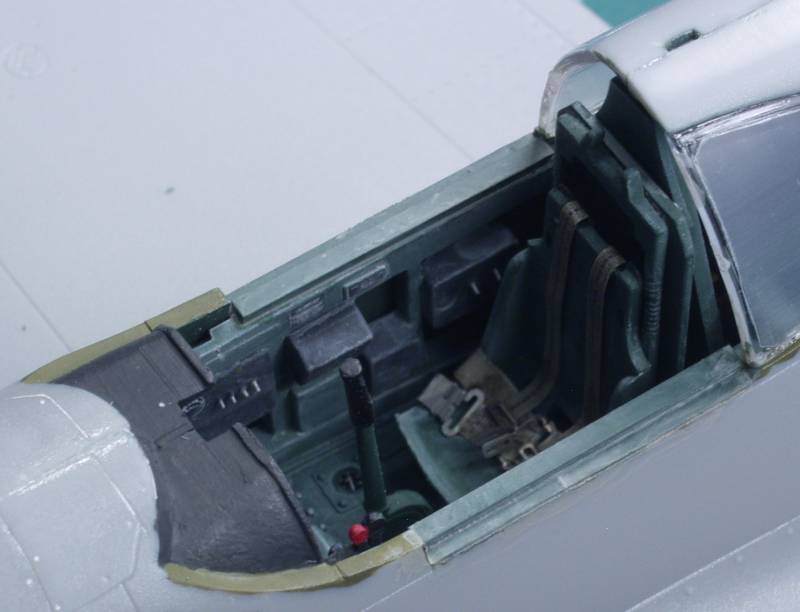
When I went to fit the canopy I found that the way it was molded it was a good 1/16" too narrow at the bottom which made the top sit proud of the top of the fuselage, I tried a little hot water on it but was afraid to put much force on it as the clear stuff is usually very brittle and I didn't want stress cracks or a complete break. Spreader bars were out as one would have needed to go right through the seat so I decided to add sills on both sides that would force the canopy out at the bottom. These were made from .030" x .060" styrene strips. Cut to length, glued in place and painted to match, they almost look like the belong there. They worked a treat and with the canopy fitted it also brought the top down even with the fuselage.

Nice work with the packing tape!
Regards,
Regards,
Missed this earlier Paddy, really nice looking landing lights. 


Gary!!! Sorry buddy...
