
-
Modelers Alliance has updated the forum software on our website. We have migrated all post, content and user accounts but we could not migrate the passwords.
This requires that you manually reset your password.
Please click here, http://modelersalliance.org/forums/login to go to logon page and use the "Forgot your Password" option.
You are using an out of date browser. It may not display this or other websites correctly.
You should upgrade or use an alternative browser.
You should upgrade or use an alternative browser.
Skinny Mike's YF-23 Black Widow
- Thread starter Skinny_Mike
- Start date

centaur567
Well-known member
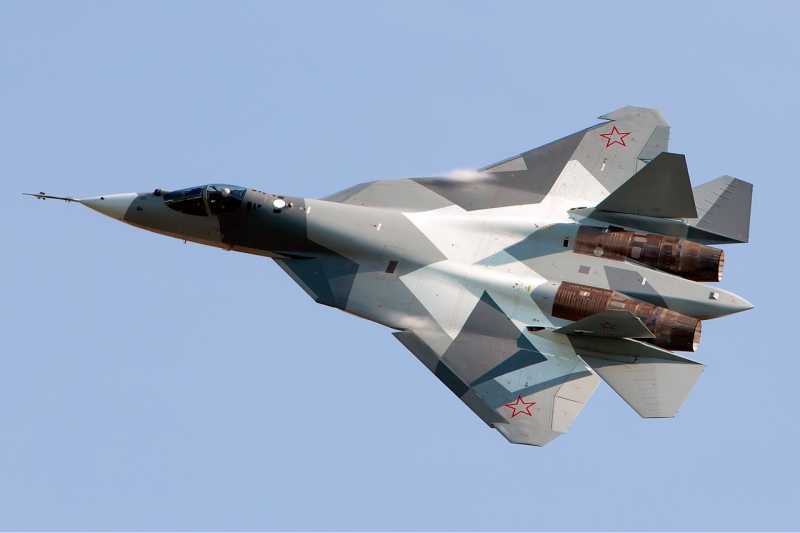
Nice job Mike. Mabey they sold the design to Russia( Sukhoi PAK FA) ? Gary S.
phantom II
Master at Arms
Wow , cool paint on that Sukhoi.... Maybe a Black widow in an Aggressor paint scheme ??? That would be interesting as a what if :woohoo: Just saying ...
Cheers, Christian B)
Cheers, Christian B)
centaur567
Well-known member
Wow , cool paint on that Sukhoi.... Maybe a Black widow in an Aggressor paint scheme ??? That would be interesting as a what if :woohoo: Just saying ...
Cheers, Christian B)[/quo
Great idea!! At least the prototype airframes wont go to waste. Gary S.
Skinny_Mike
Well-known member
Hi Guys!
Thank you all for the encouragement. I really appreciate it.
I’ve been plugging away and have a bit more progress to report. I finally got the intakes smoothed in and painted in the medium gray for the airframe. Then I turned my attention to the back of the fuselage. There are two holes above the engine troughs where you are supposed to mount a fixed triangular plate that covered the top of the trough and covered the moving section of the exhaust. This was a feature that was one PAV2 and not on PAV1 so I filled the holes.

Then I proceeded to paint the exhaust area. All the metal areas were painted in Alclad steel. This seemed to match the reference photos of that area. Then I masked the metal areas. The heat absorbing tiles were first sprayed Tamiya Nato Black then individual tiles were picked out using several different shades of gray. I tried to match the color, although not quite the pattern of the real aircraft. After these were dry I sprayed the tiles with Future followed by a heavy wash of Payne’s Gray oil paint to blend it all together, followed by a coat of AK’s Ultra Matte Varnish. Once I removed the masking I was left with this.

Next up was the engine exhaust. The engines are buried in the airframe and the rear face of the engine sits at the end of a tunnel. Hobby Boss supplies the back face of the engine as the back wall of the tunnel with some raised details.

This is really the worst part of the kit. Looking down the tunnel should look more like this:

I decided that I needed something better. Hunting though my kits, the only thing I found that would fit are the engine faces out of the Hasegawa F-18F kit. So I rebuilt the back wall (just in case I couldn’t get it to work I would still have the originals) and put a hole in the center big enough to mount the engine face. They are not perfect, but are way better then what was there.

Then I painted everything and assembled them.

Again, not perfect, but way better. Next step was to add the top and install into the top of the fuselage. In the end the engine faces are hidden from view, but if anyone happens to look down there you can see the new details so I am happy I put forth the extra effort.
After the engine exhaust was secured I assembled the top and bottom of the fuselages.

The fit is good. The worst gaps being forward of the wings.

These should be easy to clean up. There are some seams that fit really well along the back of the fuselage, but unfortunately are not located in an area where there are panel lies so they still need to be dealt with. Nothing major just a little extra work.
So that’s where we are. Things are chugging right along. Here is a parting shot of the plane with the wings and tail dry fitted.

Thanks for looking in folks!
Mike
Thank you all for the encouragement. I really appreciate it.
I’ve been plugging away and have a bit more progress to report. I finally got the intakes smoothed in and painted in the medium gray for the airframe. Then I turned my attention to the back of the fuselage. There are two holes above the engine troughs where you are supposed to mount a fixed triangular plate that covered the top of the trough and covered the moving section of the exhaust. This was a feature that was one PAV2 and not on PAV1 so I filled the holes.
Then I proceeded to paint the exhaust area. All the metal areas were painted in Alclad steel. This seemed to match the reference photos of that area. Then I masked the metal areas. The heat absorbing tiles were first sprayed Tamiya Nato Black then individual tiles were picked out using several different shades of gray. I tried to match the color, although not quite the pattern of the real aircraft. After these were dry I sprayed the tiles with Future followed by a heavy wash of Payne’s Gray oil paint to blend it all together, followed by a coat of AK’s Ultra Matte Varnish. Once I removed the masking I was left with this.
Next up was the engine exhaust. The engines are buried in the airframe and the rear face of the engine sits at the end of a tunnel. Hobby Boss supplies the back face of the engine as the back wall of the tunnel with some raised details.
This is really the worst part of the kit. Looking down the tunnel should look more like this:
I decided that I needed something better. Hunting though my kits, the only thing I found that would fit are the engine faces out of the Hasegawa F-18F kit. So I rebuilt the back wall (just in case I couldn’t get it to work I would still have the originals) and put a hole in the center big enough to mount the engine face. They are not perfect, but are way better then what was there.
Then I painted everything and assembled them.
Again, not perfect, but way better. Next step was to add the top and install into the top of the fuselage. In the end the engine faces are hidden from view, but if anyone happens to look down there you can see the new details so I am happy I put forth the extra effort.
After the engine exhaust was secured I assembled the top and bottom of the fuselages.
The fit is good. The worst gaps being forward of the wings.
These should be easy to clean up. There are some seams that fit really well along the back of the fuselage, but unfortunately are not located in an area where there are panel lies so they still need to be dealt with. Nothing major just a little extra work.
So that’s where we are. Things are chugging right along. Here is a parting shot of the plane with the wings and tail dry fitted.
Thanks for looking in folks!
Mike
phantom II
Master at Arms
Go Mike ")
Wow, that's quite the exhaust system on that :woohoo:
Cheers, Christian B)
Wow, that's quite the exhaust system on that :woohoo:
Cheers, Christian B)
centaur567
Well-known member
 Gary S.
Skinny_Mike
Well-known member
Go Mike
Wow, that's quite the exhaust system on that :woohoo:
Cheers, Christian B)
It is pretty unique for a fighter, that's for sure. I've been told PAV2 with the GE engines could super-cruise at Mach 1.8. That's not too shabby!
phantom II
Master at Arms
Even the F-16 could cruise at considerable speed with low throttle setting when we first got them.
Most likely not nearly that fast though . The Vigi was another bird capable of high speeds without the use of AB.
Cheers, Christian B)
Most likely not nearly that fast though . The Vigi was another bird capable of high speeds without the use of AB.
Cheers, Christian B)
Most excellent! :dude
Skinny_Mike
Well-known member
Skinny_Mike
Well-known member
Hello everyone!
Well I have some good news and some bad news. Good news is I’m back with a short update. Bad news, I am not going to get this build done by Tuesday.
Well, on to the progress. I cleaned up all the seams on the fuselage using a combination of CA glue mixed with pigments and in some places CA glue mixed with Microballoons. Both techniques seem to have their challenges but overall the end product is really good. After I finished filling the seams I rescribed the damaged panel lines and then attached the wings. The wings ended up being a bit of a challenge. Once installed, the wing sits higher then the top of the fuselage, but is flush on the bottom. Here is the right wing installed. This was the better of the two.

I used a more CA glue with pigments for the top seams and milliput for the bottom. Once it was all sanded and smoothed out I rescribed the panel lines that were lost.

Scribing panel lines is a skill I am still working on, especially trying to match the kits lines. I am getting better though.
After the wings were done, I attached the tail. Not much drama there.

Next step is to finish painting the ejection seat, add the HUD and the canopies, then off to primer.
I’ll keep working, but I am probably a couple weeks away from being done on this one.
Thanks all for looking!
Mike
Well I have some good news and some bad news. Good news is I’m back with a short update. Bad news, I am not going to get this build done by Tuesday.
Well, on to the progress. I cleaned up all the seams on the fuselage using a combination of CA glue mixed with pigments and in some places CA glue mixed with Microballoons. Both techniques seem to have their challenges but overall the end product is really good. After I finished filling the seams I rescribed the damaged panel lines and then attached the wings. The wings ended up being a bit of a challenge. Once installed, the wing sits higher then the top of the fuselage, but is flush on the bottom. Here is the right wing installed. This was the better of the two.
I used a more CA glue with pigments for the top seams and milliput for the bottom. Once it was all sanded and smoothed out I rescribed the panel lines that were lost.
Scribing panel lines is a skill I am still working on, especially trying to match the kits lines. I am getting better though.
After the wings were done, I attached the tail. Not much drama there.
Next step is to finish painting the ejection seat, add the HUD and the canopies, then off to primer.
I’ll keep working, but I am probably a couple weeks away from being done on this one.
Thanks all for looking!
Mike
phantom II
Master at Arms
 ...
... Cheers, Christian B)
Very smooth...
Moved...
Skinny_Mike
Well-known member
Moved...
Thanks Bob. She went to primer today. Have to clean up a few things...
centaur567
Well-known member
Looking good Mike. I hate to scribe panels. Not good at it. Gary s.
Skinny_Mike
Well-known member
Looking good Mike. I hate to scribe panels. Not good at it. Gary s.
Thank Gary! Yeah - I don't like scribing panels either, but its a necessary evil, I am getting better at it though!
Skinny_Mike
Well-known member
Looking good Mike.
Frank
Thanks Frank!