Slowly, one at a time. :zen

-
Modelers Alliance has updated the forum software on our website. We have migrated all post, content and user accounts but we could not migrate the passwords.
This requires that you manually reset your password.
Please click here, http://modelersalliance.org/forums/login to go to logon page and use the "Forgot your Password" option.
You are using an out of date browser. It may not display this or other websites correctly.
You should upgrade or use an alternative browser.
You should upgrade or use an alternative browser.
Airfix Hawker Typhoon IB
- Thread starter AndyFettes
- Start date
phantom II
Master at Arms
Seems to have become an art form ( of which I am not a master ) since every other decal sheet seems to behave differently than the last now days 
But yeah, definitely one at a time . :facepalm
Cheers, Christian B)
But yeah, definitely one at a time . :facepalm
Cheers, Christian B)
Looking good Andy!
As for the paint chipping...sometimes I use gray ahead of the silver paint to give the impression of the paint being worn off over a period of time.
Below is a Me 410 I built earlier this year and the weathering done around the wing root started out with lighter shades of gray and ended up with using silver paint.

As you can see not very much of the silver paint was used but what little there is looks about right. Another good modeling tool for aircraft models is a silver artists pencil, with the silver pencil you can add very fine scratches and scuff marks and keep them in scale. When weathering aircraft models I have found less is more.
If your decals are giving you trouble try using very warm almost hot water to loosen them from the backing sheet.
Another way to handle poor quality decals is to use Future as a setting agent, keep in mind you won't have as much working time as you would with using water but at least the decals will stick very well.
HTH
Matrixone
As for the paint chipping...sometimes I use gray ahead of the silver paint to give the impression of the paint being worn off over a period of time.
Below is a Me 410 I built earlier this year and the weathering done around the wing root started out with lighter shades of gray and ended up with using silver paint.
As you can see not very much of the silver paint was used but what little there is looks about right. Another good modeling tool for aircraft models is a silver artists pencil, with the silver pencil you can add very fine scratches and scuff marks and keep them in scale. When weathering aircraft models I have found less is more.
If your decals are giving you trouble try using very warm almost hot water to loosen them from the backing sheet.
Another way to handle poor quality decals is to use Future as a setting agent, keep in mind you won't have as much working time as you would with using water but at least the decals will stick very well.
HTH
Matrixone
AndyFettes
Master at Arms
Awesome plane Matrix
Well its started off pretty awful but got better the more I did the decals and ended up being quite fun
I'm actually quite pleased with the results, I read online to use white vinegar instead of shelling out for a decal fixative and it worked by jove !!!! I love the way that they looks like crap then nestled down into the grooves and conformed to any particular shape when they dried
Here`s the evidence,
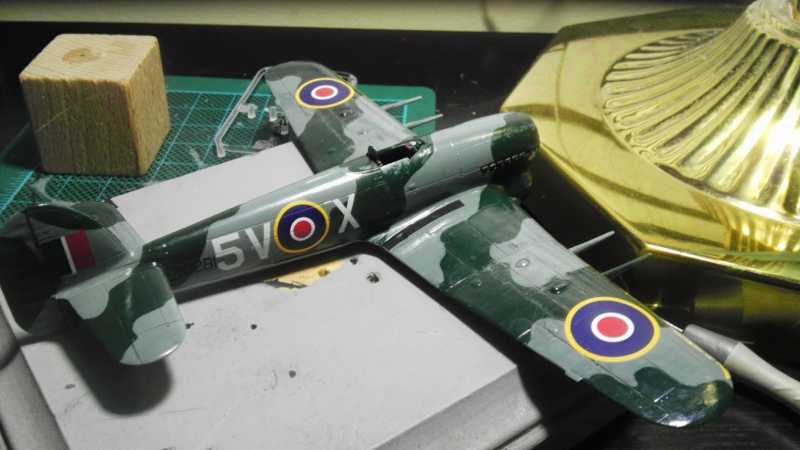
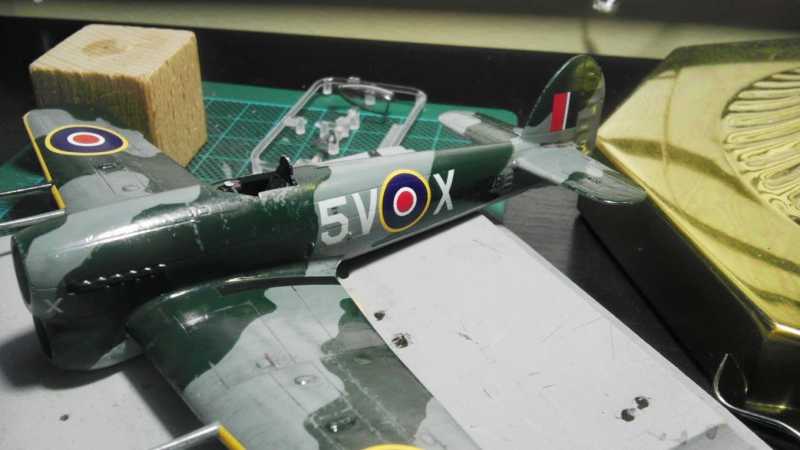
Although those yellow decals along the leading edge of the wings were a right bitch to do and still not really happy with them. :angry:
I suppose I had better get the old future out again and seal em up before I do something stupid and ruin them

Well its started off pretty awful but got better the more I did the decals and ended up being quite fun
I'm actually quite pleased with the results, I read online to use white vinegar instead of shelling out for a decal fixative and it worked by jove !!!! I love the way that they looks like crap then nestled down into the grooves and conformed to any particular shape when they dried
Here`s the evidence,
Although those yellow decals along the leading edge of the wings were a right bitch to do and still not really happy with them. :angry:
I suppose I had better get the old future out again and seal em up before I do something stupid and ruin them
Oh! Dang I guess we should have told you how the crackle up like that when you use a solvent. I guess it could scare the crap out of ya.
Andy it's looking fine, carry on big guy!
Andy it's looking fine, carry on big guy!
phantom II
Master at Arms
Wow, this thing has come to life .
I have heard of using vinegar but I have never tried it. Guess I need to the next time I have some that are particularly nasty.
Good job Andy !
Cheers, Christian B)
I have heard of using vinegar but I have never tried it. Guess I need to the next time I have some that are particularly nasty.
Good job Andy !
Cheers, Christian B)
Keep in mind Andy when you use Future for your decal placement that they just love to stick to your fingers, dip your finger into your water bowl to avoid this when working with them.
All I use on any decal now is my 1/3 bottle of Future ( one-go in Australia,) which is no longer available here.
Leading edge decals are always a right pain to do, like SA Dave I always paint them on, just put your's down to wear and tear!
looking good!
All I use on any decal now is my 1/3 bottle of Future ( one-go in Australia,) which is no longer available here.
Leading edge decals are always a right pain to do, like SA Dave I always paint them on, just put your's down to wear and tear!
looking good!
Decals look good Andy.
I have also been using vinegar as a decal setting solution and it works nicely on higher quality decals (like EagleCals) but for decals that are from most kits I have been using Future with great success.
One thing I have found with decals provided in Tamiya kits is they respond better by using very hot water, they release from the backing sheet quicker and seem to snug down on the models surface without the need for any setting solutions.
Older Hasegawa decals also benefit from using hot water.
Matrixone
AndyFettes
Master at Arms
I didn't have much bother with them regarding the backing sheet it was them misbehaving when on plane,....I did actually paint the yellow stripe but totally Balls that up badly hence going back to the decal thus making a pigs ear of that too.
phantom II
Master at Arms
[sup] I LOVE Decal SHEETS. They are like a box of chocolates ![/sup]
I find Humbrols Yellow is a perfect match and can even be applied by brush if your willing to do 2 or 3 layers and wayt for it to dry.I didn't have much bother with them regarding the backing sheet it was them misbehaving when on plane,....I did actually paint the yellow stripe but totally Balls that up badly hence going back to the decal thus making a pigs ear of that too.
AndyFettes
Master at Arms
Update time,....


Looks good Andy
AndyFettes
Master at Arms
Cheers Fellas slow progress now though and I have to use filler and primer to continue and sadly I have now got Bronchitis so that aint happenning
phantom II
Master at Arms
Get well soon Andy :Hiay
Cheers, Christian B)
Cheers, Christian B)