
-
Modelers Alliance has updated the forum software on our website. We have migrated all post, content and user accounts but we could not migrate the passwords.
This requires that you manually reset your password.
Please click here, http://modelersalliance.org/forums/login to go to logon page and use the "Forgot your Password" option.
You are using an out of date browser. It may not display this or other websites correctly.
You should upgrade or use an alternative browser.
You should upgrade or use an alternative browser.
1/35 scale Tamiya Panther
- Thread starter matrixone
- Start date

Spotty...
RichB
Well-known member
When production began in Sep 1943 the first one to two weeks of Ausf A's were built without zimmerit. After that it was factory applied. The early Ausf A's were the new turret on Ausf D hulls (letter box MG port on glacis). The ball mount for the glacis MG (as shown on the box art) was introduced in Nov/Dec 1943. So, for the rivet counters, it should have zimmerit.
To get the track sag, you may be able to run some fine thread or fishing line thru the track and tie it down around the road wheel axles.
Cheers,
Rich
To get the track sag, you may be able to run some fine thread or fishing line thru the track and tie it down around the road wheel axles.
Cheers,
Rich
I think it is important here to clarify Panther production.
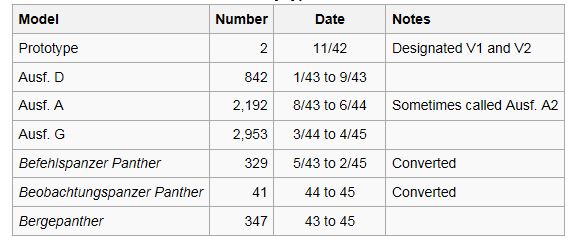
Production began with the Ausf D with the typical characteristics of the cylindrical coupla, narrow rectangular hull machine gun port, mantlet without "chin armor" and the drivers hull vision port.

The Ausf A has a ball mount hull machine gun, drivers hull vision port,the cast coupla, and mantlet without "chin armor".
The Ausf G has the ball mount hull machine gun, no drivers hull vision port, cast coupla, mantlet with "chin armor".
Zimmerit coating against magnetic mines started to be applied at the factory on late Ausf D models beginning in September 1943; an order for field units to apply Zimmerit to older versions of the Panther was issued in November 1943. In September 1944, orders to stop all application of Zimmerit were issued, based on false rumours that hits on the Zimmerit had caused vehicle fires.
While there may be other differences between the different versions, such as steel road wheels on later G models, the Tamiya Ausf A is for the most part correct.
Have fun with this one and get into the weeds with the next one.
B)
Production began with the Ausf D with the typical characteristics of the cylindrical coupla, narrow rectangular hull machine gun port, mantlet without "chin armor" and the drivers hull vision port.
The Ausf A has a ball mount hull machine gun, drivers hull vision port,the cast coupla, and mantlet without "chin armor".
The Ausf G has the ball mount hull machine gun, no drivers hull vision port, cast coupla, mantlet with "chin armor".
Zimmerit coating against magnetic mines started to be applied at the factory on late Ausf D models beginning in September 1943; an order for field units to apply Zimmerit to older versions of the Panther was issued in November 1943. In September 1944, orders to stop all application of Zimmerit were issued, based on false rumours that hits on the Zimmerit had caused vehicle fires.
While there may be other differences between the different versions, such as steel road wheels on later G models, the Tamiya Ausf A is for the most part correct.
Have fun with this one and get into the weeds with the next one.
B)
Thanks for the feedback and information on the Panthers, I don't have very much on the Panther in my library.
JSteinman,
That's a terrific suggestion for camouflage and I remember seeing a photograph or two of such a camouflage scheme on German armor on the eastern front in my old Panzer Colors Vol.3 soft cover book from Squadron, but I have always been interested in the ambush scheme and think its the coolest camouflage pattern so I will likely try that.
Rich,
The lack of zimmerit on this Tamiya kit was known to me for a couple years now long before I ever opened the box and I guess that's why I was so slow in starting building it...no enthusiasm in building a kit I knew was not going to be accurate. In my hard cover book ''SS Armor On The Eastern Front 1943-1945'' I did locate a Panther Ausf.A color profile that looks almost like it has no zimmerit, but that could be from the wild looking paint scheme it has, dark yellow base with many smaller spots of dark brown over it. It may have had zimmerit but I can't tell for sure one way or the other.
Terry,
Its odd the Panther Ausf.D was in production before the Ausf.A, German aircraft designs like the Fw 190 always followed the alphabet in the different marks of the aircraft. I wonder why the Panther was treated differently. :idonno
Matrixone
Terry,
Its odd the Panther Ausf.D was in production before the Ausf.A, German aircraft designs like the Fw 190 always followed the alphabet in the different marks of the aircraft. I wonder why the Panther was treated differently. :idonno
Matrixone
I think they did it just to mess with the Aircraft guys. :pinch:
reconron
Active member
Terry,
Its odd the Panther Ausf.D was in production before the Ausf.A, German aircraft designs like the Fw 190 always followed the alphabet in the different marks of the aircraft. I wonder why the Panther was treated differently. :idonno
Matrixone
I think they did it just to mess with the Aircraft guys. :pinch:
 Confusing isn't it?
The Panther Ausf.D was followed by Ausf.A and then came Ausf.G.
They more or less did the same with the Tiger tank,the Panzerkampfwagen VI. First came the Tiger Ausf.E,known as Tiger I,but followed up by the Ausf. B known as Tiger II (popular under the name King Tiger)
Gr,Ron.
MP and Ron, and that's why I stick to building aircraft models. :laugh:
As promised, here are some in-progress pictures of the Panther.
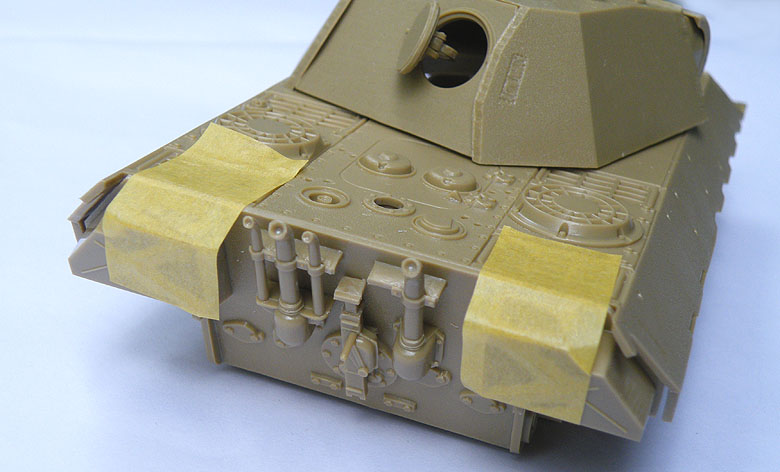
After dry fitting the upper and lower hull parts there was a noticeable gap at the very front that I am pretty sure should not be there and I tried trimming, sanding, and brute force to get rid of the gap, I made a little progress but could not eliminate it completely so I used some plastic card to take up some of the space.
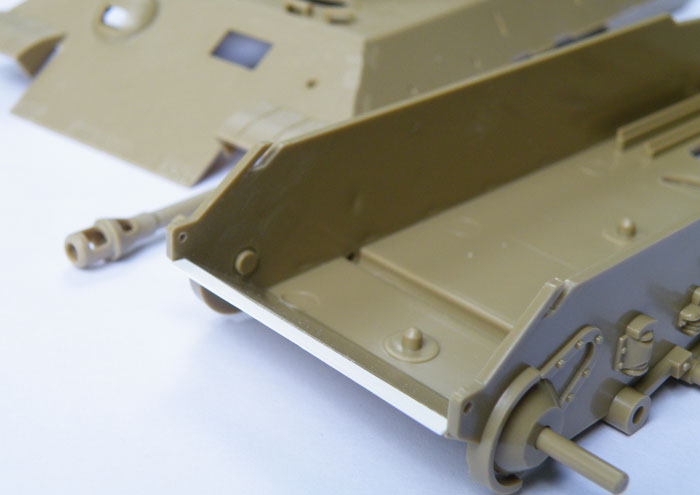
Here the top and lower hull parts are taped together. After the parts are glued together I will use a thin bead of superglue to act as a filler to fill whatever gap is left.
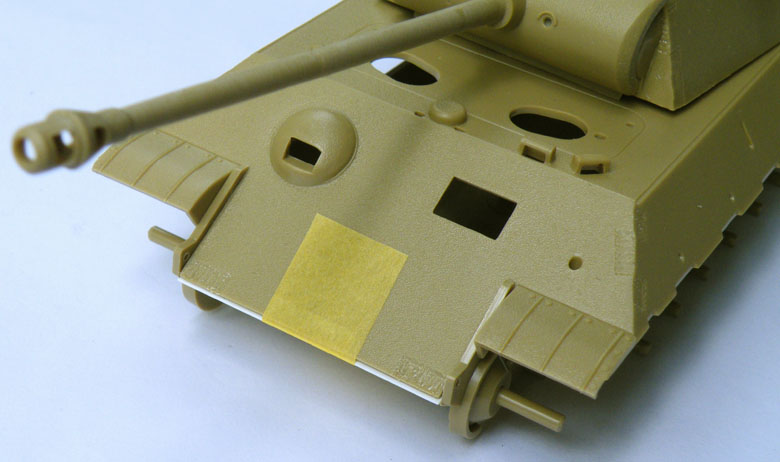
The exhaust pipes were hollowed out to give a better appearance on the finished model.
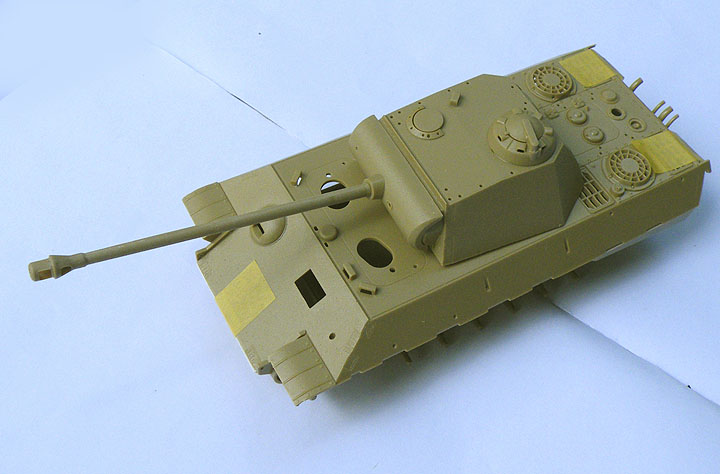
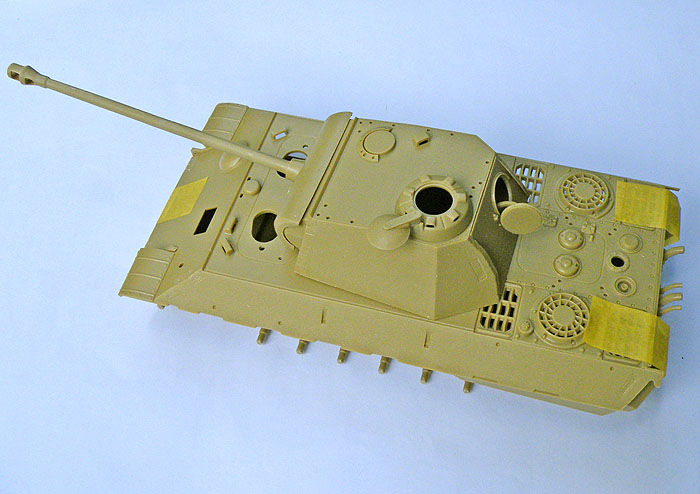
A couple shots of the model from above.
A couple of good reference books....I don't have to be an expert on German armor to recognize these are some nice books to have!
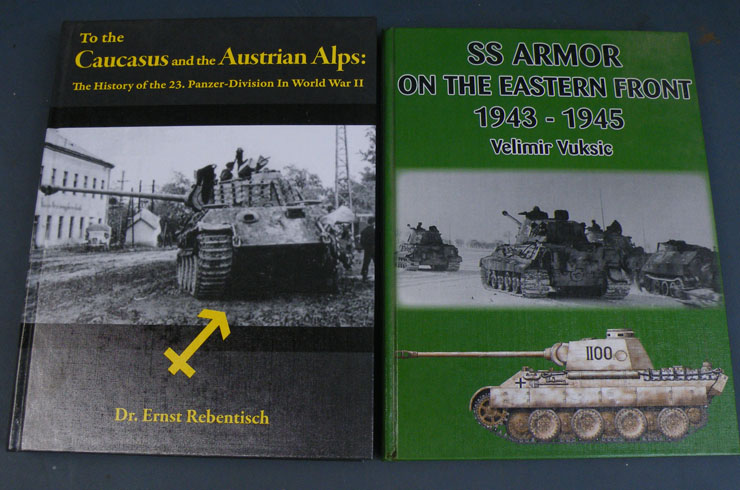
In the SS Armor book I found a couple of color profiles of the Panther Ausf.A.
This first Panther I would consider putting model in this scheme but I can't because my kit does not come with the side skirt armor plates.
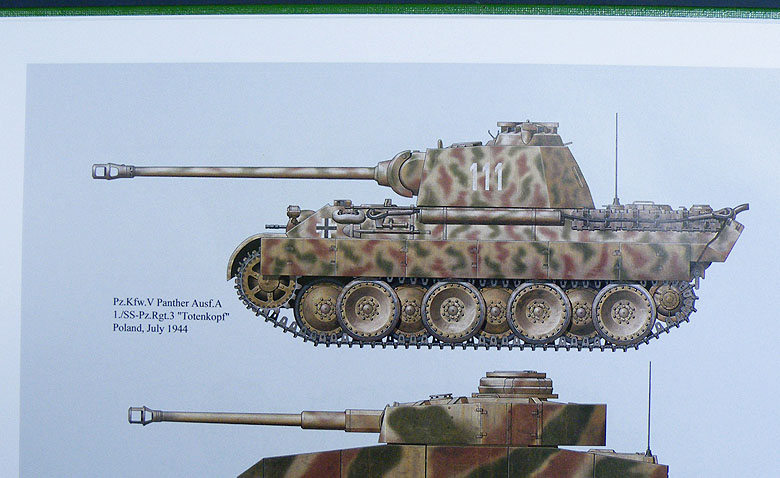
This second one I thought was without zimmerit actually does have it, I was looking at this profile in poor lighting conditions last night and thought it was lacking the zimmerit coating. But still a cool camouflage scheme!

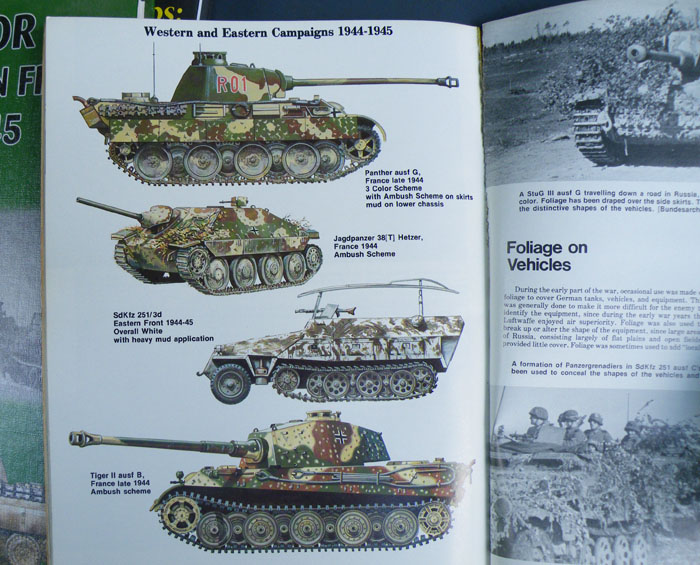
Here is a page from one of the oldest reference books in my library, Volume III of Sqaudron Signals Panzer Colors. Before I had bought this book I never had any idea the ambush scheme existed and this page sparked my interest in the late German armor and have wanted to build a model with the ambush scheme.
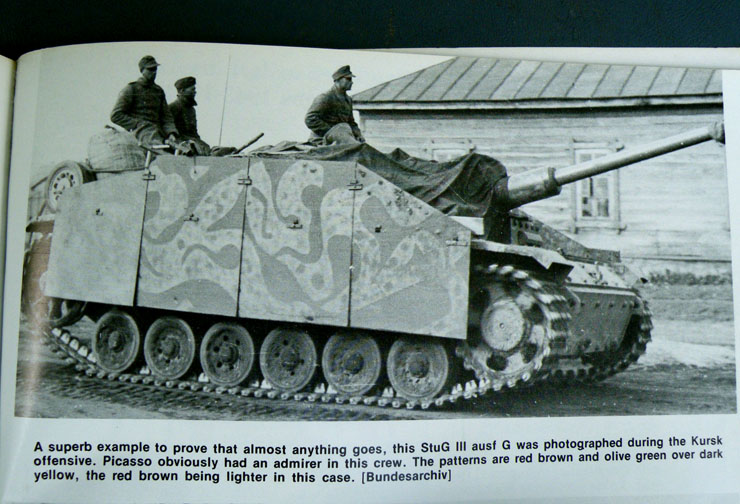
Another page from the old Squadron book, this one showing a rather wild looking camouflage scheme. If I had not seen this photograph before and looked at a model painted like this I would have thought the modeler was high on fumes.
Matrixone
As promised, here are some in-progress pictures of the Panther.
After dry fitting the upper and lower hull parts there was a noticeable gap at the very front that I am pretty sure should not be there and I tried trimming, sanding, and brute force to get rid of the gap, I made a little progress but could not eliminate it completely so I used some plastic card to take up some of the space.
Here the top and lower hull parts are taped together. After the parts are glued together I will use a thin bead of superglue to act as a filler to fill whatever gap is left.
The exhaust pipes were hollowed out to give a better appearance on the finished model.
A couple shots of the model from above.
A couple of good reference books....I don't have to be an expert on German armor to recognize these are some nice books to have!
In the SS Armor book I found a couple of color profiles of the Panther Ausf.A.
This first Panther I would consider putting model in this scheme but I can't because my kit does not come with the side skirt armor plates.
This second one I thought was without zimmerit actually does have it, I was looking at this profile in poor lighting conditions last night and thought it was lacking the zimmerit coating. But still a cool camouflage scheme!
Here is a page from one of the oldest reference books in my library, Volume III of Sqaudron Signals Panzer Colors. Before I had bought this book I never had any idea the ambush scheme existed and this page sparked my interest in the late German armor and have wanted to build a model with the ambush scheme.
Another page from the old Squadron book, this one showing a rather wild looking camouflage scheme. If I had not seen this photograph before and looked at a model painted like this I would have thought the modeler was high on fumes.
Matrixone
Thanks!
G,
For a complete armor noob like myself it would be best to just finish the model O.O.B. Maybe later on I can get recent kits of the Panther to build that already has the side skirt armor plates included...as of the moment I don't have a modeling budget so anything I build has to be with things I have on hand.
Earlier today I did more work on my kit and noticed on the instruction sheet that the towing cable (part A26) needs to be dunked in hot water to bend it in the shape needed which is no problem but there is no clear indication where the cable is to be glued to the tank. The instructions are piss poor if you don't have experience building armor models.
Matrixone
Skinny_Mike
Well-known member
Thanks!
Earlier today I did more work on my kit and noticed on the instruction sheet that the towing cable (part A26) needs to be dunked in hot water to bend it in the shape needed which is no problem but there is no clear indication where the cable is to be glued to the tank. The instructions are piss poor if you don't have experience building armor models.
Matrixone
Hey Les -
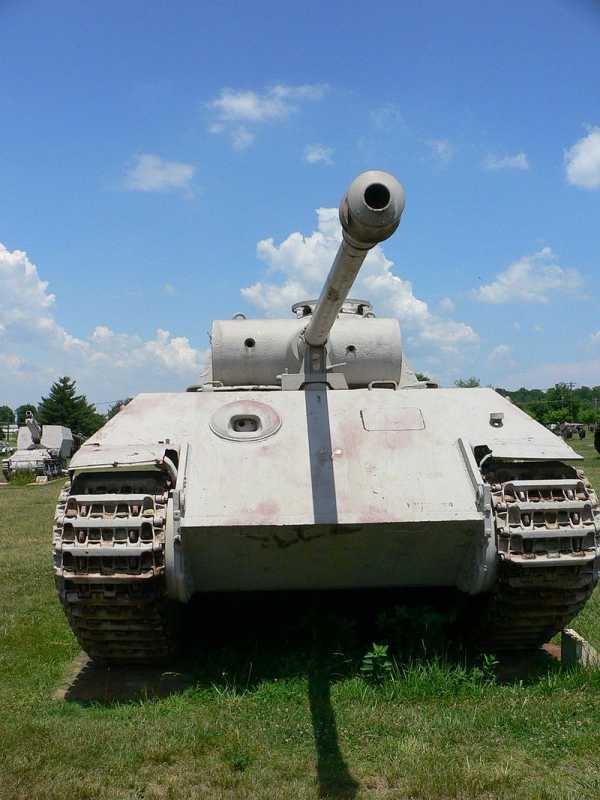
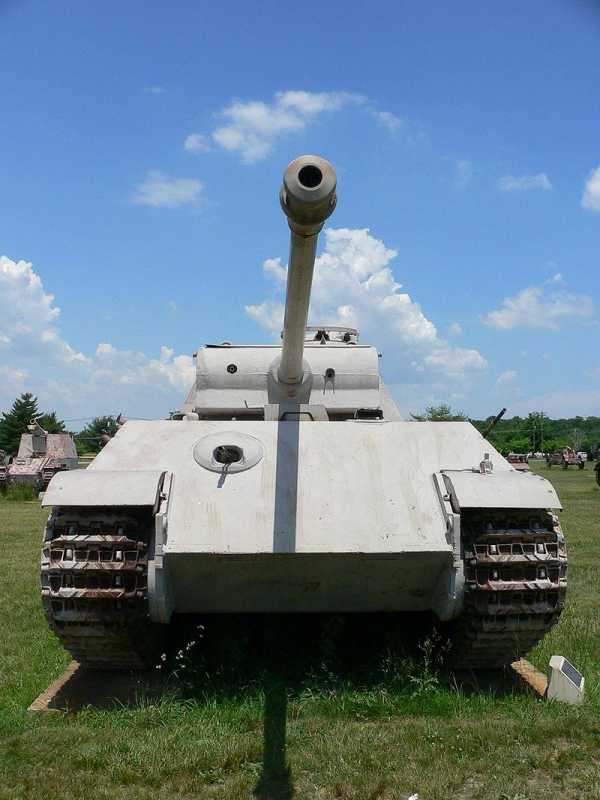
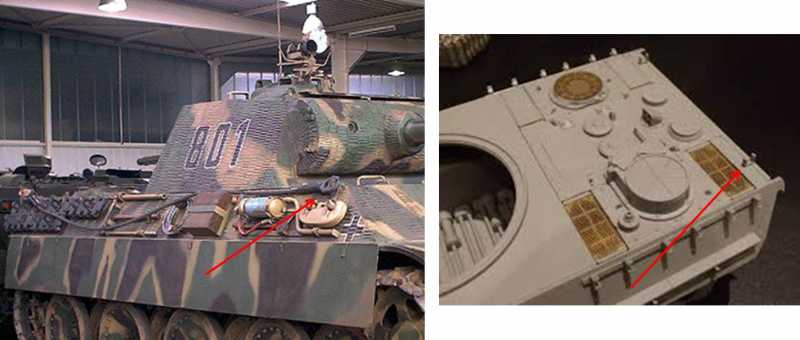
In my limited knowledge of the Panther tank, there is a post in the front tool rack, either above or behind the towing shackle and there is a bracket on the engine deck. I've indicated them in the photo below. I think there was some variation in the tool layouts for each version of the panther. (Photo of the real tank below is a early G)
I'll look when I get home, I have a few pictures of my build of this kit (it didn't survive one of my moves
 ) I don't think this kit has the bracket on the engine deck.
HTH
Mike
Thank you Mike for the pictures, there might be a hook on the tool rack on part A 20 to affix the tow cable to but the instruction sheet shows nothing for attaching the tow cable towards the rear of the tank. :idonno
That's what I get for trying to do an armor kit.
Matrixone
That's what I get for trying to do an armor kit.
Matrixone
Iron Mike
Master At Arms And Resident Curmudgeon
The cable attaches at the front as shown in Mike's photo, you insert a pin though the other end of the cable and through the bracket he shows, the rest just hangs. Make that rear bracket from leftover PE sprue, styrene strip or brass strip, drill a hole thru it for the pin and make the pin from wire shaped like an L. Rock on!


:drinks
:drinks
 ...
... Thanks for the information Iron Mike!
I don't have much reference material on armor subjects nor do I have fancy tools or P.E. but I can make some hooks from sprue and will do what you suggested.
After having built so many aircraft models trying to figure out some of the more basic things on construction of armor models is not easy when the instruction drawings are not well done.
A couple pictures of the model after the gun barrel and some of the small breakable bits have been added.
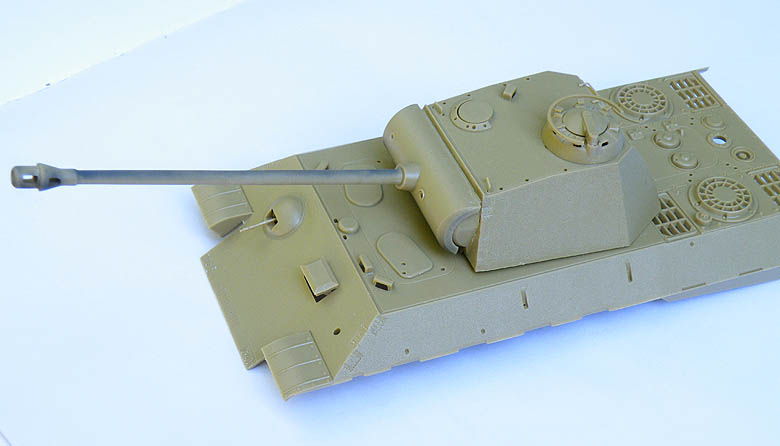

Matrixone
I don't have much reference material on armor subjects nor do I have fancy tools or P.E. but I can make some hooks from sprue and will do what you suggested.
After having built so many aircraft models trying to figure out some of the more basic things on construction of armor models is not easy when the instruction drawings are not well done.
A couple pictures of the model after the gun barrel and some of the small breakable bits have been added.
Matrixone