• Modelers Alliance has updated the forum software on our website. We have migrated all post, content and user accounts but we could not migrate the passwords.
    This requires that you manually reset your password.
    Please click here, http://modelersalliance.org/forums/login to go to logon page and use the "Forgot your Password" option.

Make an RTV Rubber Mold and Cast Resin Model Parts

Rhino

Super Moderator
The process begins with our old childhood friend. Lego! I use a bit of natural clay, to line the bottom of the mold box.
IMG_4038~0.JPG

Place the "Masters" on the clay, so they will stay where you want them.
Mix your RTV, I use 10/1 ratio 2 part rtv rubber. I get it from Micro-mark. Mine is over a year past the "Use-By" date, but we'll see how it goes! :drinks
IMG_4039~0.JPG

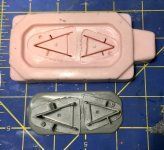
48 Hours later, in defference to my "stale" RTV, pop the lego off the walls of your box. Flex the mold, and remove your "Masters". Now is the time to wash everything. I use a wee bit o' shampoo, and an old toothbrush.
IMG_4041~0.JPG

Clean the clay off the mold, and wash up your Legos for furthe use.
IMG_4040~0.JPG

Close-up of the cured mold. hood to You have to be secure in your Manhood to use the Red/White RTV components! :coolio
 
Now for the fun part! Pouring the Resin!!
Prep the molds with a dusting of mold release powder. (Not shown) two sided molds require a bit of clamping.
IMG_4042_28760x74929~0.jpg

Resin Part A and Part B, a 50/50 mix. Use a nice clean vinyl mixing cup!
IMG_4043_28925x81629~0.jpg

When the resin is mixed, you may sense that the chemical reaction creates a little bit of heat. that's normal, don't freak out. :frantic Fresh resin is translucent. When your pour the molds, gentle flexing is a good idea, to bring air bubbles to the top, and make sure the resin flows into the smaller recesses of your molds.
IMG_4044_281024x97829~0.jpg

Cured, and extra 24 hours, just for good measure, Cured resin is solid white, and cool to the touch. (y)
IMG_4045.JPG
 
RTV molds are flexible! Bend the mold to free your castings, and the "boing" right back to the original shape. I seem to be unable to mix small amounts of resin, so I grabbed my other RTV molds, and poured all I could fit. 1 ounce of resin is a BUNCH, if you are making small castings! :facepalm
IMG_4046.JPG

This time I made the parts for another PG, a Sunderland flying boat, 2 RAF Tornadoes, a 1/72 fuel drum, 2 bedford Lorries, 4 GMC 2 1/2 ton trucks, a LCT landing craft, and 1/72 generic cockpit parts.
IMG_4046.JPG

Wash the molds before you put them away for another day. The resin reaction makes and oily residue. Don't smoke, eat, or drink anything with the residue on your hands!! :bat
IMG_4048.JPG

Let the molds dry.
IMG_4049.JPG

Wash and dry your new castings, before you play with them, er, use them to model. same shampoo/toothbrush formula works well. When you sand the overpour off the castings, DO NOT breathe the dust in. It's toxic!! I wet-sand as much as possible, frequently washing my hands. TAKE CARE!! Be a happy Healthy Guy!
 
As an aside, it is almost never easier, quicker, or cheaper to mold/resin cast the stuff I make, unless it's rare, discontinued, missing, or out of production.
Buying another 1/700 Asheville PG model would have been way less effort. :bang head I had the stuff, it's paid for, so I thought I'd give it a shot, and molding/casting IS a little bit of model-fun!
In our Country, selling resin cast copies of another Man's model violates our Copyright laws. :bat

I've learned the shelf-life of the RTV, and resin compounds are possibly much longer than the Manufacture's use-by date! :yipee
 
It is best to wet-sand your resin reproductions. It makes a mess, but no toxic spikey dust gets in your eyes of lungs! (y)
IMG_4134.JPG

I cannot stress enough, how aware you must be of resin dust! Protect yourself!! take care! :bat
 
I was hunting through "the achieves" for a picture of Cap Holder-O-Matic being used with a Zeppelin and saw this old posting.
IMG_3629.JPG
Thanks Mark!

WOW! What a Nube I was then! I appreciate you guys NOT laughing me off the 'site at my initial crude, mostly not successful mold and casting efforts. :notworthy
All y'all should have! :smack:
8 years later might be a great time to revisit molds and casting techniques.
1/700 Vietnam PGB:
IMG_0790.JPG20230423_100436.jpg
Since then no clay has been used. My technique for making two-part molds generally ends in model disaster, so I stick to what I know best.
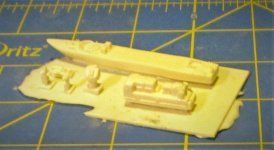
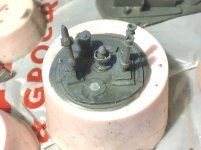
You can tell the 1/700 Vietnam Asheville class PGB mold used Lego for the mold box. An agreement with Dave at PT Dockyards allowed me to make a more accurate hull, superstructure, 3" .50 caliber turret and 40mm cannon from his original castings. Dave gets a percentage of every TLAR 1/700 Vietnam PGB sale. See the differences?
IMG_E7566.JPG
An improved PGB turret was recently mastered and molded for my friend Mark's US Navy 1/700 DER Honor Model project.

Furthermore, using a pressure vessel for making molds and castings has made a significant improvement in quality. I kept a few of the early "atmospheric" molds to remind me I still don't know every f-ing thing about resin casting. One should remember one's beginnings to be able to properly measure one's "Journey", don't you agree?
20230423_100640.jpg20230423_100650.jpg
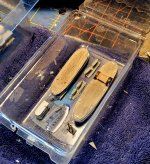
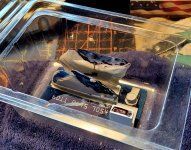
These days, I prefer plastic retail packages for mold boxes. They are watertight and flexible enough to eject the new mold and still (sometimes) reuse the plastic "Box". Hinged bottoms become a lid to keep dust out off the Masters before the mold is poured.
A 2 1/2 gallon paint pot with a 5 shelf casting rack replaced the 1958 modified Mirro-matic pressure cooker with 2 levels a while back.
I Master most of my models on a pour stub to reduce the wet sanding and cussing involved in assembly.
IMG_E3874.JPG
Micro-mark's resin was replaced with Smooth-On products. Adding color to the cream-colored resin makes it a more pleasing shade of gray.
20230415_161031.jpg
Smooth-On resin is easy to work with and still durable.
I built my 1/350 Orca in 2017 to write instructions and make box art pictures. She is much appreciated even still today!

I chose this subject for the first blog post on tlarmodels.com
The Egg Doffin Family set was uniquely challenging.
Thanks again for looking in!
 
Back
Top